Learning and Sharing
  • Home
  • Blog
  • Linux
  • macOS
  • Virtualization
    • VMware
    • VirtualBox
  • Windows
    • Windows 11
    • Windows 10
    • Windows Server
  • Series
    • Symantec
    • Intune
    • Microsoft Azure
    • Powershell
    • VirtualBox
    • VMware
    • PowerShell Learning
    • Microsoft Graph
  • More
    • Auto Installation
    • AEC Installation
  • Contact
No Result
View All Result
No Result
View All Result

How to Log in with an SSH Private Key on Linux Using PuTTY

June 29, 2024
in Blog, PuTTY
0
ADVERTISEMENT

Table of Contents

Putty is a tool for connecting to remote computers (Linux or Windows) through SSH or telnet protocols. When we open new connection to a remote computer using putty software, we need to provide username and password.

This can be avoided by using SSH private and public keys. Below explained how to generate these SSH keys and how to use them in PuTTY.

Generate Keys

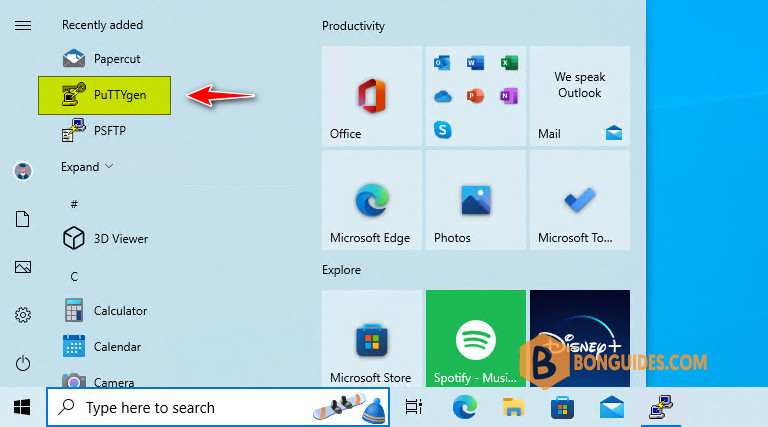
1. We start the configuration at the client windows computer. Download the latest version of Putty.exe and Puttygen.exe from the below links:

  • PuTTY: https://the.earth.li/~sgtatham/putty/latest/w64/putty.exe
  • PuTTYGen: https://the.earth.li/~sgtatham/putty/latest/w64/puttygen.exe
Note Note: In the recent version, when you download and install PuTTY, it includes PuTTY Gen, so you don't need download them separately.

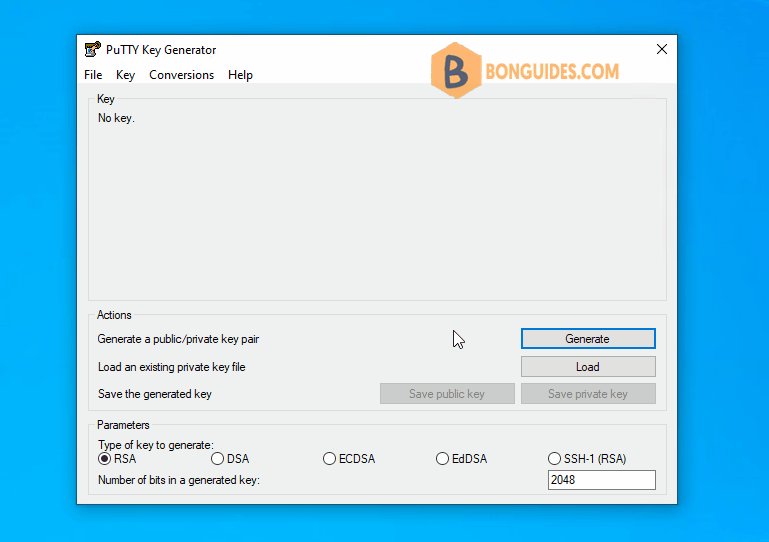
2. Using the Puttygen tool we have to generate an authentication key. This key will serve as a substitute for the password that will be entered during login.

3. Leave the default selections and click on the button. The following window opens. Move mouse randomly over the empty space below the progress bar to create some randomness in the generated key.

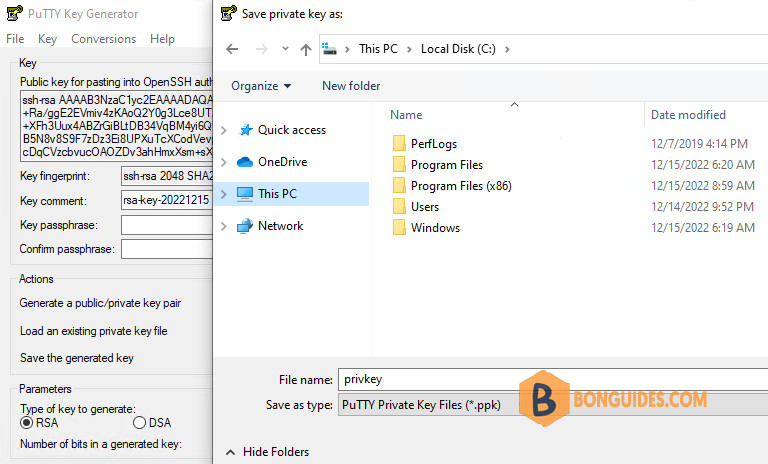
4. You don’t enter any key phrase. Let’s click on Save private Key button. Click Yes on the window asking for confirmation for saving the key without a password then save the key file to a safe location.

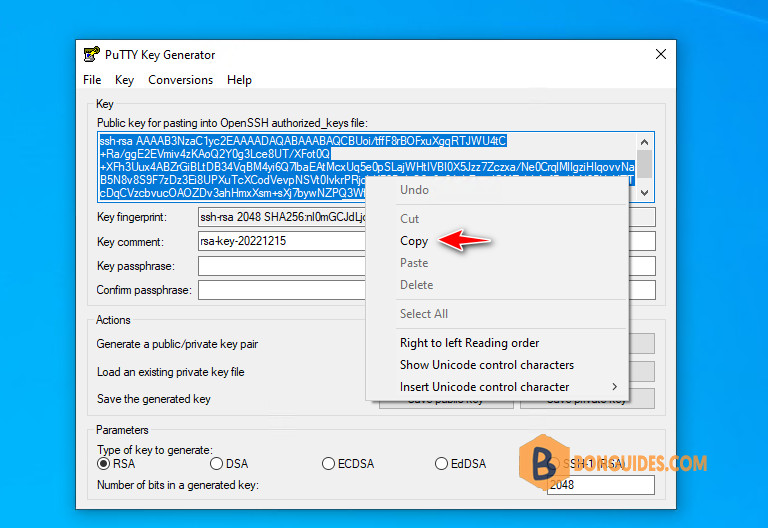
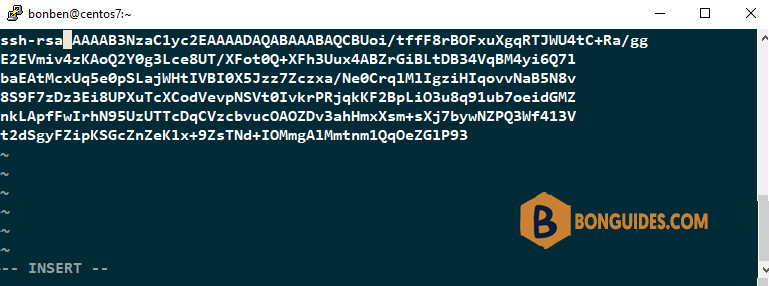
5. Now, copy the public key then save it into a text file for later uses.

Configure the Linux server

1. Close PuTTYgen and open PuTTY then connect to the remote system using the user you want to use for future with password prompt. This time when you login, you have to provide the password at the prompt. Future logins won’t require this password.

2. Under the logged in user’s home directory create a directory named ~/.ssh using the following command:

mkdir ~/.ssh

3. Enter the below command to giving users (owners) read, write and execute permissions.

chmod 700 ~/.ssh

4. Now, create an empty text file named authorized_keys using your favorite text editor.

nano ~/.ssh/authorized_keys

5. Paste the contents of the public key that you’ve saved in the previous step into authorized_keys file, then save and close the file.

Note Tip: To save a file, you must first be in command mode. Press to enter command mode, and then type to write and quit the file by press .

6. Assign permissions only for the owner using the following command:

chmod 600 ~/.ssh/authorized_keys
RUL44yKalsw3Dp4TRgzcfjHQIF35tRw2QcvcqsXUDb4PwqMGfWvbGQRB6B2r

Finally, type exit to close the SSH connection.

Configure the PuTTY client

Now we have configured SSH server, it’s time to test our setup. 

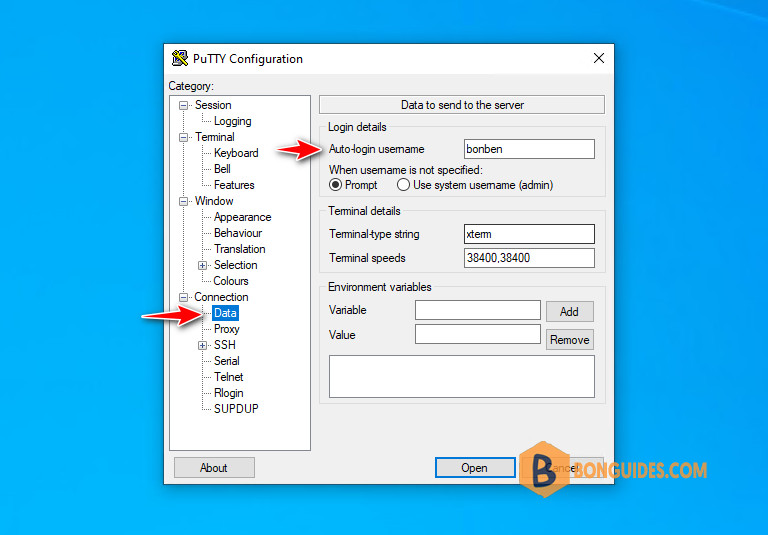
1. On the client system, open Putty. From the left navigation, select Connection > Data. Enter the username as Auto-login username on the right panel.

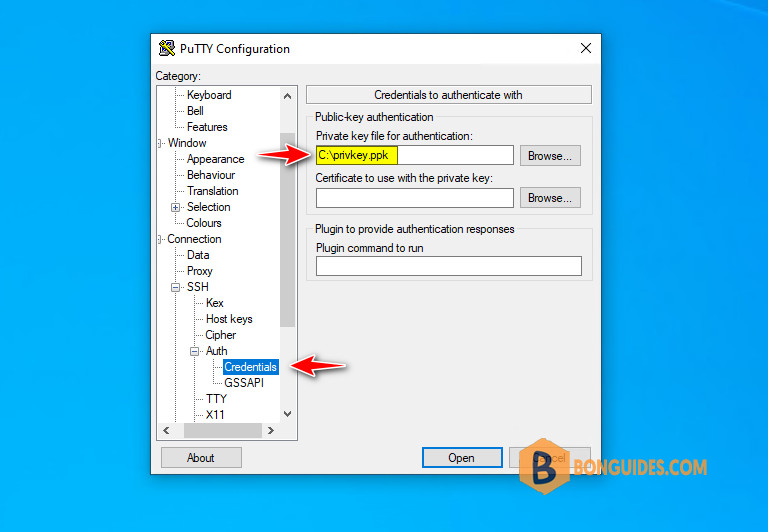
2. Again from the left navigation menu, scroll down and expand Connection > SSH > Auth. Enter the path of the saved private key file (In our case C:\privkey.ppk ). Leave other defaults as such and press Open button.

Now the PuTTY connects to the remote SSH server and there won’t be any password prompt.

QFbAt8DpRE1YFf1QAj7wqY9oRp4fY0AnAgMbsOHRuJpBDikggNkxVQo61GJc

Conclusion

SSH is a powerful tool and relies on password as a security. We just bypassed that security for sake of convenience. If a hacker get holds of the private key we generated, it allows a free access to your systems. So use this technique with care.

ADVERTISEMENT

Not a reader? Watch this related video tutorial:

5/5 - (1 vote)
Previous Post

How to Configure the Default Login Username in PuTTY

Next Post

How to Change the Text Color in PuTTY?

Related Posts

Running Hyper-V and VMware Workstation on The Same Machine

August 15, 2024

How to Uninstall All Autodesk Products At Once Silently

July 29, 2024
Ftr5

How to Uninstall the Autodesk Genuine Service on Windows

July 29, 2024
Ftr19

How to Fix Windows Cannot Read the ProductKey From the Unattend Answer File in VirtualBox

July 26, 2024
Ftr25

How to Update Windows Terminal in Windows 10/11

July 26, 2024

How to Disable The Beep Sound in WSL Terminal on Windows

July 26, 2024

Leave a Reply Cancel reply

Your email address will not be published. Required fields are marked *

Recent Posts

  • How To Turn On uBlock Origin Extension in Chrome (2025)
  • Images Hidden Due To Mature Content Settings In CivitAI
  • Azure OpenAI vs Azure AI Hub, How to Choose the Right One for Your Needs

Categories

Stay in Touch

Discord Server

Join the Discord server with the site members for all questions and discussions.

Telegram Community

Jump in Telegram server. Ask questions and discuss everything with the site members.

Youtube Channel

Watch more videos, learning and sharing with Leo ❤❤❤. Sharing to be better.

Newsletter

Join the movement and receive our weekly Tech related newsletter. It’s Free.

General

Microsoft Windows

Microsoft Office

VMware

VirtualBox

Technology

PowerShell

Microsoft 365

Microsoft Teams

Email Servers

Copyright 2025 © All rights Reserved. Design by Leo with ❤

No Result
View All Result
  • Home
  • Linux
  • Intune
  • macOS
  • VMware
  • VirtualBox
  • Powershell
  • Windows 10
  • Windows 11
  • Microsoft 365
  • Microsoft Azure
  • Microsoft Office
  • Active Directory

No Result
View All Result
  • Home
  • Linux
  • Intune
  • macOS
  • VMware
  • VirtualBox
  • Powershell
  • Windows 10
  • Windows 11
  • Microsoft 365
  • Microsoft Azure
  • Microsoft Office
  • Active Directory