
Table of Contents
Since the release of Windows 10 version 1709, a new feature in Hyper-V known as Automatic Checkpoints has been introduced. By default, it is enabled globally and can only be configured or controlled at the Guest VM level. There’re two options to disable it:
- Disable it through VM Settings GUI.
- Disable using PowerShell.
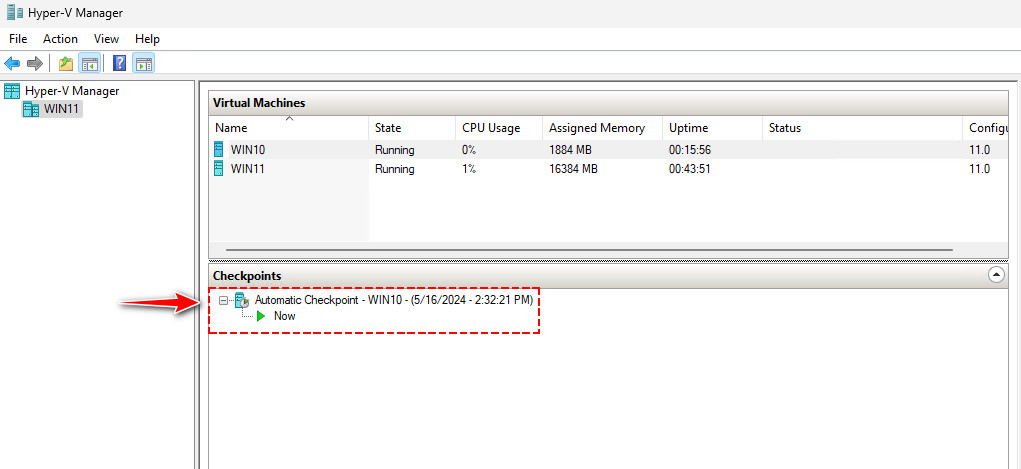
Enable or Disable Automatic Checkpoints in Hyper-V
1. Open the Hyper-V Manager.
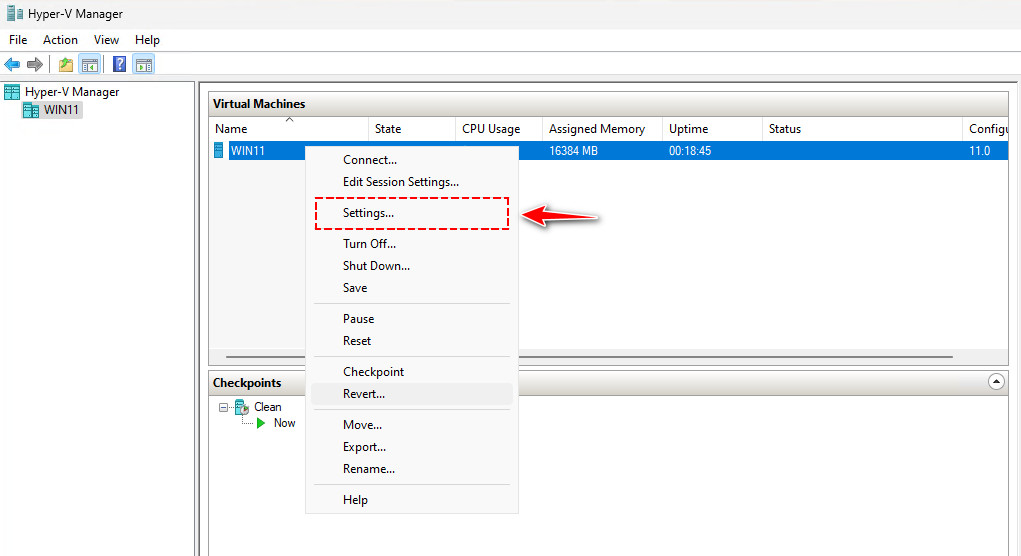
2. In the VM list, right-click on the VM you want to disable the automatic checkpoints feature.
3. In the context menu, select Settings… to open the VM’s settings window.
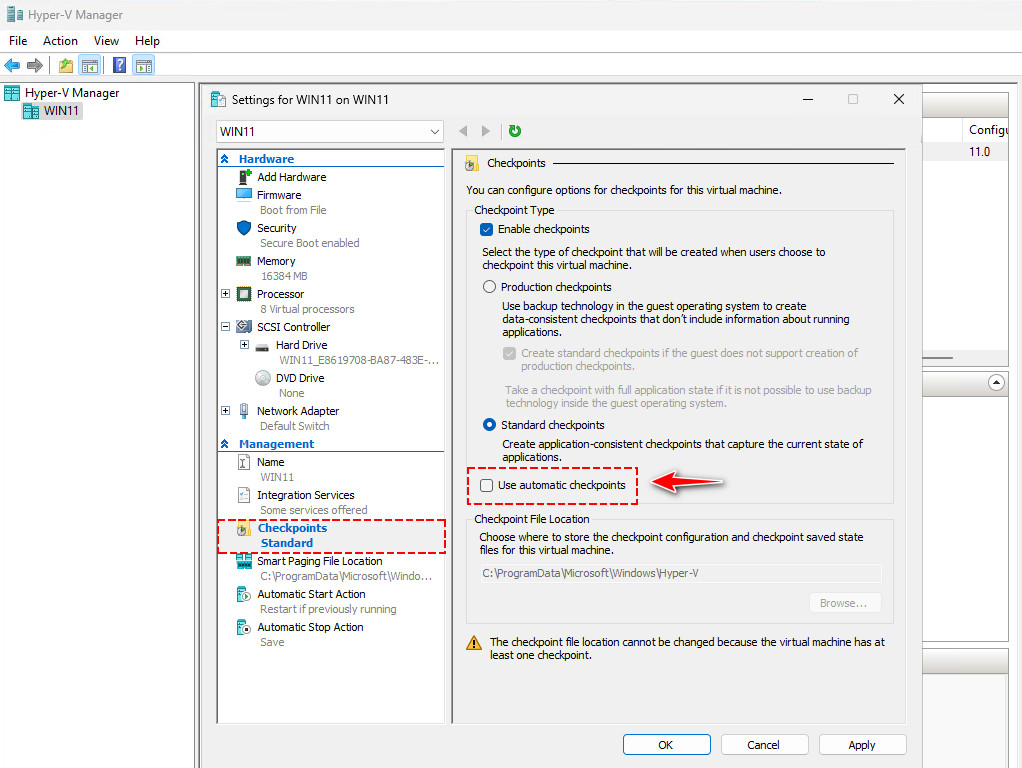
4. In the Settings window, under the Management section, select Checkpoint options.
5. In the Checkpoints section, uncheck the checkbox Use automatic checkpoints then click OK to disable it.
Disable Automatic Checkpoints in Hyper-V using PowerShell
Alternatively, the automatic checkpoints can be disabled using PowerShell.
#Disable automatic checkpoints for an individual VM.
Set-VM -VMName "NameOfTheVM" -AutomaticCheckpointsEnabled $False
#Enable automatic checkpoints for an individual VM.
Set-VM -VMName "NameOfTheVM" -AutomaticCheckpointsEnabled $TrueIn case you want to disable automatic checkpoints for all virtual machines.
#Enable automatic checkpoints on all the VM’s.
Set-VM -VMName * -AutomaticCheckpointsEnabled $True
#Disable automatic checkpoints on all the VM’s.
Set-VM -VMName * -AutomaticCheckpointsEnabled $False

