Table of Contents
In some cases, you need to change the network connection from public to private in Windows 10, 11. An example, Windows Remote Management using PowerShell doesn’t work in Public profile.
Method 1: Change the network profile using Windows settings
1. Right click on the network icon in the Windows taskbar at the bottom right corner of your screen.
2. Select Open Network & Internet settings option.

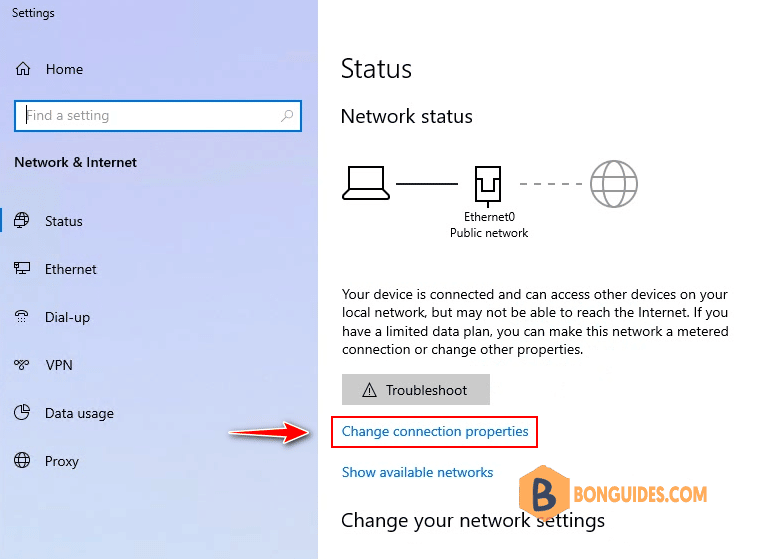
3. In the Settings window, select Change connection properties option.

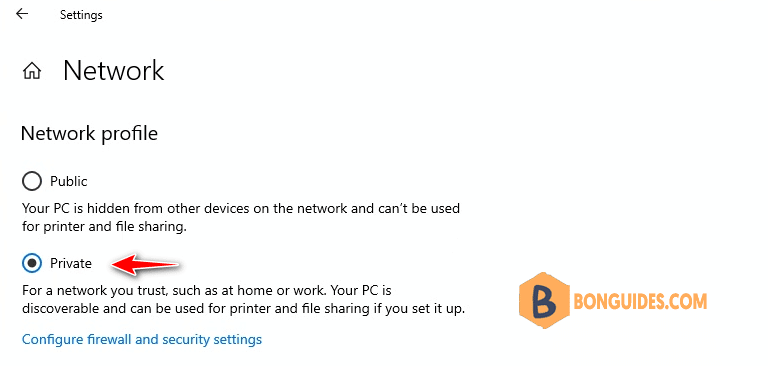
4. Now, in the Network settings page, under Network profile select Private option.

Method 2: Using PowerShell to change the network connection
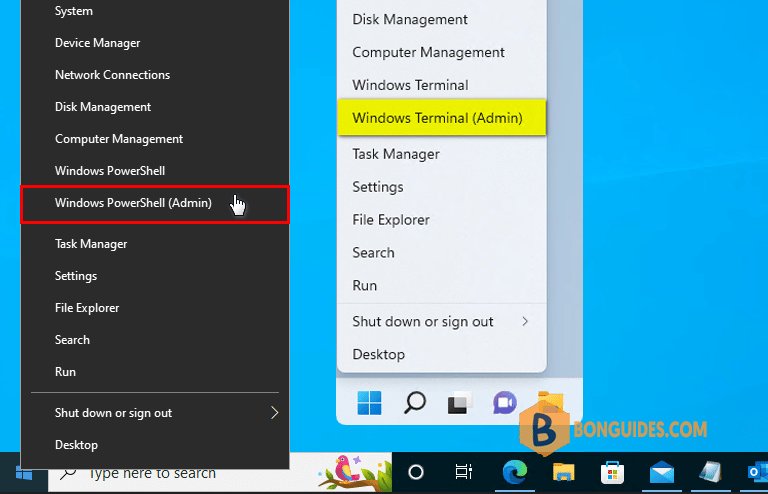
1. Right click on the Window Start icon then open Windows PowerShell Admin ( in Windows 11, select Terminal Admin).

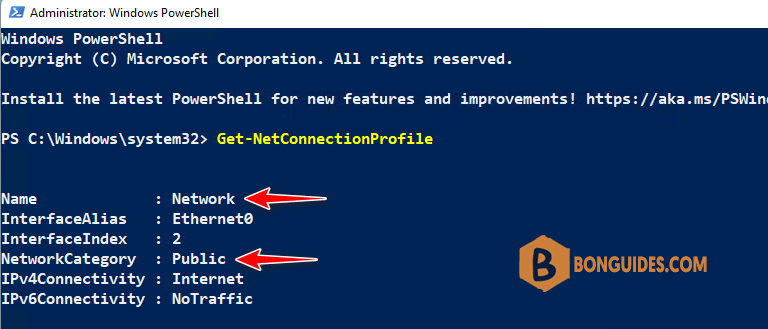
2. Run Get-NetConnectionProfile command to get the network name. In this case, the network name is Network and the network category is Public.
Get-NetConnectionProfile
3. Run the following command to change the network profile from Public to Private.
Set-NetConnectionProfile -Name "NetworkName" -NetworkCategory PrivateTo verify it works, run the command Get-NetConnectionProfile again then check the NetworkCategory.


