
Table of Contents
In this post, we’ll upgrade to the latest release of Symantec Endpoint Protection Manager and the clients.
Backing up the database and logs
Log data is not backed up unless you configure Symantec Endpoint Protection Manager to back it up. If you do not back up the logs, then only your log configuration options are saved during a backup. You can use the backup to restore your database, but the logs in the database are empty of data when they are restored.
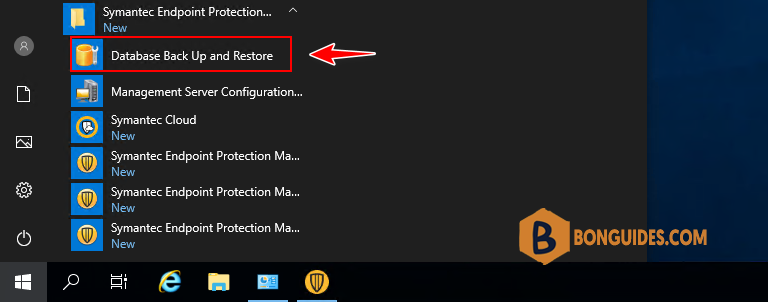
1. Open Database Backup and Restore tool in the Symantec Endpoint Protection folder.
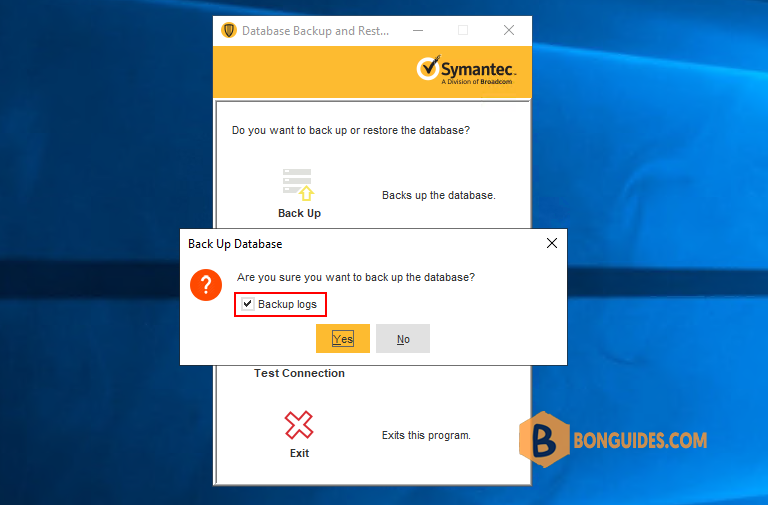
2. Click on Backup to start backing up the database and logs.
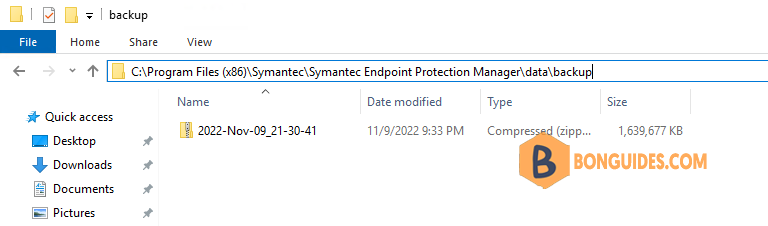
3. The backups are placed in a .zip file. By default, the backup database file is named date_timestamp.zip. The backup file is saved in the following folder: C:Program Files (x86)SymantecSymantec Endpoint Protection Managerdatabackup.
Note
Copy the backup database file to another computer or to a network share.
Back up the disaster recovery file
Before you begin the upgrade, ensure that you have backed up the current Symantec Endpoint Protection Manager installation using disaster recovery preparation techniques. If the upgrade then fails, you can restore the Symantec Endpoint Protection Manager to functionality more quickly.
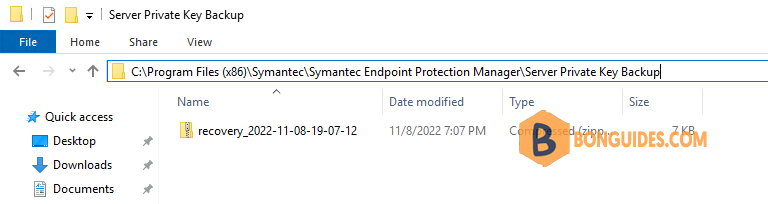
1. By default, the file is located in the following directory:
C:Program Files (x86)SymantecSymantec Endpoint Protection ManagerServer Private Key Backuprecovery_timestamp.zip
Note
Don’t forget opy the disaster recovery file to another computer or to a network share.
Upgrading to the Latest Release of Symantec Endpoint Protection (SEP)
1. Download the latest version from the Broadcom Download Center.
2. Stop the Symantec Endpoint Protection Manager services and close all opening SEPM console.
3. Open downloaded file to install the new version of Symantec Endpoint Protection Manager over the existing version on all sites in your network. The existing version is detected automatically, and all settings are saved during the upgrade.
4. You’ve already backed up all needed stuff, so you can ignore this step.
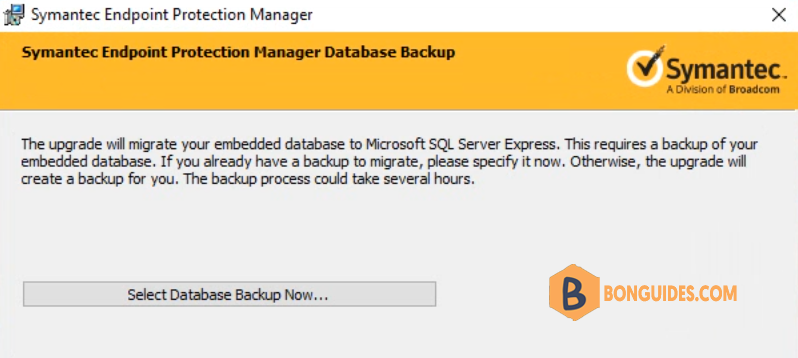
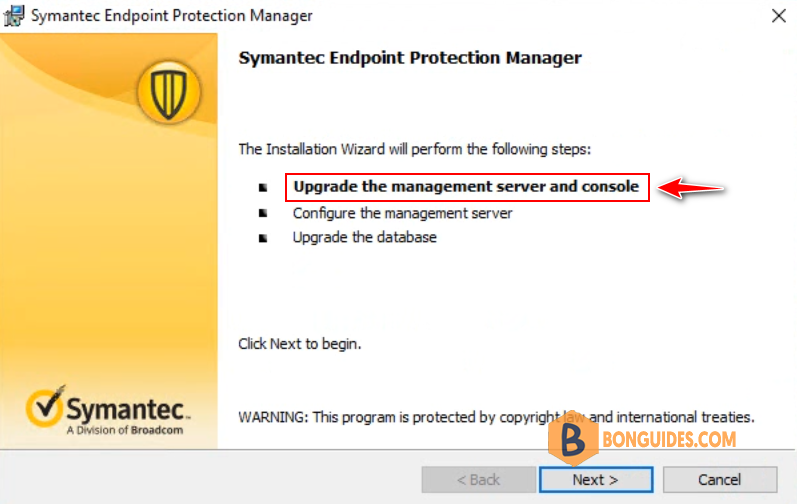
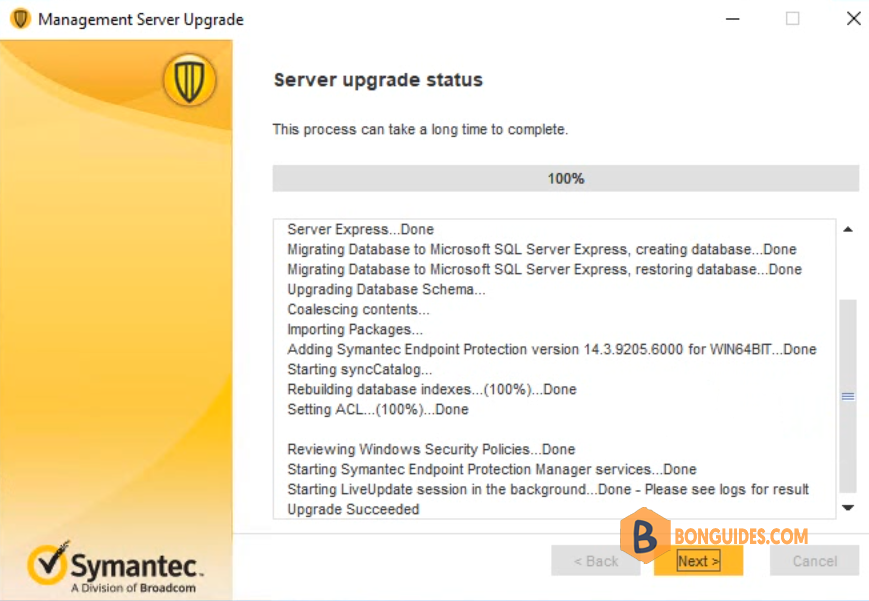
5. Follow the installation wizard to upgrade Symantec Endpoint Protection Manager.
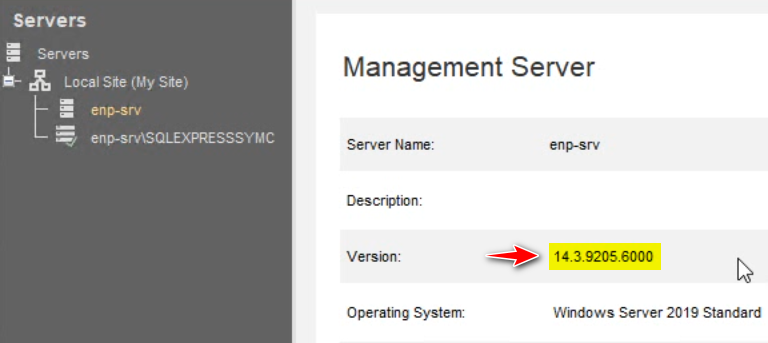
Finally, check the version of SEPM to verify you have the latest version.
Upgrade Symantec client software (SEP)
Once the SEPM was upgraded, this time to upgrade Symantec Endpoint Protection software SEP on clients.
You do not need to uninstall previous clients before you install the new version. The over install process saves the client settings, and then upgrades the client to the latest version.
Note
You should first update a group with a small number of test computers before you update your entire production network.
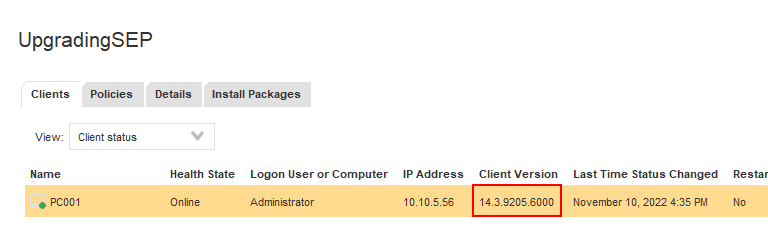
In this post, we’ll using AutoUpgrade to update the Windows and Mac client software in groups. Below image is version number on a client before upgrading.

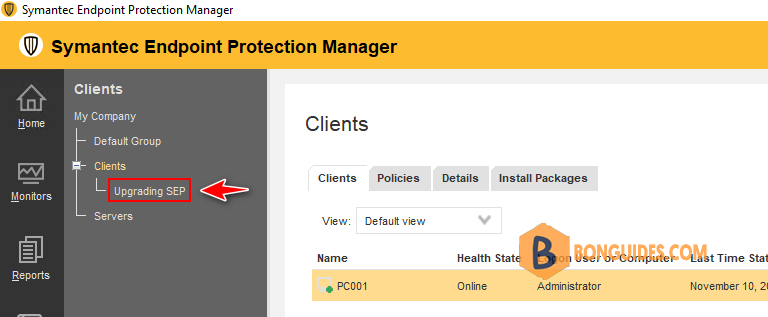
1. You should create a subgroup then move some clients into it for upgrading process to avoid missing policies during upgrade for testing before do upgrade on multiple clients.
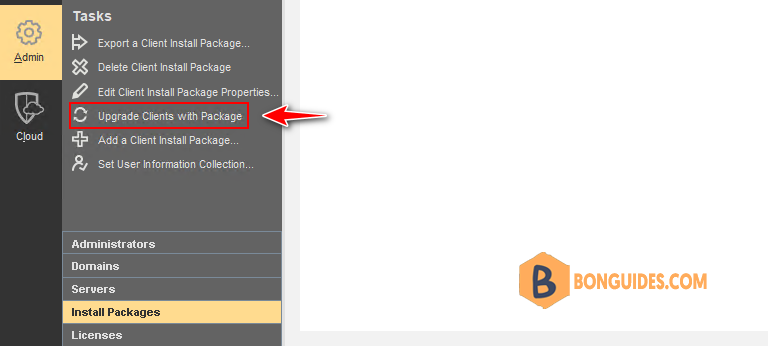
2. In the console, click Admin > Install Packages. Under Tasks, click Upgrade Clients with Package.
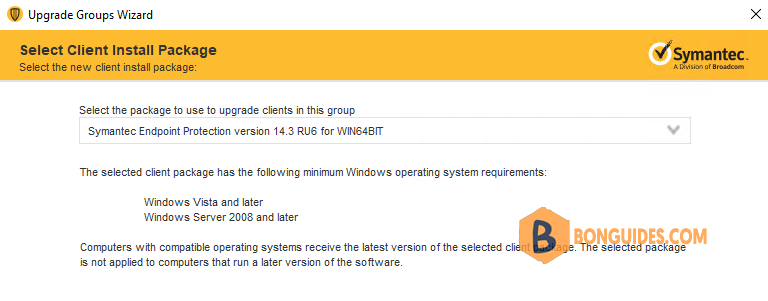
3. In the Upgrade Clients Wizard panel, click Next, select the appropriate client installation package, and then click Next.
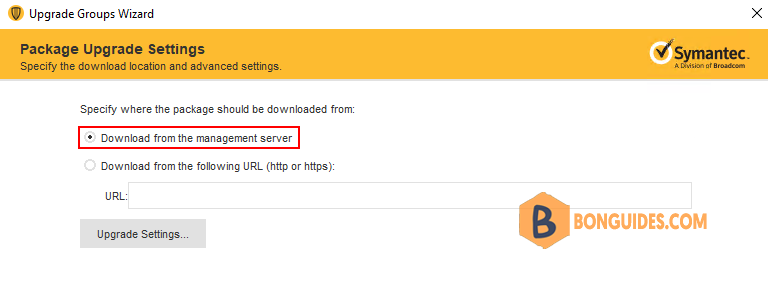
4. Select download from the Symantec Endpoint Protection Manager server.
5. Select the group or groups that contain the client computers that you want to upgrade, and then click Next.

6. In the Upgrade Clients Wizard Complete panel, click Finish.
7. After the upgrade completes, you can check the version to confirm a successful upgrade in one of the following ways: In the console, click Clients then select the appropriate group, and change the view to Client Status.
Note
By default, the clients restart after installation. For 14.3 RU2 and earlier clients, the computer must restart after the upgrade. You can configure the restart options in the group’s general settings to control how the clients in a group restart after AutoUpgrade.
Conclusion
This post is a part of the Symantec Endpoint Protection series. You can click on the hyperlink to read more guides.


