Table of Contents
Install security updates on Windows 7
Before installing the VMware Tools on Windows 7 virtual machine. There’re some secuity updates need to install first. Otherwise, you would ger the following error:
- Setup failed to install the VSock Virtual Machine Communication Interface Sockets driver automatically. This driver will have to be installed manually.
- Setup failed to install the Memory Control driver automatically. This driver will have to be installed manually.

1️⃣ So, before you begin, you need to download then install the following KB. Download the security updates for Windows 7 from below link:
2️⃣ Without the VMware Tools installed, you cannot copy/paste or grad/drop files from the host to the virtual machine. So, we’ve created a iso image file then you can mount it into the virtual machine easily.
3️⃣ Browse to the downloaded iso image file. The file would be mounted into your VM automatically.
4️⃣ Once the iso image is mounted, let open it then install the security updates then restart your VM.
Install VMware Tools
In some cases, the Install VMware Tools option is greyed out and you cannot install the tools for the virtual machine. In this case, we cannot install the VMware Tools on our Windows 7 virtual machine.

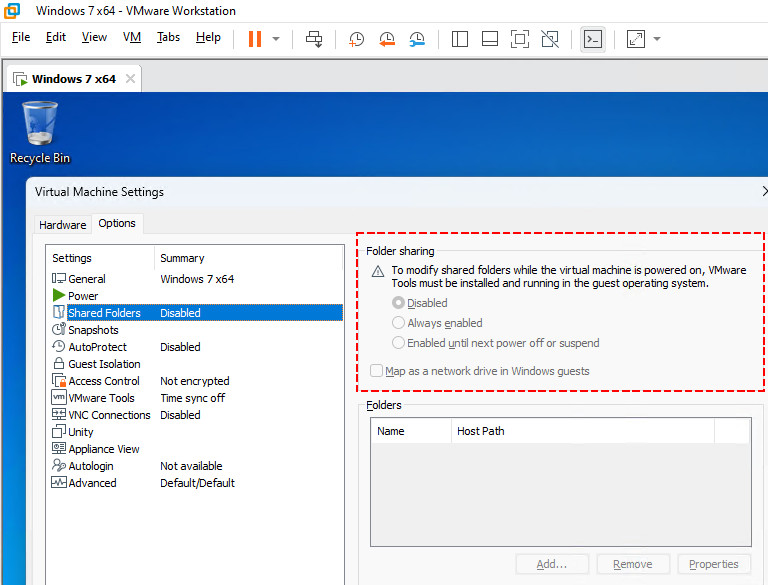
When the VMware Tools isn’t installed. the VM screen gets smaller, and you cannot copy/paste between VM and the physical machine. Drag/ drop and shared folder features also not working.
Fix the Install VMware Tools Greyed out
1️⃣ First, power off the virtual machine that you want to install VMware Tools.

2️⃣ When the VM is not running, let’s edit virtual machine settings.

3️⃣ In the virtual machine settings page, select the Floppy then remove it. Click OK to save the changes then turn on the virtual machine.
Note
You get it because you install this VM in typical auto mode instead of custom mode.

4️⃣ Once the VM started, as you can see, you can install the VMware Tools normally.

Install the VMware Tools manually
In case if the first method doesn’t work. You can try to install the VMware Tools manually.
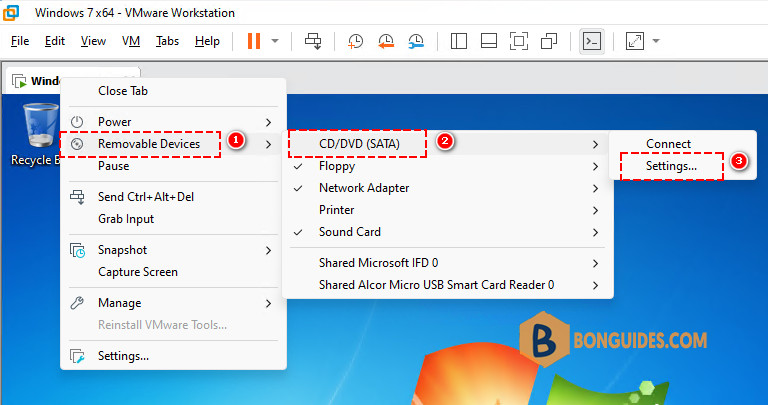
1️⃣ Right click on the VM tab > Removeable Devices > CD/DVD (SATA) > Settings…
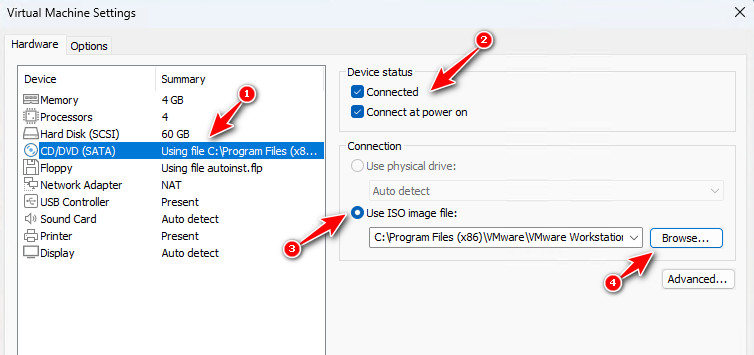
2️⃣ In the VM settings page, select CD/DVD > Select the checkboxes > Select the radio button Use ISO image file > Then click Browse… button.
3️⃣ Navigate to the installation location of VMware Workstation then select the file named windows.iso (Disk Image File). This is the VMware Tools iso image for Windows.
C:\Program Files (x86)\VMware\VMware Workstation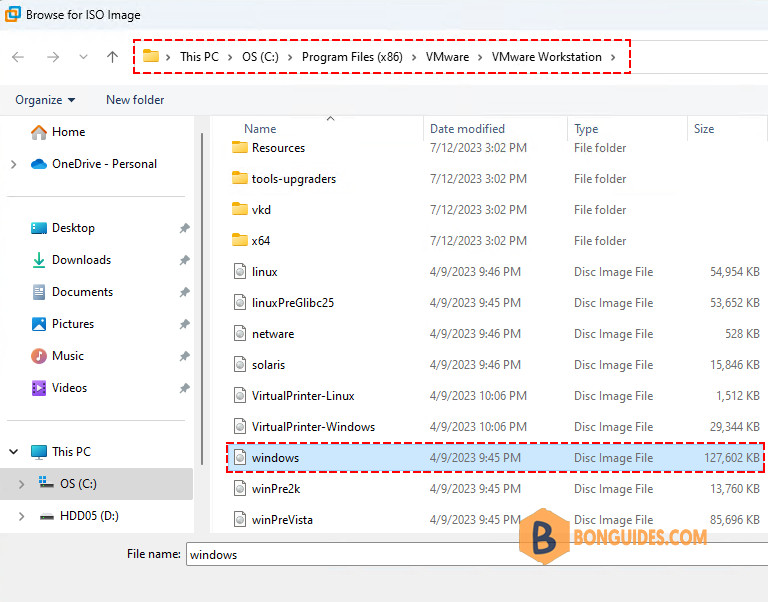
4️⃣ Click OK, then go back to the VM. The file would be mounted into the VM automatically. From here, you can install the VMware Tools as normal.
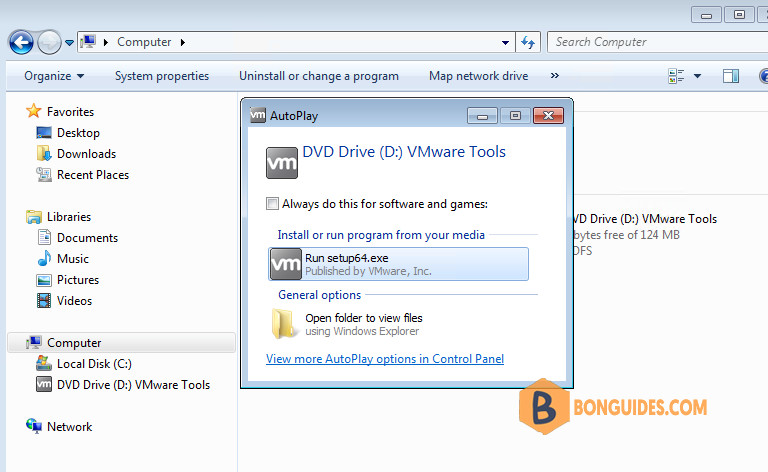
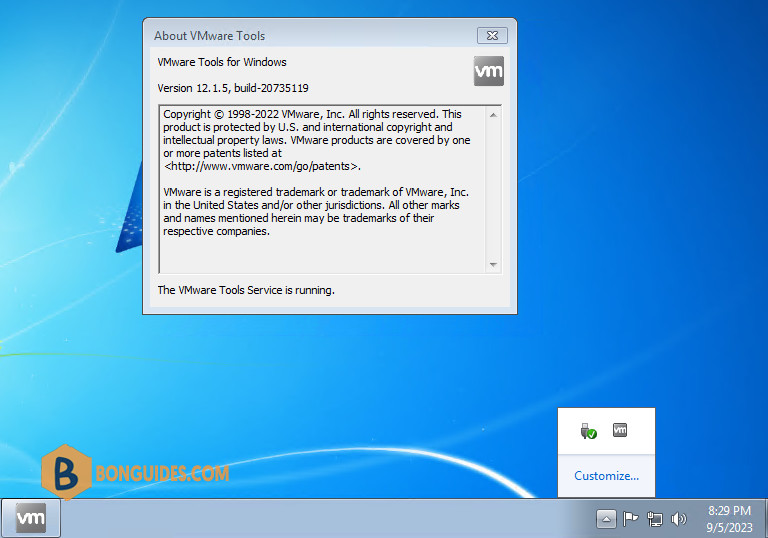
Once the tools have been installed, restart the VM. You can check the VMware Tools Services from the VM Windows taskbar (see the below screenshot).