Table of Contents
Microsoft Word has lot of hidden features. Developer menu is one such a feature many users are not aware. In fact, people using Word for years do not that they can easily customize the ribbon and menu items as per their convenience. Here we will explain how to enable developer menu in Microsoft Word for Windows and Mac versions.
Developer Menu in Microsoft Word
By default, Word will not show developer menu and its sub-groups in the ribbon. You need to manually enable this option to get the hidden features. In this article, we will show the steps with Microsoft 365 version and the process is same for Word 2019 and earlier versions.

Enable Developer Menu in Word for Windows
1. Open blank Word document and navigate to File > Options menu.

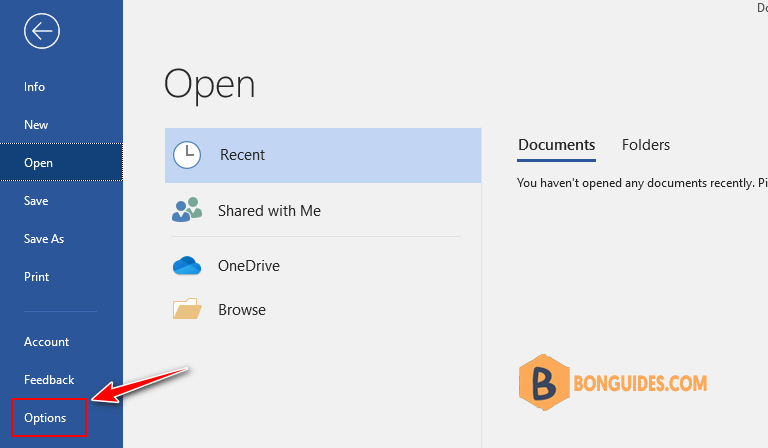
2. In the Word Options window, go to Customize Ribbon section from the sidebar.
3. Enable Developer option under Customize the Ribbon > Main Tabs section.
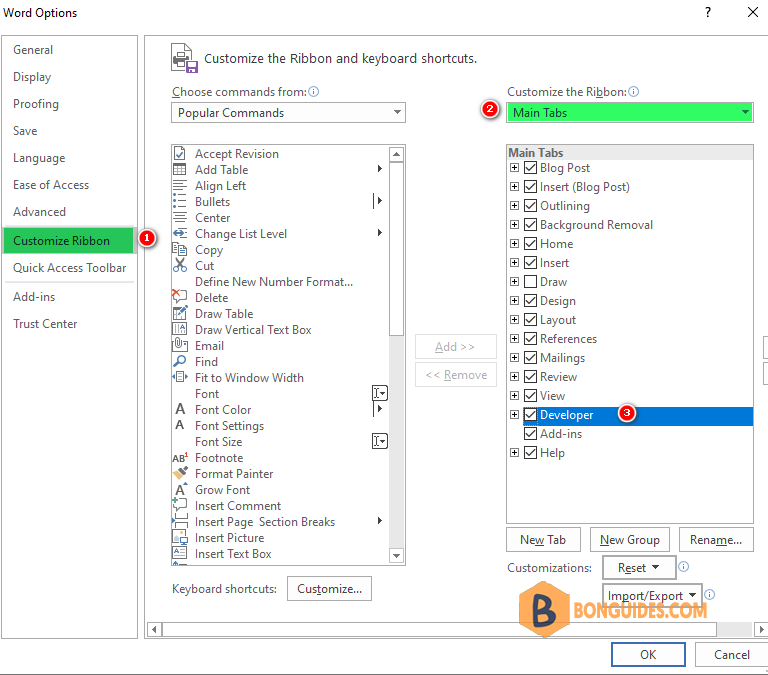
4. Click OK and you can see the Developer menu between View and Help menu items in the ribbon.

Enable Developer Menu in Word for Mac
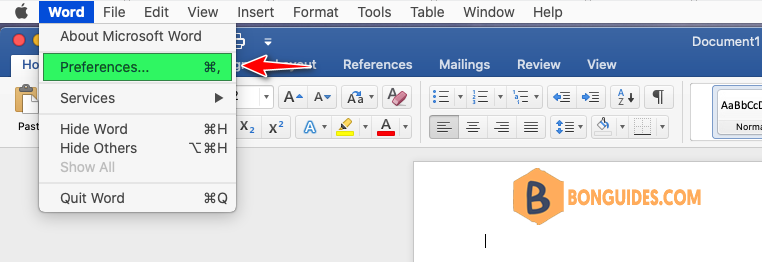
1. Open Word for Mac and go to Word > Preferences… menu.
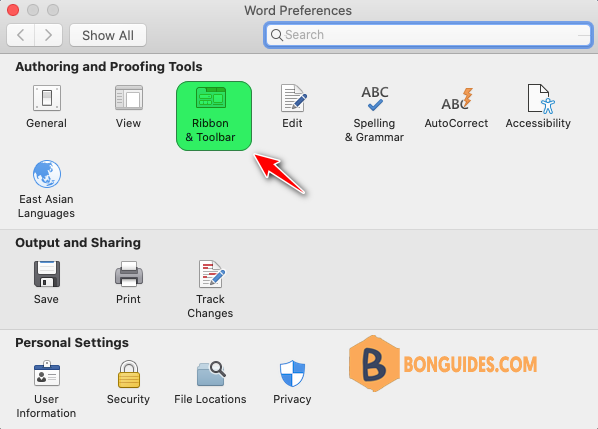
2. Click on Ribbon & Toolbar settings icon under Author and Proofing Tools section.
3. You will see two list of items under Ribbon tab. Scroll down to bottom of the Custom the Ribbon section and enable the checkbox option.
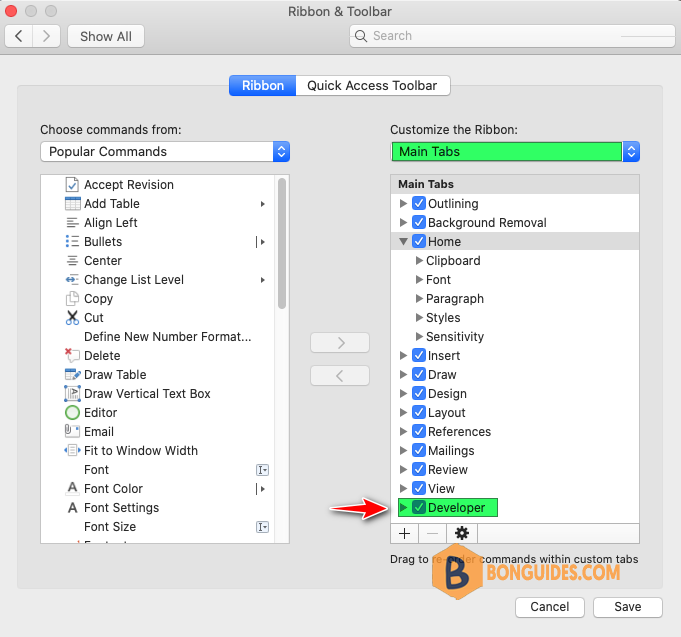
4. Click Save button and check your Word menu items. Now, you will see a new Developer menu added in the ribbon.


