Table of Contents
Enter the Exchange Server Product key using GUI
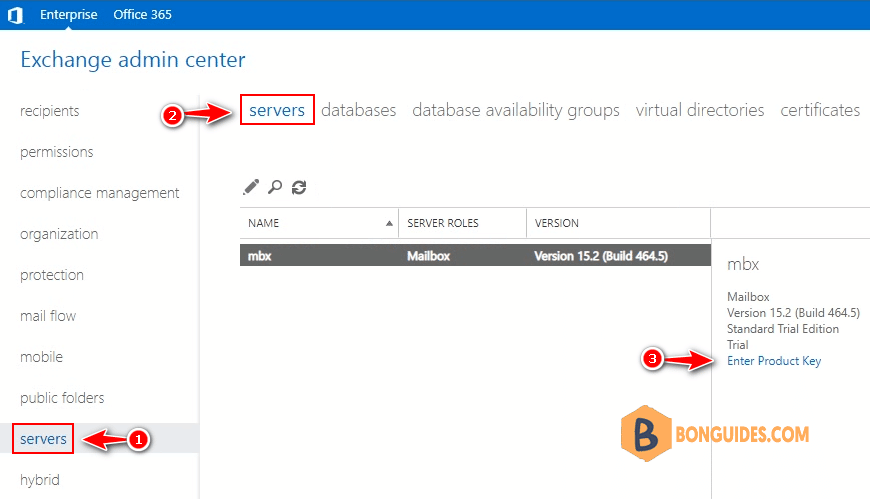
Login to Exchange Admin Center and select the servers tab and select Servers so, select the server you want to add the license and then click on Enter Product Key.

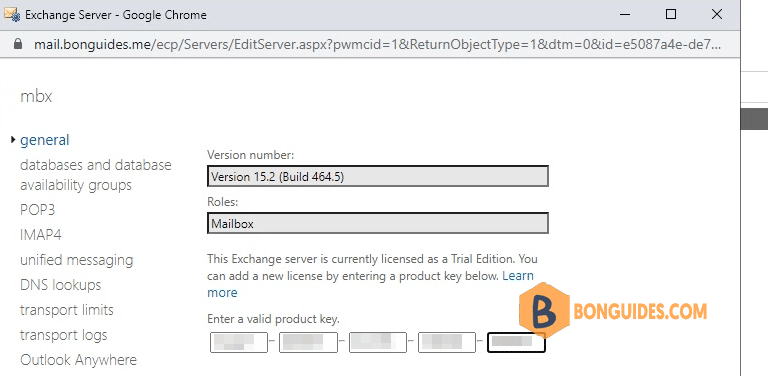
2- Now select the General tab so enter your product key under entering a valid product key and then click on Save button.

3- Now you will get a warning message to restart the Microsoft Exchange Information Store service so click on OK.
4. Reset IIS using PowerShell iisreset.exe.
[PS] C:\Windows\system32>.\iisreset.exe

Attempting stop...
Internet services successfully stopped
Attempting start...
Internet services successfully restarted
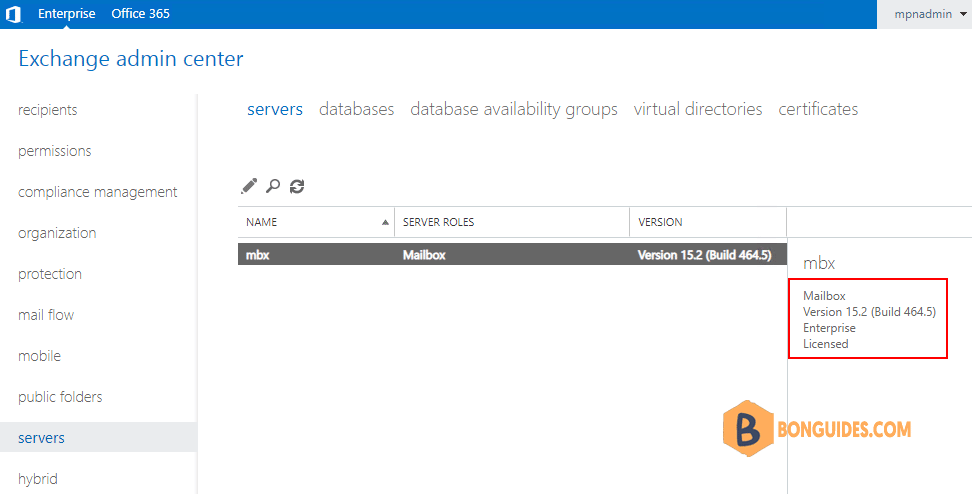
5. After restarting the Microsoft Exchange Information Store service now Your Exchange Server product is activated.

Activate Microsoft Exchange Server using PowerShell
Enter the Product key using Exchange Management Shell command. For example, license the Exchange server named mbx.
Set-ExchangeServer mbx -ProductKey XXXXX-XXXXX-XXXXX-XXXXX-XXXXX[PS] C:\Windows\system32>Set-ExchangeServer mbx -ProductKey XXXXX-XXXXX-XXXXX-XXXXX-XXXXX
WARNING: The product key has been validated and the product ID has been successfully created. This change won't take
effect until the Information Store service has been restarted.Run the following shell command to restart the Exchange Information Store service to activate the product key.
[PS] C:\Windows\system32>.\iisreset.exe

Attempting stop...
Internet services successfully stopped
Attempting start...
Internet services successfully restarted
[PS] C:\>Get-ExchangeServer | Select IsExchangeTrialEdition,Edition
IsExchangeTrialEdition Edition
---------------------- -------
False Enterprise


