Table of Contents
Change the Location of the Offline Outlook Data File
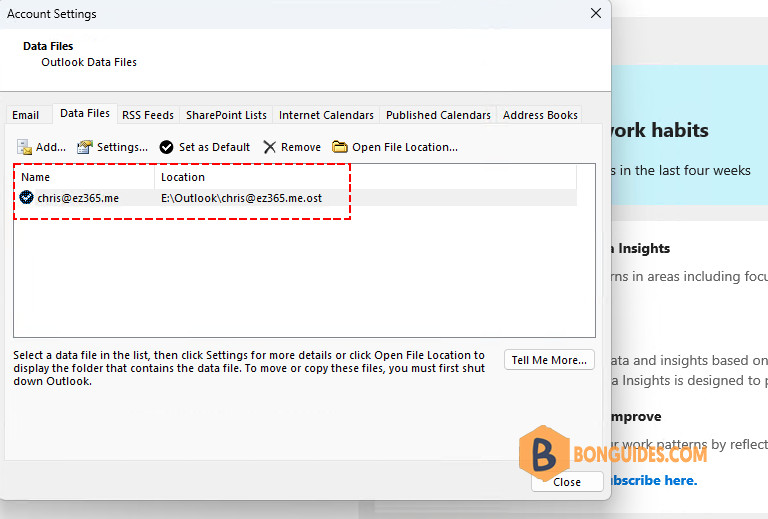
When you try to change the location of the offline Outlook Data File (.ost) in Microsoft Outlook 2013 or later versions, the Browse button on the Outlook Data File Settings page is disabled.
This issue occurs because of the deprecation of the classic offline mode in Outlook 2013 or later versions. This mode is a legacy data access method for online mode connections to Microsoft Exchange Server or Microsoft 365 ( Exchange Online).
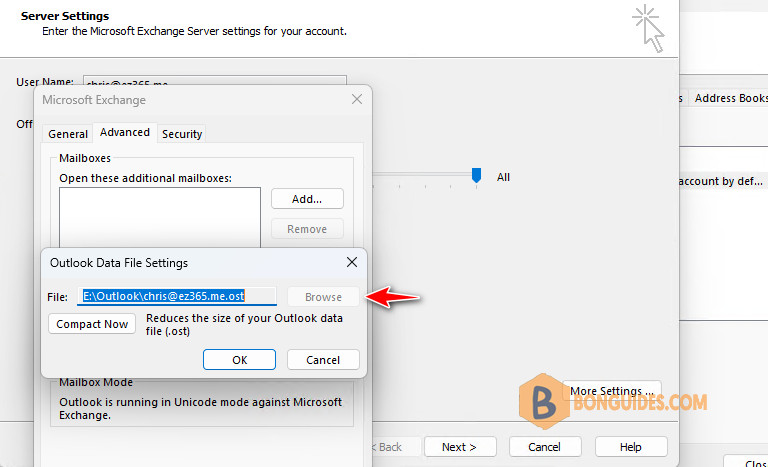
Change location of Outlook Data File to another drive
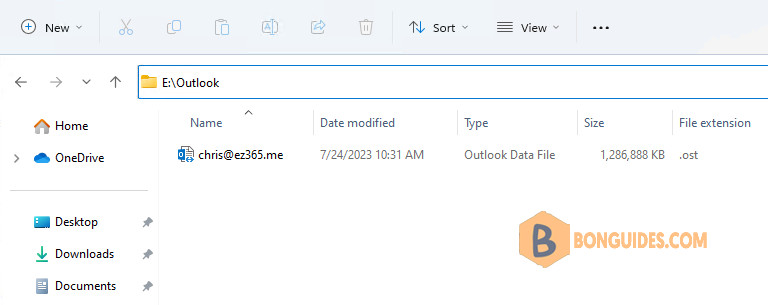
1️⃣ Close the Outlook app then copy the existing .ost file to the new location that you want to use. If you want to create a new .ost file instead, you can skip this step.
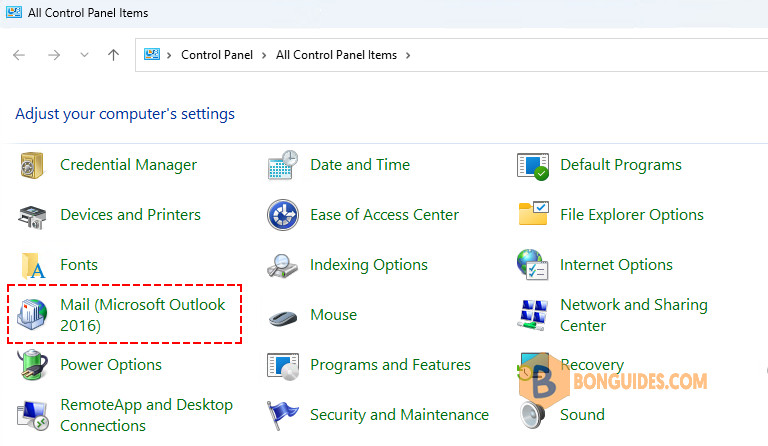
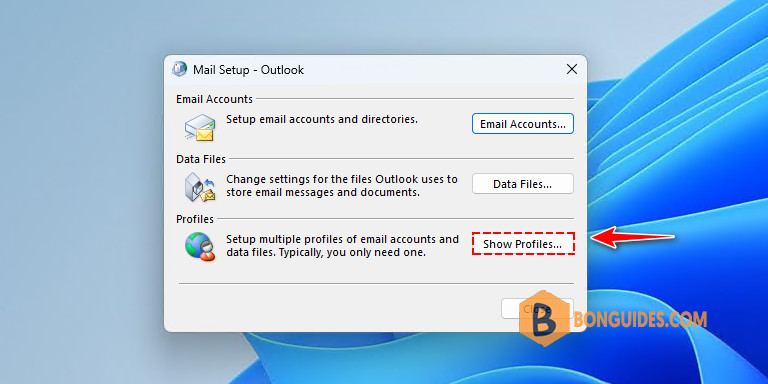
2️⃣ Open Control Panel then search for the Mail item, and then open it. The screenshot for this step is listed below.
3️⃣ Select Show Profiles.
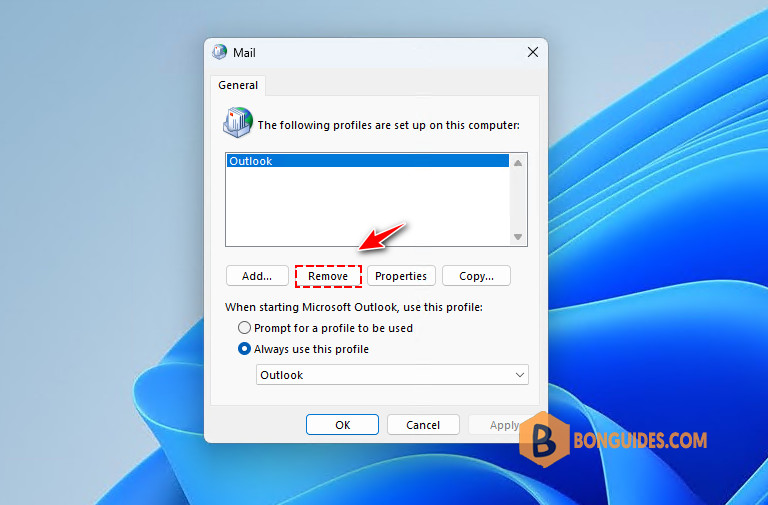
4️⃣ Select the old profile then remove it. Once done, click Add to create a new profile.
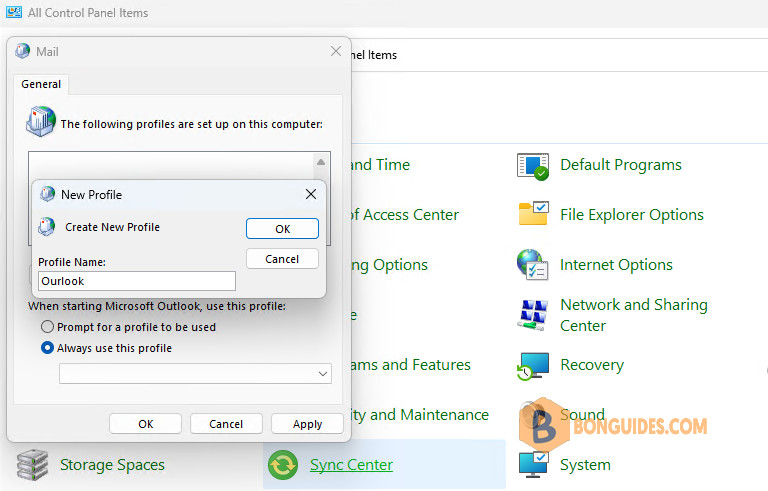
5️⃣ In the Profile Name box, type the name that you want to use for the new email profile, and then select OK.
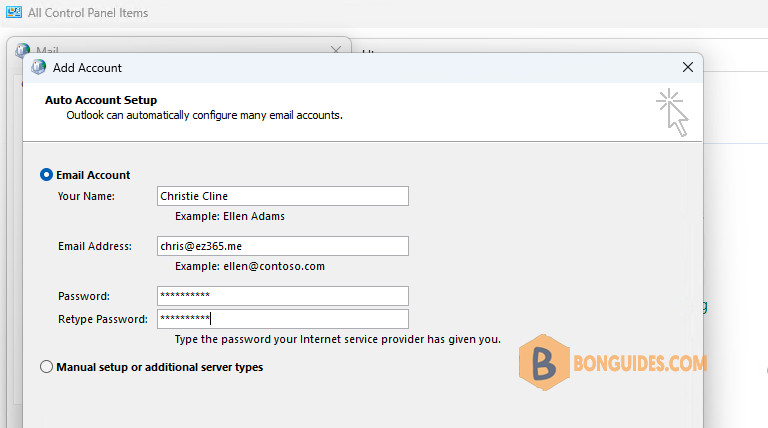
6️⃣ Select Next after Outlook finds your account information.
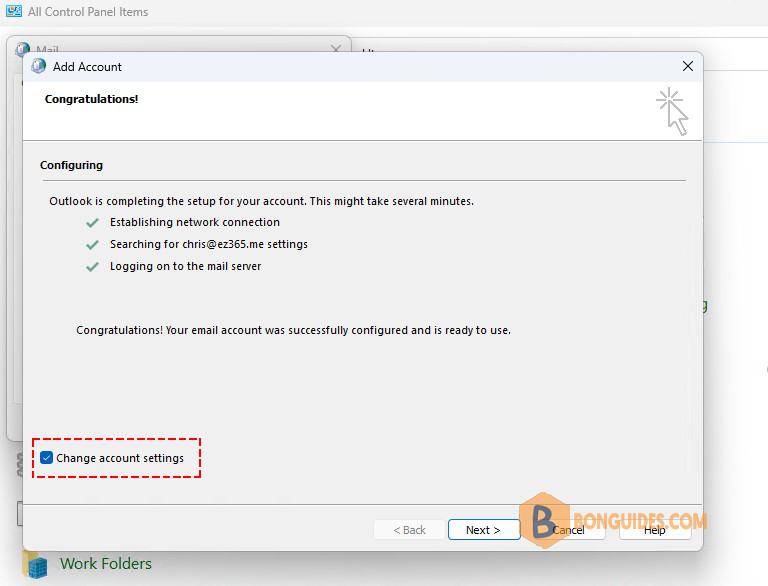
7️⃣ After Outlook finishes the setup for your account, select the Change account settings option, and then select Next.
8️⃣ In the Server Settings section, select More Settings.

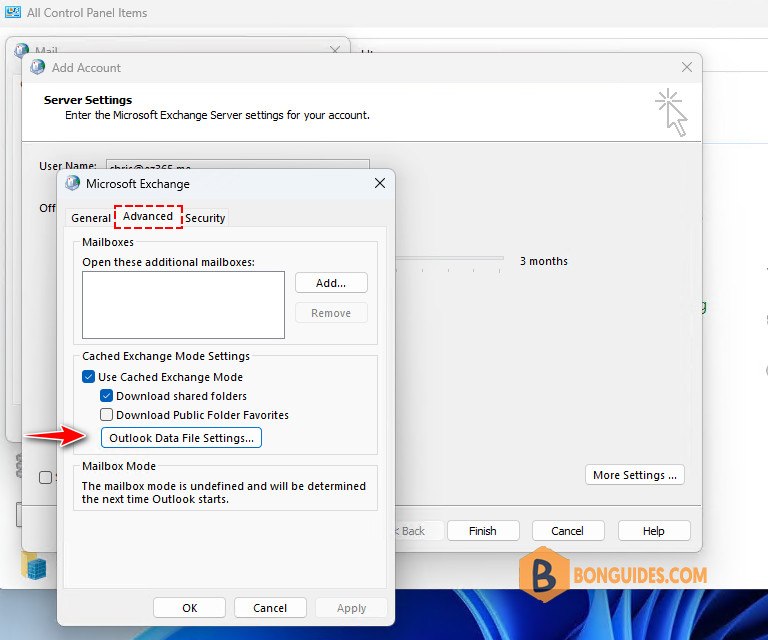
9️⃣ On the Advanced tab, select Outlook Data File Settings.
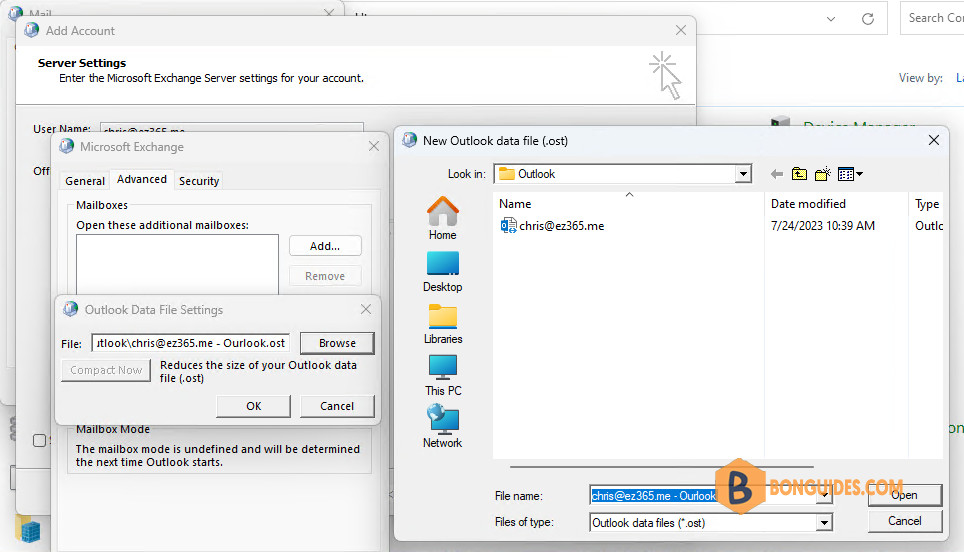
🔟 Select Browse, browse to the .ost file that you copied in step 1, and then select Open.
Select Finish to finish the setup for your email account. Reopen Outlook app then verify the data location was changed to the new location.
