
Table of Contents
This is a quick guide to make a bootable Windows 11 USB drive/stick on a Mac from an ISO file. The process is straightforward but requires one third party tool called wimlib and some terminal/command prompt usage.
Normally, I use Etcher for burning ISOs, but a Windows USB installer has special requirements in order to be bootable (it uses a special UEFI boot process).
Originally it seems that you could create a bootable USB disk using MacOS’s Boot Camp Assistant, but that option seems to’ve been removed in recent versions of MacOS.
To make a USB bootable device, the installer requires the USB drive be formatted as FAT32, which has a file size limit of 4 GB. One of the files in the current 64-bit version of the Windows 11 installer, install.wim, is 4.8 GB. The solution is to split the file, as described in the official installation instructions from Microsoft, but that only covers creating the USB drive from Windows.
What You Will Need Before Starting
- An 8GB or larger (16GB is preferred) USB drive that you don’t mind formatting.
- Your MacBook power adaptor should be plugged in, as you don’t want your battery to run out during the process.
- An active internet connection, to download the Windows 11 ISO.
Format the USB stick
1. The first step is to identify the USB drive device name using diskutil list command.
Note
Make sure you identify the correct USB disk, as entering the wrong device name in the next command could lead to data loss.
bonben@Mac ~ % diskutil list
/dev/disk0 (internal, physical):
   #:                       TYPE NAME                    SIZE       IDENTIFIER
   0:      GUID_partition_scheme                        *85.9 GB    disk0
   1:                        EFI EFI                     209.7 MB   disk0s1
   2:                 Apple_APFS Container disk1         85.6 GB    disk0s2

/dev/disk1 (synthesized):
   #:                       TYPE NAME                    SIZE       IDENTIFIER
   0:      APFS Container Scheme -                      +85.6 GB    disk1
                                 Physical Store disk0s2
   1:                APFS Volume Untitled - Data         5.2 GB     disk1s1
   2:                APFS Volume Preboot                 82.7 MB    disk1s2
   3:                APFS Volume Recovery                528.9 MB   disk1s3

/dev/disk2 (external, physical):
   #:                       TYPE NAME                    SIZE       IDENTIFIER
   0:     FDisk_partition_scheme                        *15.5 GB    disk2
   1:                  Apple_HFS Untitled 2              15.5 GB    disk2s1
2. Now format the drive as follows, substituting your disk name for disk2 (in my case):
diskutil eraseDisk MS-DOS "WIN11" MBR disk2bonben@Mac ~ % diskutil eraseDisk MS-DOS "WIN11" MBR disk2
Started erase on disk2
Unmounting disk
Creating the partition map
Waiting for partitions to activate
Formatting disk2s1 as MS-DOS (FAT) with name WIN11
512 bytes per physical sector
/dev/rdisk2s1: 30186672 sectors in 1886667 FAT32 clusters (8192 bytes/cluster)
bps=512 spc=16 res=32 nft=2 mid=0xf8 spt=32 hds=255 hid=2048 drv=0x80 ...
Mounting disk
Finished erase on disk2Mount ISO file and copy source
1. Mount the downloaded ISO file into your Mac. It should then show up in your Mac’s connected devices as CCCOMA_X64FRE_EN-US_DV9 or similar.
Check the name of the volume in Finder, or in Terminal with this command . For mys case, the disk name is /Volumes/CCCOMA_X64FRE_EN-US_DV9. If yours is slightly different, substitute it in future commands.
bonben@Mac ~ % ls /Volumes
CCCOMA_X64FRE_EN-US_DV9	         Untitled		WIN10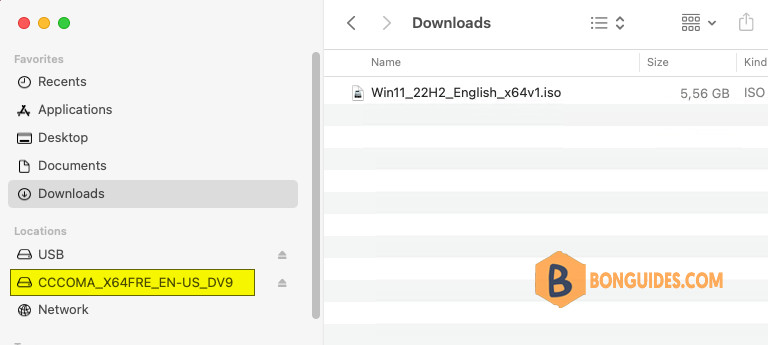
2. If it’s more than 4GB, which it seems to be on all recent Windows 11 downloads, you’ll need to split the file. Copy all files except install.wim to the USB drive:
rsync -avh --progress \
--exclude=sources/install.wim "/Volumes/CCCOMA_X64FRE_EN-US_DV9/" "/Volumes/WIN11"
It could take a while depending on your USB stick speed.
bonben@Mac ~ % rsync -avh --progress \
--exclude=sources/install.wim /Volumes/CCCOMA_X64FRE_EN-US_DV9/ /Volumes/WIN11
building file list ...
991 files to consider
autorun.inf
...
support/logging/en-us/
support/logging/en-us/actionqueueetw.dll.mui 3.58K 100%   20.35kB/s
sent 950.68M bytes  received 20.45K bytes  5.24M bytes/sec
total size is 950.49M  speedup is 1.00
Download wimlib and use it to split install.wim
The final problem is that the install.wim file is too big to copy across to the FAT32-formatted USB stick. You can check the size of the install.wim file as follows:
ls -lh /Volumes/CCCOMA_X64FRE_EN-US_DV9/sources/install.wim
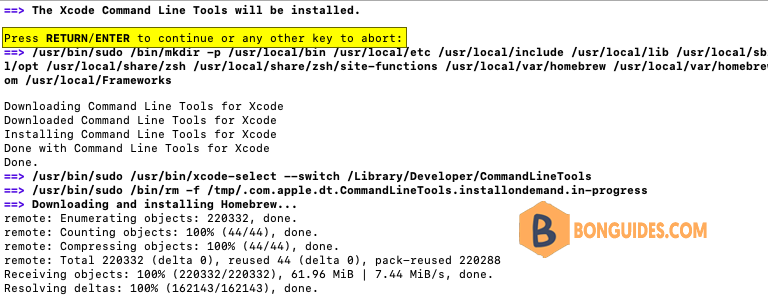
1. To install Homebrew, run the following command in Terminal:
url='https://raw.githubusercontent.com/Homebrew/install/HEAD/install.sh'
/bin/bash -c "$(curl -fsSL $url)"
When asked, enter your user’s password and confirm if the Xcode Command Line Tools need to be installed.
Note
On an M1-based Mac, you might need to go through an additional step to add brew to the PATH before you can use it otherwise you would get the error command not found.
Warning: /opt/homebrew/bin is not in your PATH.
  Instructions on how to configure your shell for Homebrew
  can be found in the 'Next steps' section below.
==> Installation successful!
...
==> Next steps:
- Run these three commands in your terminal to add Homebrew to your PATH:
    echo '# Set PATH, MANPATH, etc., for Homebrew.' >> /Users/bonben/.zprofile
    echo 'eval "$(/opt/homebrew/bin/brew shellenv)"' >> /Users/bonben/.zprofile
    eval "$(/opt/homebrew/bin/brew shellenv)"
- Run brew help to get started
2. Once Brew is installed, we can use it to install Wimlib using below command:
brew install wimlibNow, you can split the install.wim file and copy it to your USB drive as follows:
In the command below, we told to execute the wimlib-imagex tool (part of Wimlib) and passed some arguments:
- split to indicate that we want to split this larger file
/Volumes/CCCOMA_X64FRE_EN-US_DV9/sources/install.wim which is the source file to split. Keep in mind that the name under /Volumes depends on the ISO name so you need to adjust this accordingly. - /Volumes/WIN11/sources/install.swm the destination of where the split files should end.
3800 is the max size of the destination file, so the file will be split in a part of 3800MB and the rest.
wimlib-imagex split "/Volumes/CCCOMA_X64FRE_EN-US_DV9/sources/install.wim" \
"/Volumes/WIN11/sources/install.swm" 3800
bonben@Mac ~ % wimlib-imagex split "/Volumes/CCCOMA_X64FRE_EN-US_DV9/sources/install.wim" \
"/Volumes/WIN11/sources/install.swm" 3800
Splitting WIM: 4883 MiB of 4883 MiB (100%) written, part 2 of 2
Finished splitting "/Volumes/CCCOMA_X64FRE_EN-US_DV9/sources/install.wim"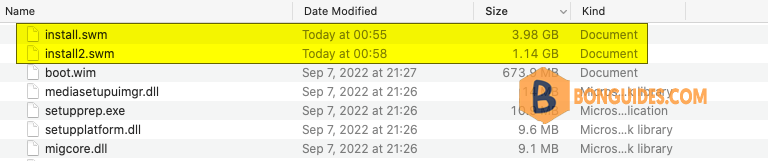
After the command completes, you can see that now two files were created on the USB drive.
Simply eject the WIN11 volume by clicking on the eject symbol in Finder and remove the USB drive. It’s now ready to use as a bootable installation disk.
Conclusion
Here, I’ve covered how to create a bootable USB drive for installing Windows 10 using a Mac and an ISO image downloaded from Microsoft.


