Table of Contents
Reset WSL instance in Windows Subsystem for Linux
After a lot of testing, you’ve installed many apps in the instance. In some cases, you want to factory reset the instance to the default settings to get a clean and fresh one. In WSL 2, you can unregister the instance then install the new one manually. But it could be a boring task if you need to it frequently.
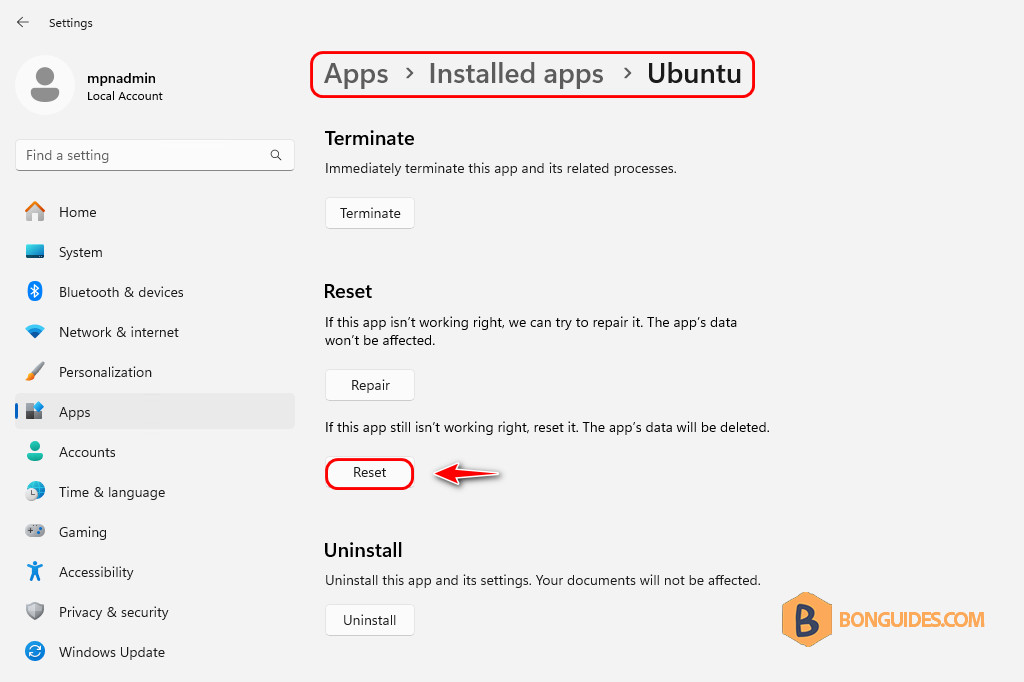
All the tips on the internet advise you to reset the Ubuntu instance from the Windows Settings → Apps, but unfortunately, it not works as expected and the installed app in the insteance still remain.
Wipe a WSL Distro in Windows Subsystem for Linux
So, we need another solution to do it automatically. The steps are:
- Install a clean and fresh WSL instance.
- Export the clean instance to a .tar file.
- Create a PowerShell script to unregister the current instance then import the exported .tar file to a new instance automatically.
- Execute the PowerShell script when you need a clean instance.
1. To create a new and fresh instance, let’s unregister the current instance then reinstall a new fresh one.
wsl --unregister ubuntu
wsl --install -d ubuntu
2. Next, we need to create two folders for exporting and importing the WSL instance. For example, we created the folders in the D drive using the below PowerShell command:
New-Item -Type Directory D:\wsl\export, D:\wsl\import3. Terminate the running instance then export it to a .tar file in the export folder.
wsl --shutdown
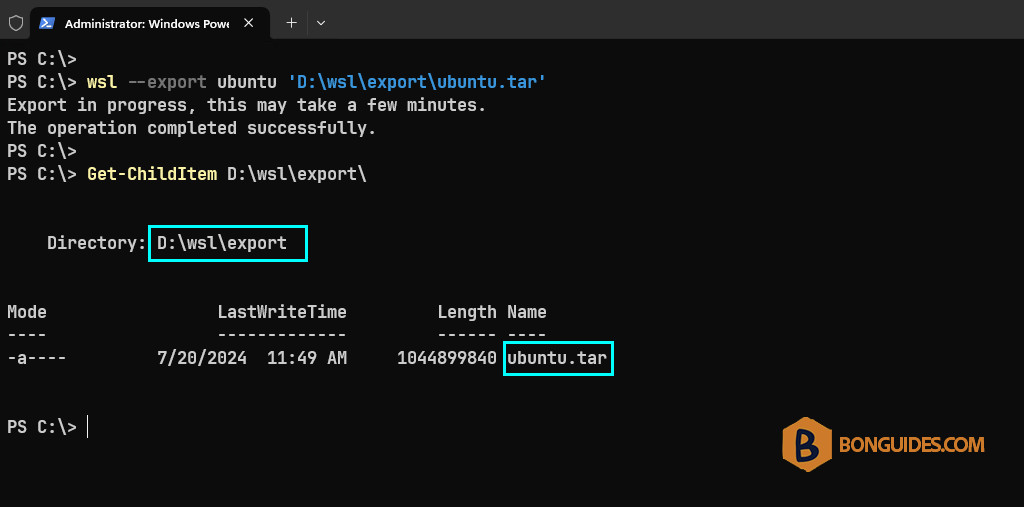
wsl --export ubuntu 'D:\wsl\export\ubuntu.tar'
4. Now, we need to create a PowerShell script using your favorite text editor to do below tasks automatically:
- Unregister the current install.
- Import the exported ubuntu.tar file (from the clean instance) to a new instance.
wsl --unregister ubuntu
wsl --import ubuntu 'D:\wsl\import' 'D:\wsl\export\ubuntur.tar'
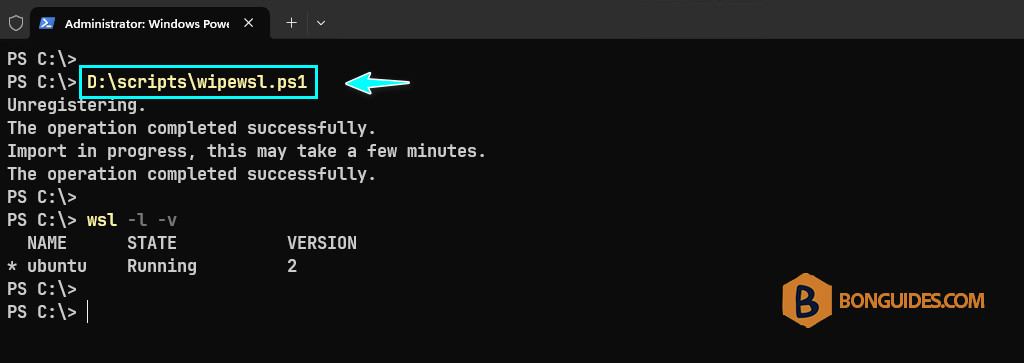
5. Save the script to your computer. For example, we save the script at D:\scripts\wipewsl.ps1. Please note, the extension of PowerShell script is .ps1.
6. Now, trying to run the script from PowerShell, script will remove the old instance then create a new instance (the fresh one) automatically.
7. When you launch the instance, the instance starts normally but login using the root user instead of the user that you’ve created in the first time when instaiing the instance (in our cases, it’s bonben).
8. So, we need to edit the PowerShell script to config the default login user for the imported instance. Below is our Powershell script, after import the instance, the script will configure bonben as the default login user.
wsl --unregister ubuntu
wsl --import ubuntu 'D:\wsl\import' 'D:\wsl\export\ubuntur.tar'
ubuntu config --default-user bonben
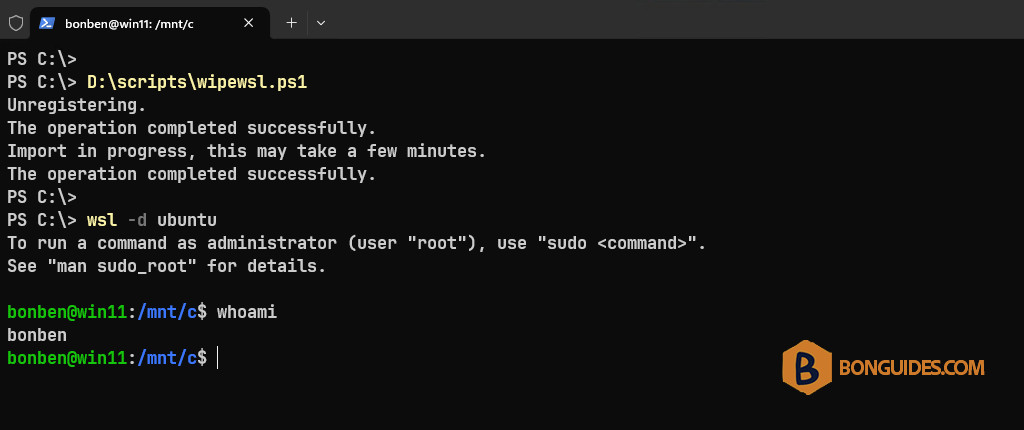
9. Save the script then execute it one more time. This time, the new WSL instance should start with the same user as when instaiing the fresh and clean instance.
How do you know it works?
The instance was imported successfully, but how do we know it works as expected? The steps are:
- Install an app (php) in the imported instance.
- Run the Powershell script to automatically delete the instance then create a new one.
- Once done, start the new instance and check using php -v command.
- Expected result: The output shows that php is not installed.
1. In an imported instance, install php then check using php -v command.
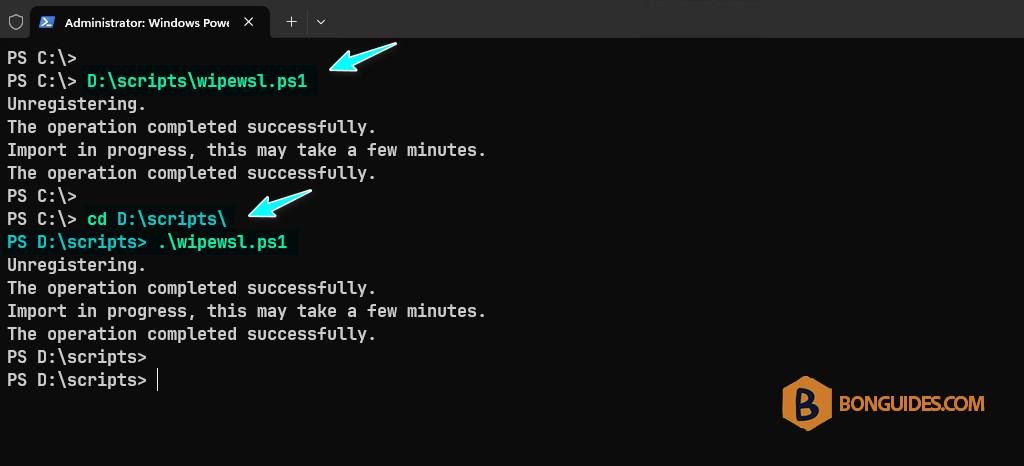
2. Execute the PowerShell script to reset the instance to the fresh one.
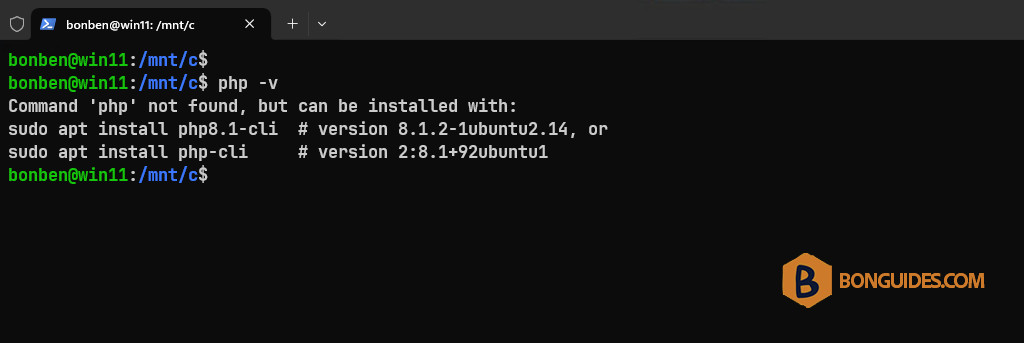
3. Start the new instance then check if php is already installed or not.
As you can see, in the new instance, when running the php -v command. The output shows that it has not been installed. It means you’ve the fresh and clean instance like when you do unregister and reinstall manually with wsl –install -d ubuntu.
Run the script from any where
By default, you need to type the full path of the PowerShell script to run it, or you need to open PowerShell → Navigate to the location of the script by the Set-Location (cd) cmdlet → Then execute the script.
If it bothers you, you can add the path of the PowerShell script to the environment variables. After that, you can run the script from any location. Command below will do it automatically, don’t forget to change the path D:\scripts to fits with yours.
setx /M PATH "$Env:PATH;D:\scripts"After executing the above command, close then reopen a new PowerShell window. Now, you just need to type the script name then hit Enter (you can use the Tab key for auto-completion) instead of typing the full path or navigate to the script location.
Conslusion
From now, after testing by install apps in a WSL instance. When you need a fresh and clean instance, you just need to execute the PowerShell script and wait a few seconds. Then, a new instance is ready for development.
Not a reader? Watch this related video tutorial:

