Table of Contents
GPU acceleration in Adobe Premiere Pro is a combination of a graphics processing unit and a computer processing unit to allow the user to playback your Timeline in Premiere Pro in high quality real-time. You can see the different in the image below.

It facilitates the playback of the average timeline in real time at high quality. You can playback GPU-accelerated effects and transitions in real time without rendering them.
Playback in real time without rendering is also possible in case the media added to the timeline does not match the project settings. This feature also accelerates the encoding pipeline and thus reduces the export time taken by Premiere Elements.

How to enable Premiere Pro GPU acceleration
There are a few things to keep in mind when working with GPU acceleration in Premiere Pro:
- Not all effects and plugins are compatible with GPU acceleration.
- Certain effects may actually render faster without GPU acceleration.
- Premiere Pro may not always use the GPU for all tasks, even if it’s enabled in the preferences.
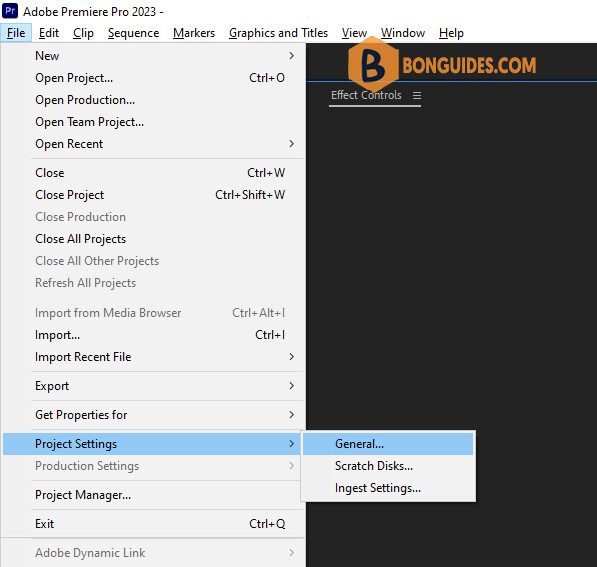
To enable GPU acceleration in Premiere Pro let’s:
1. Navigate to File > Project Settings > General.

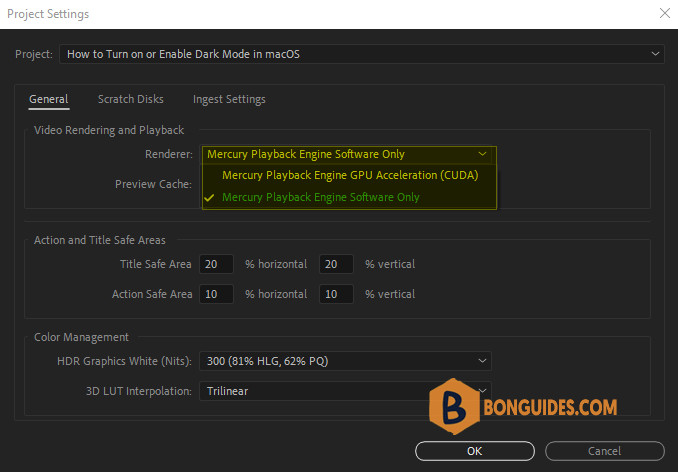
2. Under Video Rendering and Playback. Then, set the Renderer in Premiere Pro to Mercury Playback Engine GPU Acceleration.

GPU acceleration in Adobe Media Encoder
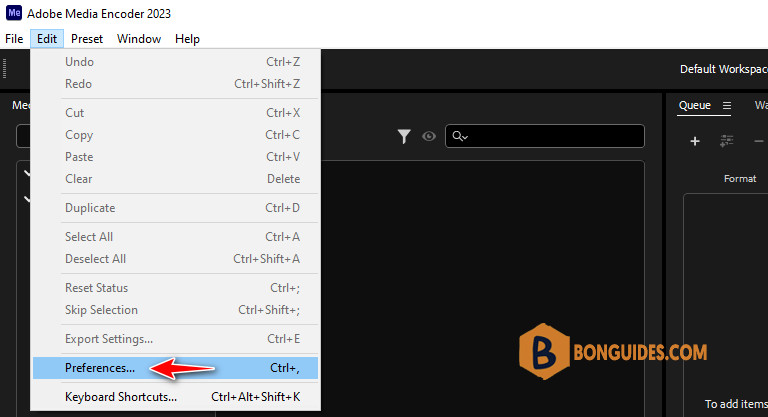
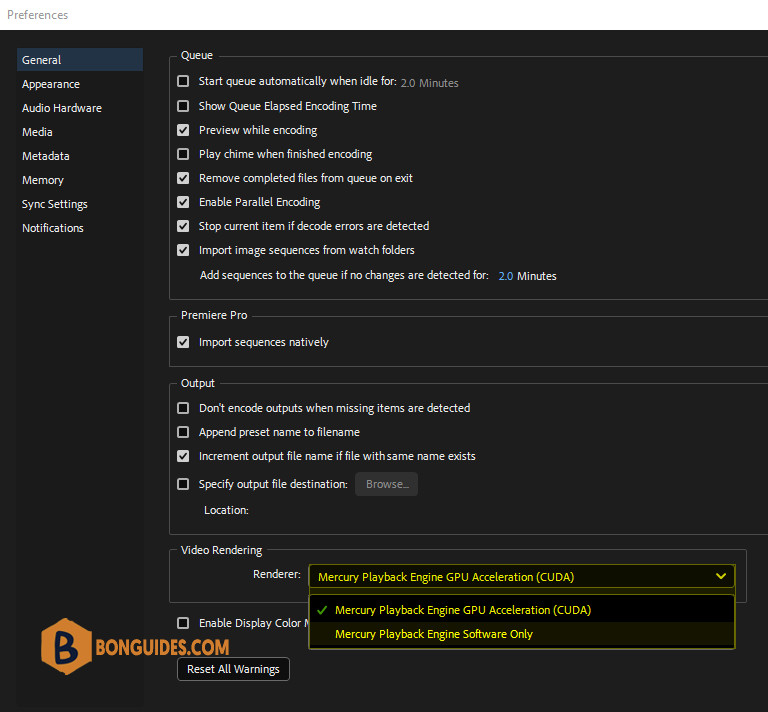
Or if you’re looking to enable the GPU acceleration in Adobe Media Encoder. Firstly, go to Preferences > General.

Set the Renderer to Mercury Playback Engine GPU Acceleration (this can be found under the Video Rendering section).

Once you have enabled GPU acceleration, you may notice a difference in the way that Premiere Pro operates. For example, you may see a decrease in the time it takes to render or export videos.


