Table of Contents
By default, WSL does not support CentOS 9 Stream. It needs to be installed manually. To obtain the list of supported distributions on Windows Subsystem for Linux, run:
PS C:\> wsl --list --online

The following is a list of valid distributions that can be installed.
Install using 'wsl.exe --install <Distro>'.

NAME                                   FRIENDLY NAME
Ubuntu                                 Ubuntu
Debian                                 Debian GNU/Linux
kali-linux                             Kali Linux Rolling
Ubuntu-18.04                           Ubuntu 18.04 LTS
Ubuntu-20.04                           Ubuntu 20.04 LTS
Ubuntu-22.04                           Ubuntu 22.04 LTS
OracleLinux_7_9                        Oracle Linux 7.9
OracleLinux_8_7                        Oracle Linux 8.7
OracleLinux_9_1                        Oracle Linux 9.1
openSUSE-Leap-15.5                     openSUSE Leap 15.5
SUSE-Linux-Enterprise-Server-15-SP4    SUSE Linux Enterprise Server 15 SP4
SUSE-Linux-Enterprise-15-SP5           SUSE Linux Enterprise 15 SP5
openSUSE-Tumbleweed                    openSUSE Tumbleweed
Prerequisites
Before you begin, make sure:
- You’ve enabled WSL on you Windows machine.
- Installed WSL2 Linux kernel update
Install CentOS 9 Stream in WSL2
1. Download the CentOS9-stream.zip file from GitHub mishamosher/CentOS-WSL repository. You can either download it manually or use our PowerShell script to do it automatically. You just need to open PowerShell as administrator then run the below command:
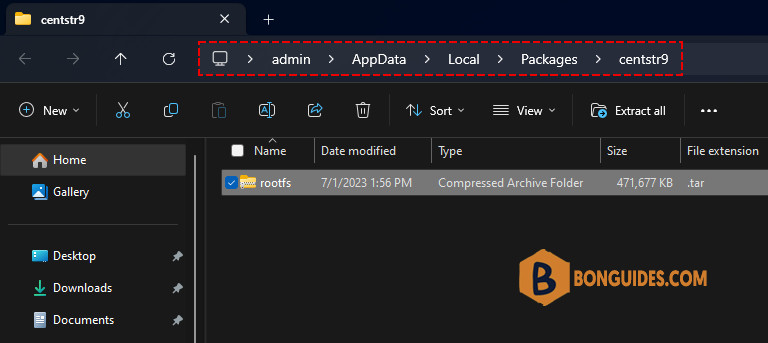
irm bonguides.com/wsl/centos9 | iex2. The file rootfs.tar would be downloaded into the temporary folder.

3. From PowerShell, navigate to the downloaded folder then import the .tar file as an instance on WSL.
Set-Location "${env:LOCALAPPDATA}\Packages\centstr9"
wsl --import "CentOSStream9" "${env:LOCALAPPDATA}\Packages\centstr9" rootfs.tar --version 2
Import in progress, this may take a few minutes.
The operation completed successfully.4. Once done, you can get the list of installed distributions to verify it works.
PS C:\Users\admin\AppData\Local\Packages\centstr9> wsl -l -v

  NAME             STATE           VERSION
* Ubuntu           Stopped         2
  Ubuntu-20.04     Stopped         2
  CentOSStream9    Stopped         2
  kali-linux       Stopped         2
  centos7          Stopped         2
  Debian           Stopped         2
5. Start the imported instance by wsl -d CentOSStream9 command.
PS C:\Users\admin\AppData\Local\Packages\centstr9> wsl -d CentOSStream9

[root@DESKTOP-B2TOHJT centstr9]# cat /etc/os-release
NAME="CentOS Stream"
VERSION="9"
ID="centos"
ID_LIKE="rhel fedora"
VERSION_ID="9"
PLATFORM_ID="platform:el9"
PRETTY_NAME="CentOS Stream 9"
ANSI_COLOR="0;31"
LOGO="fedora-logo-icon"
CPE_NAME="cpe:/o:centos:centos:9"
HOME_URL="https://centos.org/"
BUG_REPORT_URL="https://bugzilla.redhat.com/"
REDHAT_SUPPORT_PRODUCT="Red Hat Enterprise Linux 9"
REDHAT_SUPPORT_PRODUCT_VERSION="CentOS Stream"
6. The downloaded rootfs.tar file is no longer needed. We can delete it usuing Windows Explorer or using the command below:
Remove-Item "${env:LOCALAPPDATA}\Packages\centstr9\rootfs.tar"Not a reader? Watch this related video tutorial:
Related Titles:
- How to Install CentOS 8 on WSL
- Installing CentOS Stream 9 on Windows 10/11
- WSL2: Installing CentOS Stream 9 on Windows
- Complete Guide to Setting Up CentOS Stream 9 on WSL
- How to Configure CentOS Stream 9 on WSL2
- Step-by-Step Installation of CentOS Stream 9 on WSL
- How to Run CentOS Stream 9 on Windows Subsystem for Linux
- CentOS Stream 9 Installation Tutorial for WSL2
- Setting Up a CentOS Stream 9 Development Environment on WSL
- Easy Installation of CentOS Stream 9 on Windows 11
- WSL2 Setup: Installing CentOS Stream 9 on Windows
- How to Use CentOS Stream 9 with WSL2
- Installing and Configuring CentOS Stream 9 on WSL
- How to Install Linux CentOS Stream 9 on Windows Subsystem
- Getting Started with CentOS Stream 9 on WSL2
Keywords:
CentOS Stream 9, WSL2, install CentOS Stream 9, Windows Subsystem for Linux, WSL installation, CentOS on Windows, CentOS Stream 9 tutorial, WSL CentOS installation, Windows 10 CentOS setup, Windows 11 WSL, Linux on Windows, CentOS Stream 9 setup, WSL2 CentOS, install Linux on WSL, WSL CentOS Stream


