Table of Contents
Installing a certificate in Exchange Server is key to keeping things secure. An SSL certificate helps protect the server, and since we already have one ready, it just needs to be imported. There are two ways to handle the import process.
- You can install the certificate using the Exchange Admin Center.
- Another option is to use PowerShell to install an Exchange certificate.
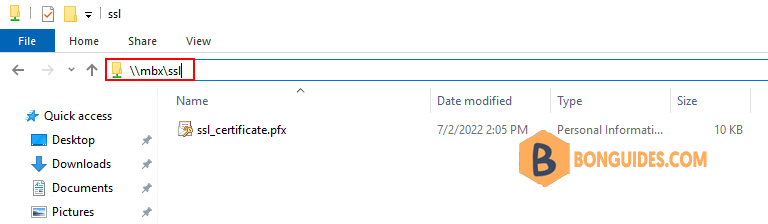
Create shared folder
Regardless of how you install the certificate, start by creating a shared folder to store the SSL certificate. Ensure the folder has the correct permissions, such as those for the SYSTEM account. If the permissions are wrong, the certificate import will fail and trigger an error.
Import certificate in Exchange Server
From Exchange Server 2016 CU23 onward, and in Exchange Server 2019 starting with CU12, importing the Exchange certificate can only be done using PowerShell through the Exchange Management Shell.
Import Exchange certificate with PowerShell
Open the Exchange Management Shell as an administrator, then run the following command to import the certificate.
Import-ExchangeCertificate `
    -Server "MBX01" `
    -FileData ([System.IO.File]::ReadAllBytes('\\dc01\cert\result.pfx')) `
    -PrivateKeyExportable:$true `
    -Password (ConvertTo-SecureString -String '123456' -AsPlainText -Force)
Thumbprint Services Subject
---------- -------- -------
D83496F75206C32C5451D4361ACDBD21E2DD8AC1 ....S.. CN=*.bonguides.meImport Exchange certificate in Exchange Admin Center
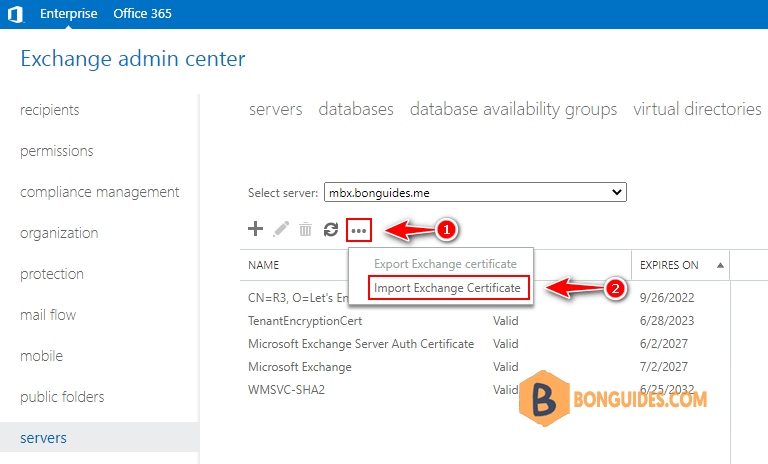
If you’re using an Exchange Server version earlier than Exchange Server 2016 CU23 or Exchange Server 2019 CU12, you can import the certificate through the Exchange Admin Center.
To import an Exchange Certificate, sign in to the Exchange Admin Center, navigate to the ‘Servers’ section in the feature pane, and open the ‘Certificates’ tab. Then, click on ‘More options’ (…) and select ‘Import Exchange Certificate’.
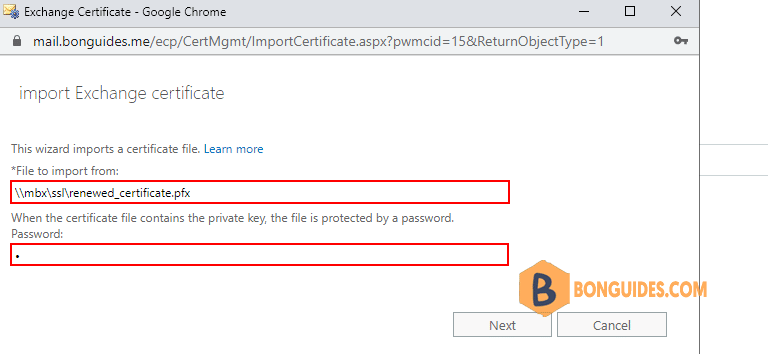
When the new window opens, enter the path to the Exchange certificate, fill in the password field if needed, or leave it blank if there’s no password. Then, click ‘Next’.
Click the “+” (Add) button to select the Exchange Server. Choose the server for the new certificate installation, click “Add,” and then finish by clicking “OK.”
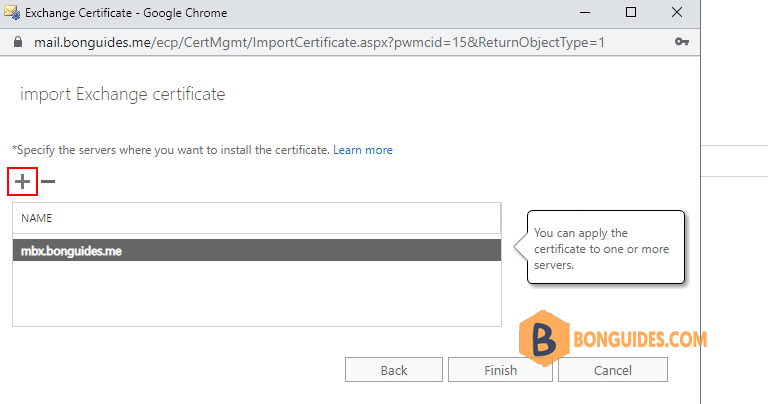
The certificate has been successfully imported into the Exchange Server, and the next step is to link it to the Exchange services.
Assign Exchange services to certificate
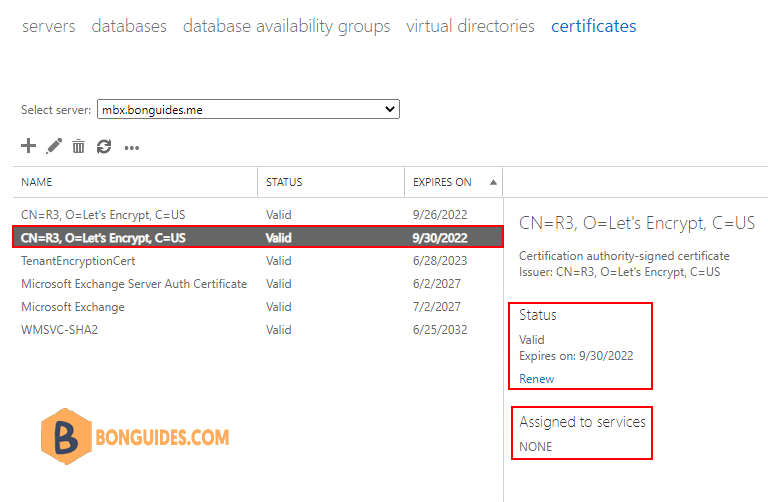
Double-click on the certificate you just imported.
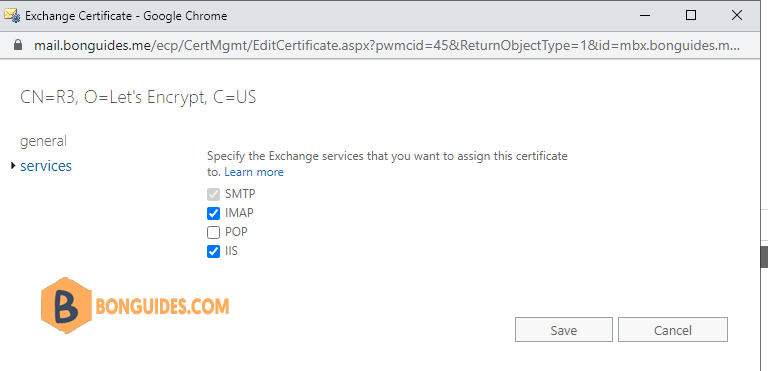
From the left menu, select ‘Services’. Assign the certificate to the desired Exchange services, then click ‘Save’. For example, in this case, the SMTP, IMAP, and IIS services are selected.
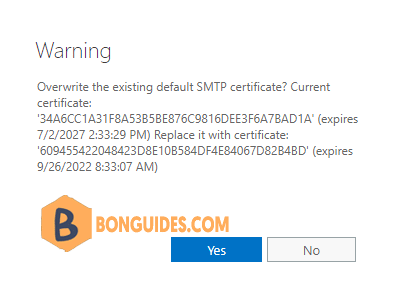
If you attempt to overwrite the current certificate, a warning will appear. Just click ‘Yes’ to proceed.
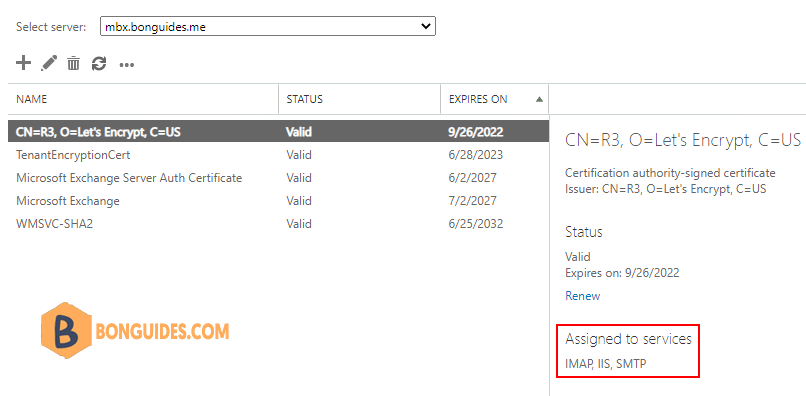
Select the certificate from the list view to view the assigned services in the details pane. The certificate is connected to the services we chose.
After importing a certificate with PowerShell, use this command to assign it to the Exchange services.
Enable-ExchangeCertificate –Thumbprint D83496F75206C32C5451D4361ACDBD21E2DD8AC1 –Services "IIS, SMTP, POP, IMAP"Not a reader? Watch this related video tutorial:


