Table of Contents
In some cases, you want to move an installed WSL instance to another drive instead of the system drive (C:). For example, you want to backup or preventing any mistake when re-installing Windows.
PS C:\> wsl -l -v

NAME            STATE           VERSION
Ubuntu          Running         2
Default installation location in WSL
In this post, only Ubuntu is installed. The path to the VHD file of the WSL distribution is stored in the BasePath registry parameter under the registry key.
HKCU\Software\Microsoft\Windows\CurrentVersion\LxssAlternatively, you can open the default installation location of WSL using below PowerShell command:
Invoke-Item $env:LOCALAPPDATA\PackagesFrom here, you can determine your WSL distributions by its name. Then navigate to each folder, you can see the virtual disk of each instance.
Move an WSL instance to another location
In case you want to move the installation location of an installed WSL instance to a new location. You can follow the below steps:
1. First, run the WSL instance and check the username. In our example, it is bon.
bon@DESKTOP-K34B7Q9:~$ whoami
bon
2. Close all apps running in your Linux environment and WSL console:
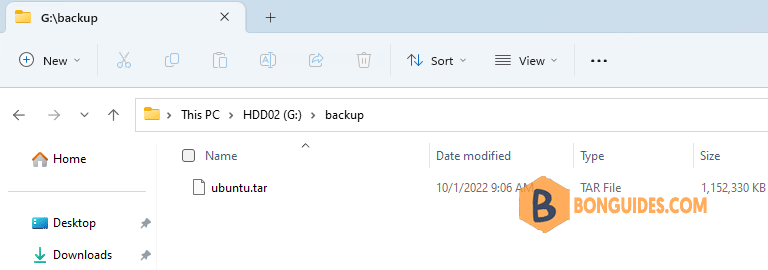
wsl --shutdown3. In order to backup (export) your WSL instance and save it to G:\backup, run the below commands to create a folder to store the exported file then export the instance:
mkdir G:\backup
wsl --export Ubuntu G:\backup\ubuntu.tar
4. Wait till the WSL export is over (it may take much time). A .tar archive with your WSL ext4 file system will appear in the target directory.
#Output
PS C:\> wsl --export Ubuntu G:\backup\ubuntu.tar
Export in progress, this may take a few minutes.
The operation completed successfully.
5. Then you may remove the WSL instance and its files on the source disk (on the system drive).
wsl --unregister Ubuntu6. Create a new directory for your Linux instance. The instance would be installed on that path. For example, we will import the instance to G:\wsl directory.
mkdir G:\wsl7. Import the exported .tar archive to an WSL instance using the below command:
wsl --import Ubuntu 'G:\wsl' 'G:\backup\ubuntu.tar'For example, this instance run as a webserver, so we’ll import it with that name. When we get the list of instances in WSL, we can recognize it easier.
wsl --import webserver 'G:\wsl' 'G:\backup\ubuntu.tar'#Output
PS C:\> wsl --import webserver 'G:\wsl' 'G:\backup\ubuntu.tar'
Import in progress, this may take a few minutes.
The operation completed successfully.
PS C:\Users\admin> wsl -l -v
NAME STATE VERSION
* webserver Stopped 28. After imported the instance. The default login to Ubuntu is root. If it’s no problem, you’ve done to move a WSL instance to another location.
PS C:\Users\admin> wsl -d webserver
Welcome to Ubuntu 22.04.2 LTS (GNU/Linux 5.15.90.4-microsoft-standard-WSL2 x86_64)

root@DESKTOP-K34B7Q9:/mnt/c/Users/admin# whoami
root
Configure the default user for imported instance
In case, you want to change the username to another username (we got it earlier – bon). You can run the below commands:
cd $env:USERPROFILE\AppData\Local\Microsoft\WindowsApps
.\ubuntu.exe config --default-user bon
Start the WSL instance. This time, the default login user is same as the user you’ve configured in the first time when you are installing the instance.
PS C:\> wsl -d ubuntu

To run a command as administrator (user "root"), use "sudo <command>".
See "man sudo_root" for details.

bon@DESKTOP-K34B7Q9:/mnt/c/Users/admin/AppData/Local/Microsoft/WindowsApps$
Note: You may use the same scenario to move a configured WSL instance to other computers.
Not a reader? Watch this related video tutorial:


