Learning and Sharing
  • Home
  • Blog
  • Linux
  • macOS
  • Virtualization
    • VMware
    • VirtualBox
  • Windows
    • Windows 11
    • Windows 10
    • Windows Server
  • Series
    • Symantec
    • Intune
    • Microsoft Azure
    • Powershell
    • VirtualBox
    • VMware
    • PowerShell Learning
    • Microsoft Graph
  • More
    • Auto Installation
    • AEC Installation
  • Contact
No Result
View All Result
No Result
View All Result

How to Enable and Configured DKIM for a Domain in Microsoft 365

April 1, 2023
in Blog, Microsoft 365, Powershell
0
ADVERTISEMENT

Table of Contents

Enable DKIM using Microsoft 365 admin center

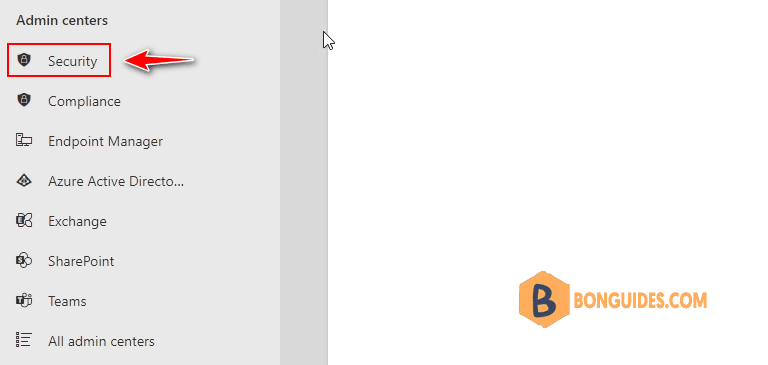
1. Visit Microsoft admin center then navigate to Security admin center. In the new admin center, let click Show all to open all options.

Sa1

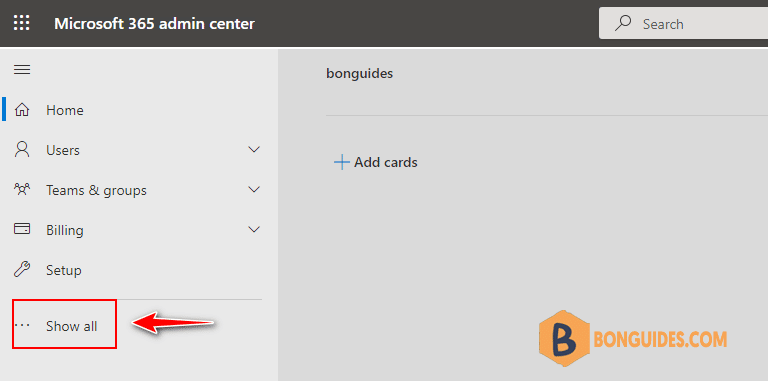
Or you can visit https://security.microsoft.com to open Microsoft 365 Defender portal directly.

Bg886

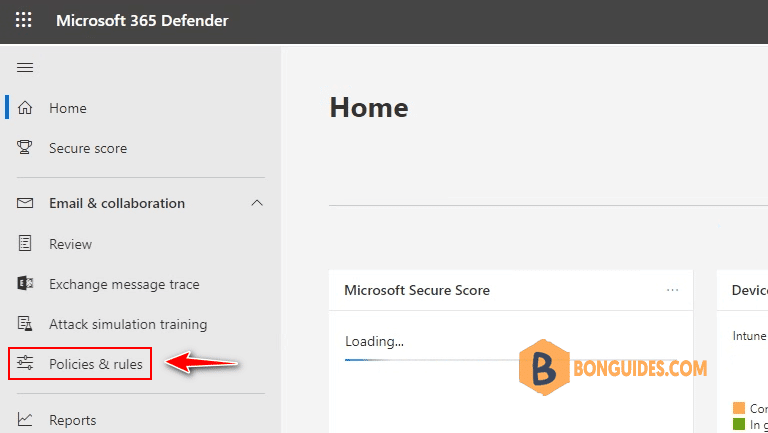
2. In the Microsoft 365 Defender portal, select Policies & rules under Email & collaboration section.

Bg887

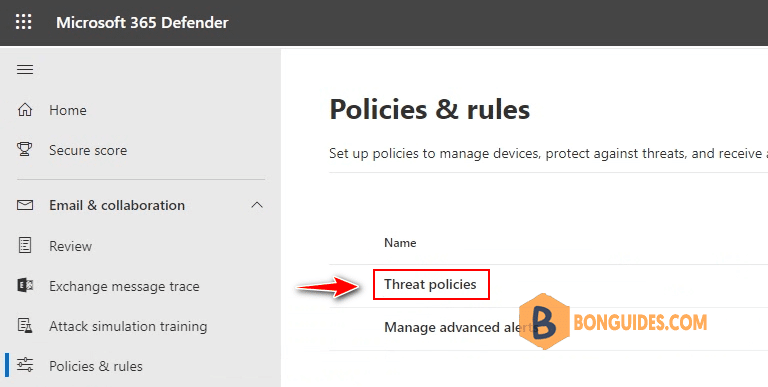
3. In the policies and rules, select Threat policies rule.

Bg888

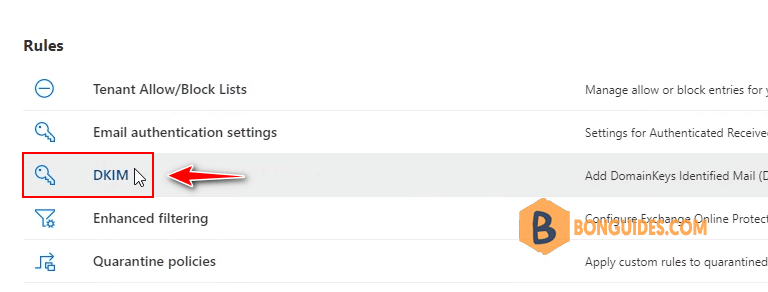
4. Now, select DKIM under the Rules section. Tips: You can visit DKIM page directly using this link https://security.microsoft.com/dkimv2.

Bg889

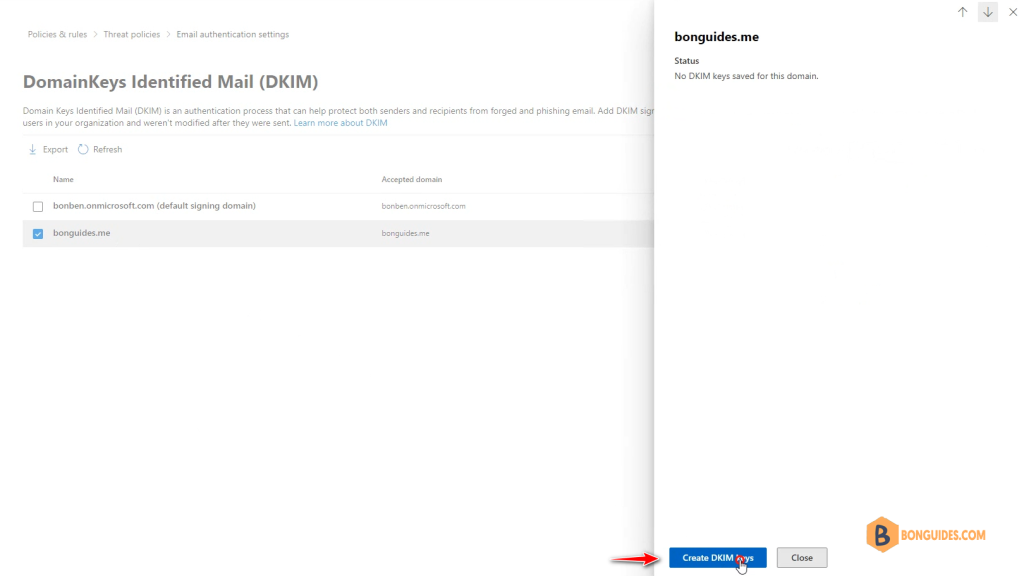
5. In the DomainKeys Identified Mail page, select the domain you want to enable DKIM then click on Create DKIM keys button.

Bg890

6. A new popup window opened, it contains two CNAME records details that you need create for your domain.

Bg891

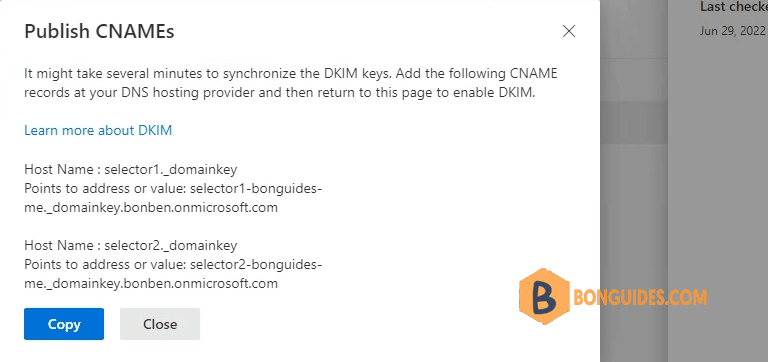
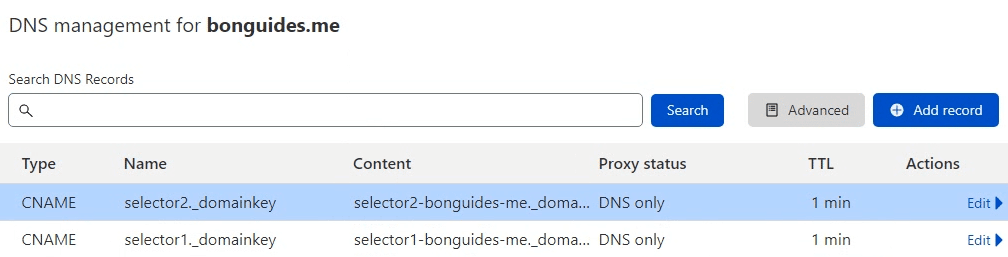
7. On your DNS provider’s website, add CNAME records for DKIM that you want to enable. Make sure that the fields are set to the following values for each:

Record Type: CNAME (Alias)
Host: Paste the values you copy from DKIM page.
Points to address: Copy the value from DKIM page.
TTL: 3600 (or your provider default)
Bg892
Bg893

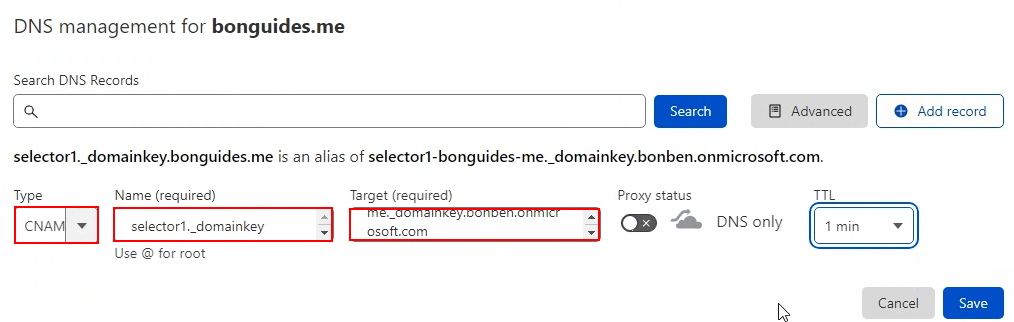
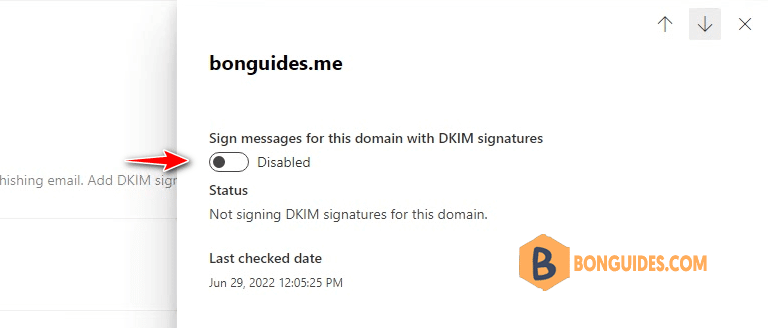
8. Return to DKIM page to enable DKIM.

Bg894
Note Note: If you see CNAME record doesn't exist error, it might be due to: Synchronization with DNS server, which might take few seconds to hours, if the problem persists repeat the steps again
Bg895

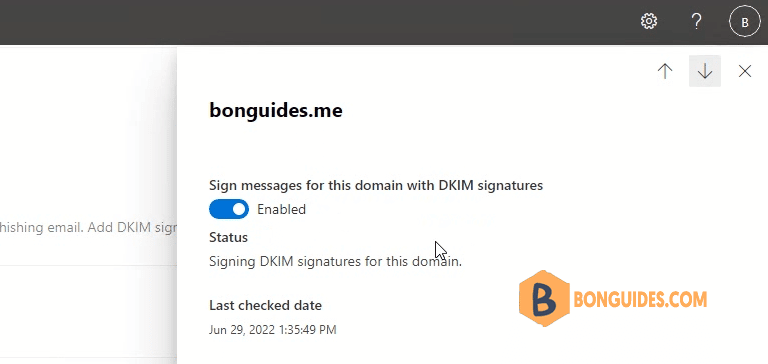
Once DKIM is enabled for your domain in Microsoft, let check it’s configured correctly or not How to Check DKIM is Enabled and Configured Correctly in Microsoft 365.

Enable DKIM using Windows PowerShell

If you prefer using PowerShell, let move forward to using PowerShell to enable DKIM for Microsoft 365.

1. Connect to Exchange Online using PowerShell.

2. Run the following command in Exchange Online PowerShell to create the selector records:

New-DkimSigningConfig -DomainName leoguides.me -Enabled $false

3. Run the following command to get the CNAME records details:

Get-DkimSigningConfig -Identity leoguides.me | Format-List Selector1CNAME, Selector2CNAME

#Output
Selector1CNAME : selector1-leoguides-me._domainkey.bonben.onmicrosoft.com
Selector2CNAME : selector2-leoguides-me._domainkey.bonben.onmicrosoft.com

4. Add two CNAME records into your DNS server then run the following command to enable DKIM for Microsoft 365.

Set-DkimSigningConfig -Identity leoguides.me -Enabled $true
Get-DkimSigningConfig -Identity leoguides.me | Format-List

#Output
RunspaceId                   : 5cb04a21-1186-48c0-8cce-6f24dce8ce80
Domain                       : leoguides.me
AdminDisplayName             :
-------------------------------------------
Enabled                      : True
IsDefault                    : False
HeaderCanonicalization       : Relaxed
BodyCanonicalization         : Relaxed
Algorithm                    : RsaSHA256
NumberOfBytesToSign          : All
IncludeSignatureCreationTime : True
IncludeKeyExpiration         : False
KeyCreationTime              : 6/29/2022 1:58:31 PM
LastChecked                  : 6/29/2022 2:31:10 PM
RotateOnDate                 : 6/29/2022 1:58:31 PM
SelectorBeforeRotateOnDate   : selector2
SelectorAfterRotateOnDate    : selector1
Status                       : Valid
Identity                     : leoguides.me
Id                           : leoguides.me
IsValid                      : True
ExchangeVersion              : 0.20 (15.0.0.0)
Name                         : leoguides.me
5/5 - (2 votes)
Previous Post

How to Install Nginx in Windows as a Windows Service Auto Start

Next Post

How to Check DKIM is Enabled and Configured Correctly in Microsoft 365

Related Posts

Running Hyper-V and VMware Workstation on The Same Machine

August 15, 2024

How to Uninstall All Autodesk Products At Once Silently

July 29, 2024
Ftr5

How to Uninstall the Autodesk Genuine Service on Windows

July 29, 2024
Ftr19

How to Fix Windows Cannot Read the ProductKey From the Unattend Answer File in VirtualBox

July 26, 2024
Ftr25

How to Update Windows Terminal in Windows 10/11

July 26, 2024

How to Disable The Beep Sound in WSL Terminal on Windows

July 26, 2024

Leave a Reply Cancel reply

Your email address will not be published. Required fields are marked *

Recent Posts

  • How To Turn On uBlock Origin Extension in Chrome (2025)
  • Images Hidden Due To Mature Content Settings In CivitAI
  • Azure OpenAI vs Azure AI Hub, How to Choose the Right One for Your Needs

Categories

Stay in Touch

Discord Server

Join the Discord server with the site members for all questions and discussions.

Telegram Community

Jump in Telegram server. Ask questions and discuss everything with the site members.

Youtube Channel

Watch more videos, learning and sharing with Leo ❤❤❤. Sharing to be better.

Newsletter

Join the movement and receive our weekly Tech related newsletter. It’s Free.

General

Microsoft Windows

Microsoft Office

VMware

VirtualBox

Technology

PowerShell

Microsoft 365

Microsoft Teams

Email Servers

Copyright 2025 © All rights Reserved. Design by Leo with ❤

No Result
View All Result
  • Home
  • Linux
  • Intune
  • macOS
  • VMware
  • VirtualBox
  • Powershell
  • Windows 10
  • Windows 11
  • Microsoft 365
  • Microsoft Azure
  • Microsoft Office
  • Active Directory

No Result
View All Result
  • Home
  • Linux
  • Intune
  • macOS
  • VMware
  • VirtualBox
  • Powershell
  • Windows 10
  • Windows 11
  • Microsoft 365
  • Microsoft Azure
  • Microsoft Office
  • Active Directory