Table of Contents
In this post, we will show you how to use Group Policy to deploy software to computers and users. In this example, we will deploy Mozilla Firefox to computers via Group Policy. The steps in this example will work with other MSI files.
Create a Network Share for the MSI Install File
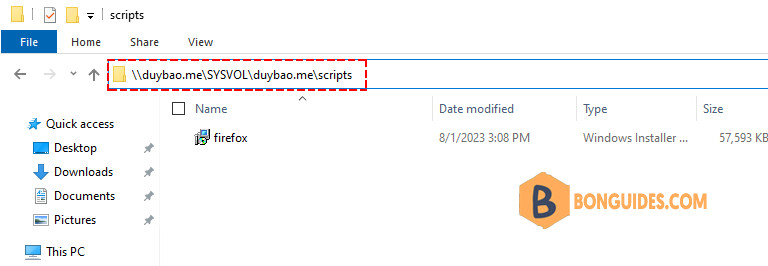
The easiest way is copy the installation files in to to the SYSVOL folder on the domain controller (\\duybao.me\SysVol\duybao.me\scripts).
Or you can create a secured distribution point for your MSI install files. It needs to be accessible for domain computers and users.
1️⃣ Create a folder on any computer or server that everyone can access to the shared folder. For example, we’ll create a folder named deploy on a domain controller. You can name your folders anything you want.

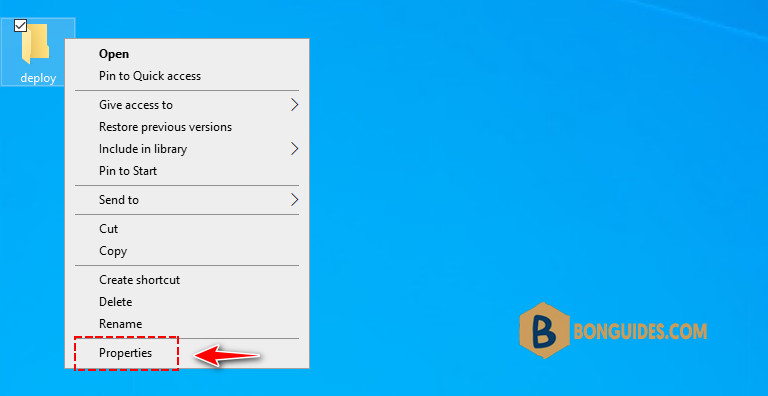
2️⃣ Right-click on the folder, then select Properties.
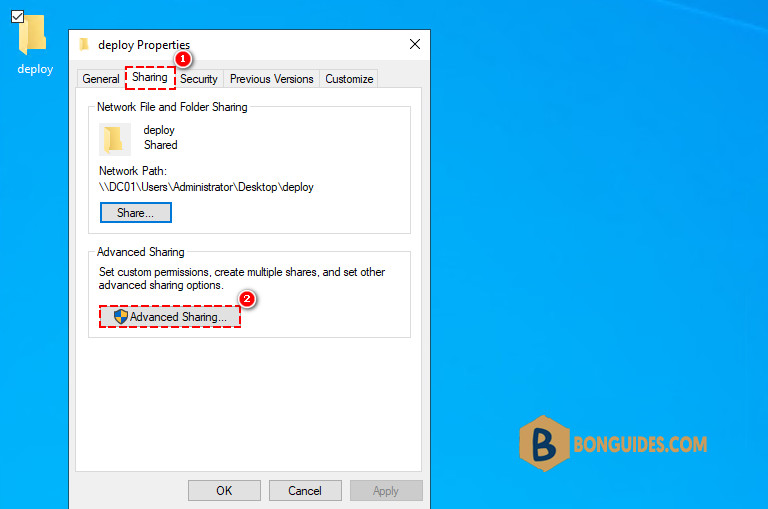
3️⃣ Select the Sharing tab then click Advanced Sharing option.
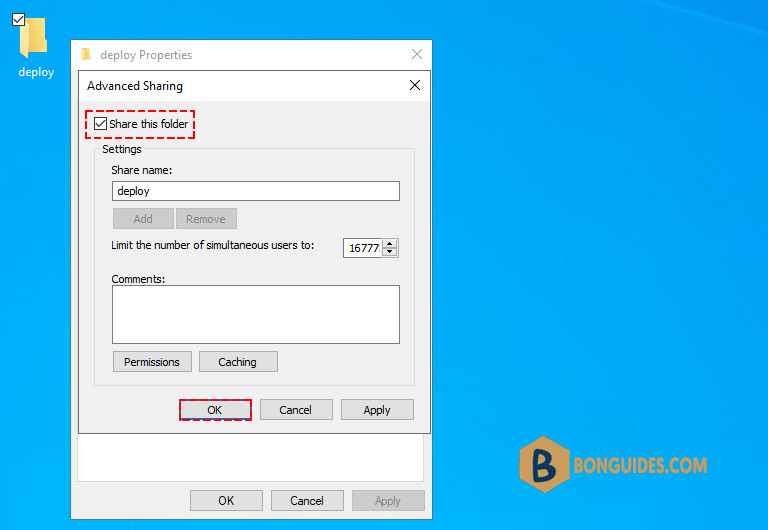
4️⃣ On the Advanced Sharing screen, select the box to share this folder. The share name can be anything you want.
5️⃣ Now, click on the Share button then grant Read permission for Everyone group and click Share.
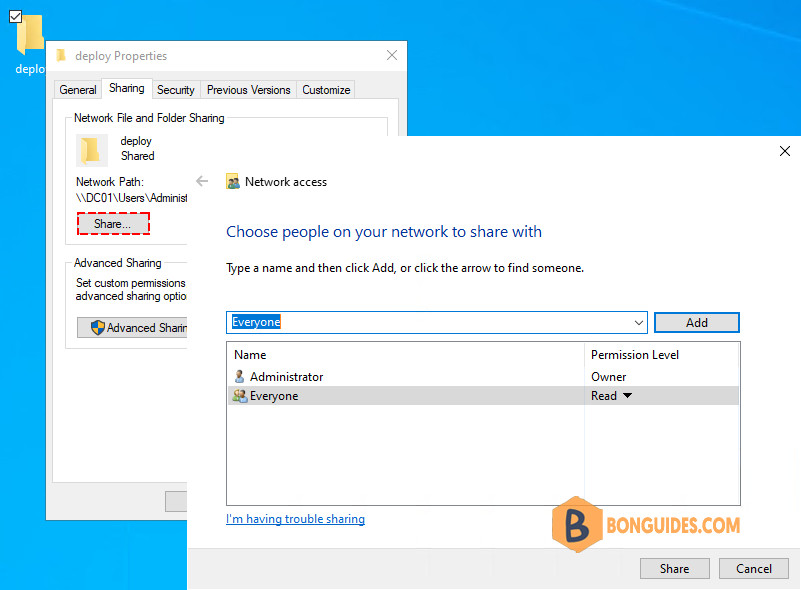
6️⃣ The shared folder configuration is complete. Now copy the MSI install files to the folder you just created.
7️⃣ From any computer in your domain, trying to access the shared folder to verify it is configured correctly.

Create GPO to Deploy Software to Computers
Group policy has settings for targeting computers and settings to target users. In this section, we will target computers for deploying software. This means the software install will be installed for anyone that logs into the computer.
For example, we’ve created an OU for the computers of HR team. Then we’ll deploy the app into all computers of this OU.
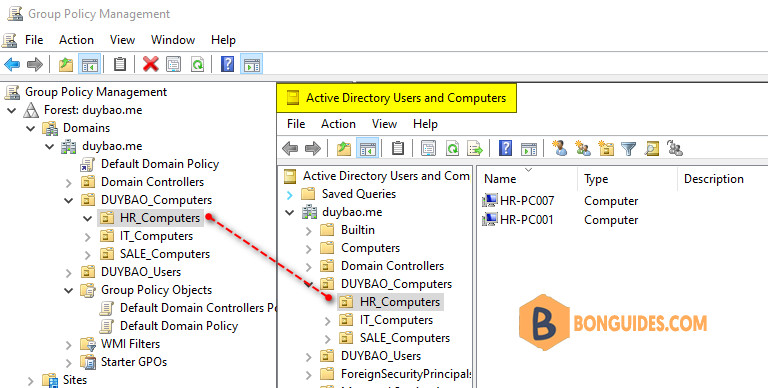
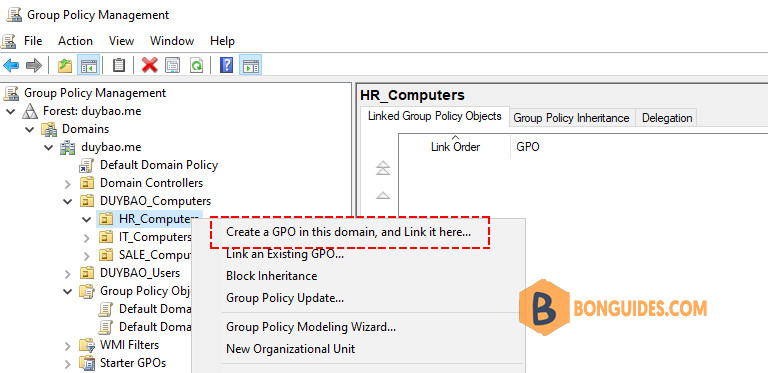
1️⃣ Open Group Policy Management console then navigate to the OU. Right click and select Create a GPO in this domain, and link it here.
In this example, we’re going to install Firefox on all the computers in the HR OU, so we will create and link the GPO to the HR OU.
2️⃣ Give the GPO a name then right click on the newly created GPO to edit it.
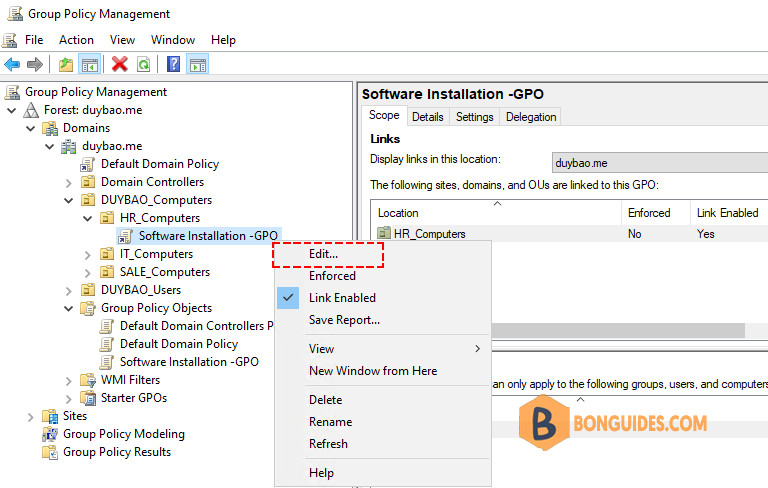
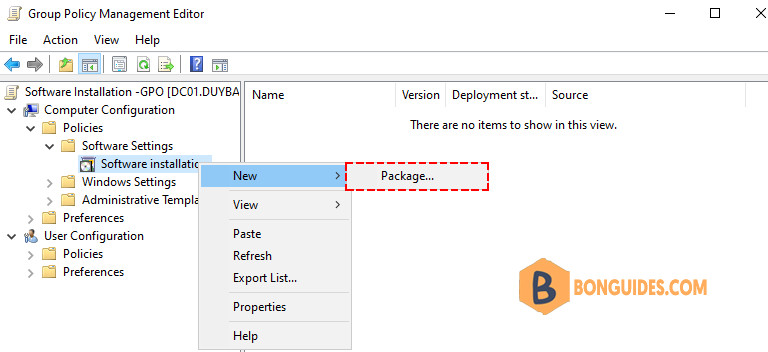
3️⃣ Navigate to Computer Configuration > Policies > Software Settings > Software installation then right click New > Package… to add the MSI installation files from the network shared folder we’ve created in the previous steps.
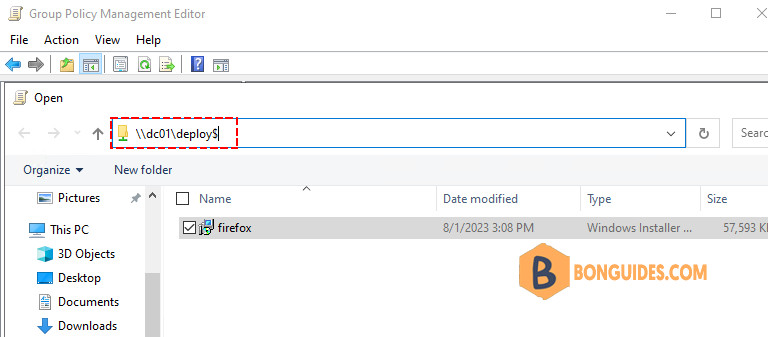
4️⃣ On the open screen browse to the network share using the UNC path, select the MSI you want to install, and click open.
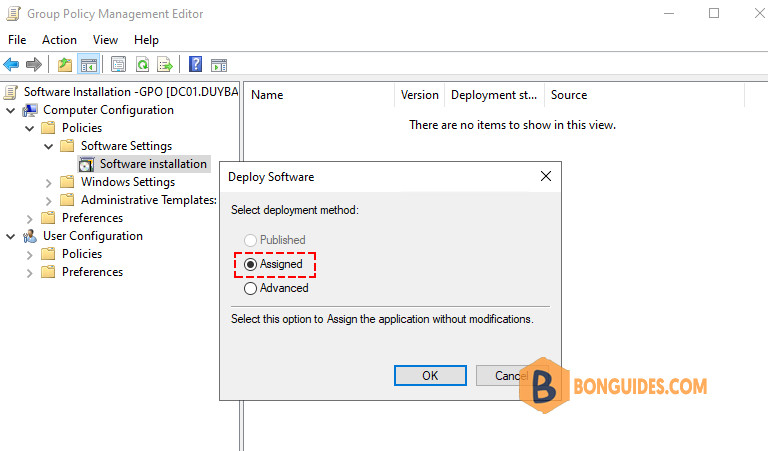
5️⃣ On the Deploy Software screen, click Assigned and then click OK. Published will be grayed out as that option can only be used when deploying software to users.
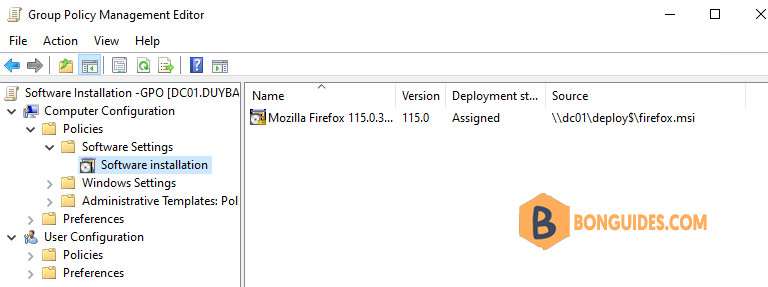
That completes the GPO configuration. The GPO settings should look like this.
Installing software using Group Policy
The software will only install during a reboot and the computer must have its GPO settings updated. GPO settings will refresh automatically every 90 minutes. On a client, to force the GPO settings you can use the gpupdate /force command.
When you run the gpupdate command you will get a message saying one or more settings must be processed before the system start or user logon. This is referring to the software installed by GPO and is expected. Type Y to restart the computer.

You can see the software will be installed during reboot.
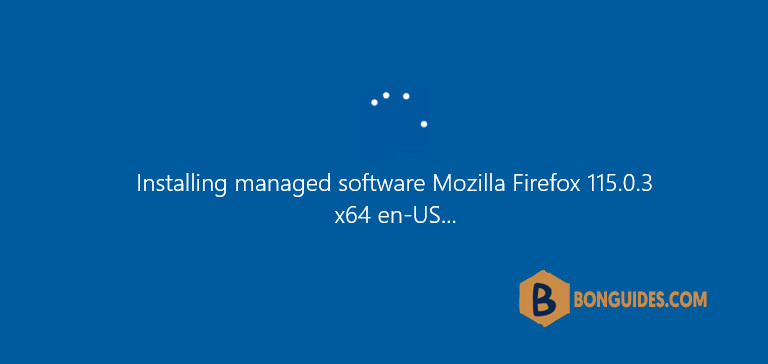
When users log in, he can see the app’s icon on the desktop and that confirms the software installed.

That completes the steps on how to deploy software using group policy (.msi installer).
Method 2: Deploy Using PowerShell Script
If the apps that you want to deploy does not support .msi file, you can use a PowerShell script to install the app at startup.
When using this method:
- You don’t need to download and save the setup file locally.
- The client computers will access to internet to download the setup file automatically.
- You don’t need to care about the installation file is .exe or .msi.
- The app will be installed with system context regardless user login.
In this post, we use Windows Package Manager and Chocolatey Package Manager.
Next, you need to create a PowerShell script as follows. It’s very basic scripts. You can modify it and add logging or other options. That is the nice thing about PowerShell you can customize it to your needs.
Sample PowerShell script to install Zoom Meeting client using Windows Package Manager.
#Script to install apps via Group Policy - https:// bonguides.com
#Steps in this script:
#1. Check then update Windows Package Manager (Winget).
$winget = Get-AppxProvisionedPackage -Online |
Where-Object {$_.DisplayName -eq "Microsoft.DesktopAppInstaller"}

If ([Version]$winGet. Version -lt "2022.506.16.0") {
	irm https://bonguides.com/winget | iex
}
Else {}

$wpath = "C:\Program Files\WindowsApps"
$winget = Get-ChildItem $wpath -Recurse -File -ErrorAction SilentlyContinue | `
Where-Object { $_.name -like "AppInstallerCLI.exe" -or $_.name -like "WinGet.exe" } | `
Select-Object -ExpandProperty fullname -ErrorAction SilentlyContinue

# If there are multiple versions, select latest.
if ($winget.count -gt 1){ $winget = $winget[-1] }
$wingetPath = [string]((Get-Item $winget).Directory.FullName)

#2. Check the path exists to determine if the program is already installed.
#3. If the path doesn’t exist then it will start the install process.
#4. If it does exist it will move to the else line and do nothing.
$path = 'C:\Program Files\Zoom'
if (-not (Test-Path -Path $path)) {
    & "$wingetPath\winget.exe" install Zoom.Zoom -e --silent `
    --scope machine --accept-source-agreements --accept-package-agreements
    }
else  {}
Sample PowerShell script to install Zoom Meeting client using Chocolatey Package Manager.
$path = 'C:\ProgramData\chocolatey'
if (-not (Test-Path -Path $path)) {
    Set-ExecutionPolicy Bypass -Scope Process -Force
    irm https://community.chocolatey.org/install.ps1 | iex
}

Start-Sleep -Seconds 10

$path = 'C:\Program Files\Zoom'
if (-not (Test-Path -Path $path)) {
    choco feature enable -n allowGlobalConfirmation
    choco install zoom -y --accept-license
    }
else  {}
In case you have deploy the apps into the new computers. You can remove the Test-Path in the PowerShell script then install all your needed apps at once:
$winget = Get-AppxProvisionedPackage -Online |
Where-Object {$_.DisplayName -eq "Microsoft.DesktopAppInstaller"}

If ([Version]$winGet. Version -lt "2022.506.16.0") {
	irm https://raw.githubusercontent.com/bonben365/wsandbox/main/winget.ps1 | iex
}
Else {}

$wpath = "C:\Program Files\WindowsApps"
$winget = Get-ChildItem $wpath -Recurse -File -ErrorAction SilentlyContinue | `
Where-Object { $_.name -like "AppInstallerCLI.exe" -or $_.name -like "WinGet.exe" } | `
Select-Object -ExpandProperty fullname -ErrorAction SilentlyContinue

if ($winget.count -gt 1){ $winget = $winget[-1] }
$wingetPath = [string]((Get-Item $winget).Directory.FullName)

$ids = @(
    'Zoom.Zoom';
    'Google.Chrome';
    'mRemoteNG.mRemoteNG';
    'Dropbox.Dropbox'
)
ForEach ($id in $ids) {
    & "$wingetPath\winget.exe" install $id -e --silent --scope machine `
    --accept-source-agreements --accept-package-agreements
}
$path = 'C:\ProgramData\chocolatey'
if (-not (Test-Path -Path $path)) {
Set-ExecutionPolicy Bypass -Scope Process -Force
irm https://community.chocolatey.org/install.ps1 | iex
}
Start-Sleep -Seconds 10
$ids = @(
'zoom';
'firefox';
'mRemoteNG';
'dropbox'
)
ForEach ($id in $ids) {
choco install $id -y --accept-license
}1️⃣ Save the script to a .ps1 file.
2️⃣ Create a policy then assigns it to the computers of HR team.
3️⃣ Edit the policy as follows:
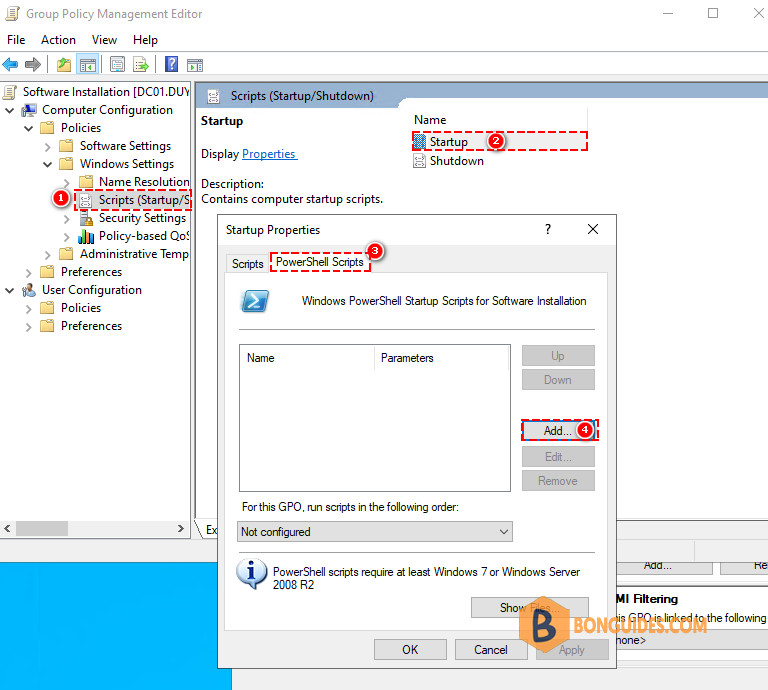
4️⃣ With the browser window opened, you need to copy and paste the .ps1 file that you’ve created in the previous step into this window.
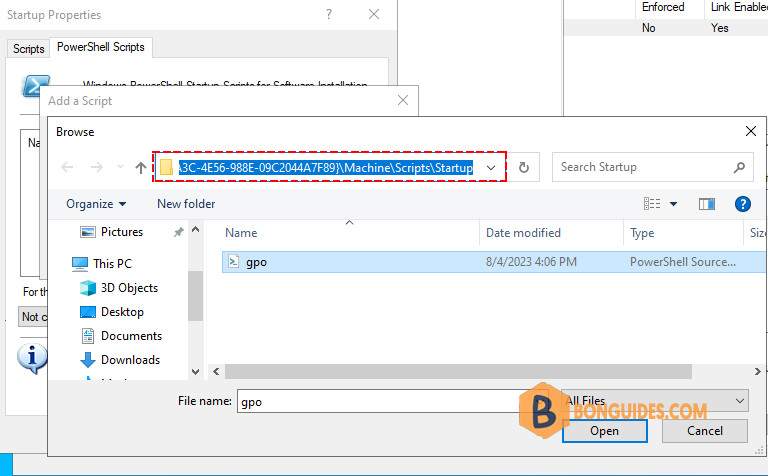
5️⃣ Click OK until you back at the main screen. This completes the GPO configuration.
6️⃣ Now reboot a computer of the HR team, and the software should be installed automatically.
Not a reader? Watch this related video tutorial:


