Table of Contents
In this blog post we explain you how to create an Entra ID App Registration with the Microsoft Graph PowerShell. You need to have the Azure Active Directory Role Application Administrator or Application Developer or Global Administrator.
Before you begin
Make sure you have:
- A Windows computer with Windows PowerShell 5.1 + or PowerShell 7+.
- Install Microsoft Graph PowerShell SDK.
Create App Registration with Microsoft Graph PowerShell
1️⃣ Connect to your Azure Active Directory with required scopes.
Connect-MgGraph -Scopes "Application.Read.All","Application.ReadWrite.All","User.Read.All"2️⃣ Create an application with the appName testapp.
$appName =  "testapp"
$app = New-MgApplication -DisplayName $appName
$appObjectId = $app.Id

Get-MgApplication -ApplicationId $appObjectId | select DisplayName, Id, AppId
3️⃣ Create a client secret for the app. We’ll using it for authenticate with app-only authentication method.
$passwordCred = @{
"displayName" = "DemoClientSecret"
"endDateTime" = (Get-Date).AddMonths(+12)
}
$clientSecret = Add-MgApplicationPassword `
-ApplicationId $appObjectId `
-PasswordCredential $passwordCred
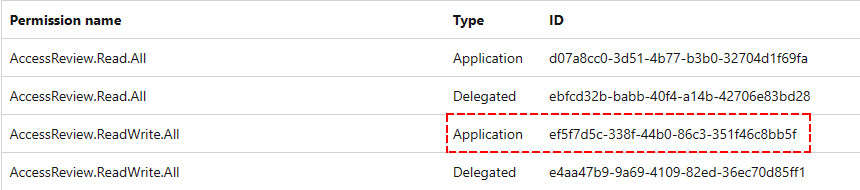
$clientSecret | Format-List4️⃣ Now, we need to grant the permissions to the app. You can get the list of permission id from this link. From that link, please note to copy the application permission id instead of delegated permission id.
#Add Application Permission
#User.ReadBasic.All    Application    97235f07-e226-4f63-ace3-39588e11d3a1
$permissionParams = @{
    RequiredResourceAccess = @(
        @{
            ResourceAppId = "00000003-0000-0000-c000-000000000000"
            ResourceAccess = @(
                @{
                    Id = "97235f07-e226-4f63-ace3-39588e11d3a1"
                    Type = "Role"
                }
            )
        }
    )
}
Update-MgApplication -ApplicationId $appObjectId -BodyParameter $permissionParams
5️⃣ Finally, grab the needed information to connect to Microsoft Graph PowerShell with app-only mode.
Write-Host "Client ID: $($app.AppID)"
Write-Host "Tenent ID: $((Get-MgOrganization).Id)"
Write-Host "Client Secret: $($clientSecret.SecretText)"
6️⃣ From the output, insert client id, tenant id and client secret into the below script. The script will connect to Microsoft Graph PowerShell without user login prompt.
Disconnect-MgGraph#Configuration
$ClientId = ''
$TenantId = ''
$ClientSecret = ''
#Convert the client secret to a secure string
$ClientSecretPass = ConvertTo-SecureString -String $ClientSecret -AsPlainText -Force
#Create a credential object using the client ID and secure string
$ClientSecretCredential = New-Object `
-TypeName System.Management.Automation.PSCredential `
-ArgumentList $ClientId, $ClientSecretPass
#Connect to Microsoft Graph with Client Secret
Connect-MgGraph -TenantId $TenantId -ClientSecretCredential $ClientSecretCredentialAs you can see, in the below output, we’ve connected to Microsoft Graph PowerShell using the app that we’ve registered in the previous steps.
PS C:\> Connect-MgGraph -TenantId $TenantId -ClientSecretCredential $ClientSecretCredential
Welcome to Microsoft Graph!

Connected via apponly access using 577ae9b4-60c8-4b38-a196-01e0e0fdc1b7
Readme: https://aka.ms/graph/sdk/powershell
SDK Docs: https://aka.ms/graph/sdk/powershell/docs
API Docs: https://aka.ms/graph/docs

NOTE: You can use the -NoWelcome parameter to suppress this message.

PS C:\> Get-MgContext

ClientId               : 577ae9b4-60c8-4b38-a196-01e0e0fdc1b7
TenantId               : c032627b-6715-4e39-9990-bcf48ee5e0c5
Scopes                 :
AuthType               : AppOnly
TokenCredentialType    : ClientSecret
CertificateThumbprint  :
CertificateSubjectName :
Account                :
AppName                : testapp
ContextScope           : Process
Certificate            :
PSHostVersion          : 5.1.22621.1778
ManagedIdentityId      :
ClientSecret           : System.Security.SecureString
Environment            : Global
If you do a check on Microsoft Entra admin center. You can see the app has been listed in the app registration list.

Connecting with Certificate
Alternatively, if you don’t want to use client secret to connect to Microsoft Graph PowerShell. You can follow the following steps to create a certificate for authentication.
1️⃣ Connect to Microsoft Graph PowerShell with require scopes then create an app. This time we use the new name as testapp1.
Connect-MgGraph -Scopes "Application.Read.All","Application.ReadWrite.All","User.Read.All"$appName = "testapp1"
$app = New-MgApplication -DisplayName $appName
$appObjectId = $app.Id
Get-MgApplication -ApplicationId $appObjectId | select DisplayName, Id, AppId2️⃣ Create a self-certificate on your computer. For exampe, we’ve created a self-certificate with GraphApi as the subject and the certificate will valid for 5 years.
$certParams = @{
    Subject = 'CN=GraphApi'
    CertStoreLocation = 'cert:\LocalMachine\My'
    NotAfter = (Get-Date).AddYears(5)
    KeySpec = 'KeyExchange'
}
$mycert = New-SelfSignedCertificate @certParams
3️⃣ Next, upload the newly created certificate to the app on Entra ID.
$cert = Get-ChildItem -Path Cert:\LocalMachine\my | ? {$_.Subject -eq "$($certParams.Subject)"}
$CertCredentials = @(
    @{
        Type = "AsymmetricX509Cert"
        Usage = "Verify"
        Key = [byte[]]$cert.RawData
    }
)
Update-MgApplication -ApplicationId $appObjectId -KeyCredentials $CertCredentials
4️⃣ Grab the needed information for connection, this time we need the certificate thumbprint instead of client secret.
Write-Host "Client ID: $($app.AppID)"
Write-Host "Tenent ID: $((Get-MgOrganization).Id)"
Write-Host "Cert Thumbprint: $($mycert.Thumbprint)"
5️⃣ From the output, insert client id, tenant id and certificate thumbprint into the below script. The script will connect to Microsoft Graph PowerShell without user login prompt.
#Configuration
$ClientId = ''
$TenantId = ''
$CertificateThumbprint = ''

#Connect to Microsoft Graph with CBA
Connect-MgGraph `
    -ClientId $ClientId `
    -TenantId $TenantId `
    -CertificateThumbprint $CertificateThumbprint
Welcome to Microsoft Graph!
Connected via apponly access using f9e90dfc-4bc5-4f0d-aee4-725b874474ff
Readme: https://aka.ms/graph/sdk/powershell
SDK Docs: https://aka.ms/graph/sdk/powershell/docs
API Docs: https://aka.ms/graph/docs
NOTE: You can use the -NoWelcome parameter to suppress this message.
PS C:\> Get-MgContext
ClientId : f9e90dfc-4bc5-4f0d-aee4-725b874474ff
TenantId : c032627b-6715-4e39-9990-bcf48ee5e0c5
Scopes :
AuthType : AppOnly
TokenCredentialType : ClientCertificate
CertificateThumbprint : B6ECDF0AC9CD387C5BC1F6A0154B84FE7B44A6F0
CertificateSubjectName :
Account :
AppName : testapp1
ContextScope : Process
Certificate :
PSHostVersion : 5.1.22621.1778
ManagedIdentityId :
ClientSecret :
Environment : GlobalRemove app registration from Entra ID
Anytime, if an app no longer need for you. You can remove the app using below commands:
$appRemove = Get-MgApplication | Where-Object {$_.DisplayName -eq "testapp"} | Format-List
Remove-MgApplication -ApplicationId $appRemove.Id
If you’re a PowerShell nerd like me. Here are the full PowerShell scripts for above steps.
Manage Microsoft 365 Using Microsoft Graph
You can also take a look at the following Microsoft Graph posts that help to manage Microsoft 365 efficiently.
- Create a new user
- Create bulk users in Microsoft 365
- Get a list of all users in Microsoft 365
- Update user properties
- Add a user to a group
- Add bulk users to a group
- Remove users from a group
- Remove multiple users from a group
- Assign managers for Microsoft 365 users
- Assign licenses to users
- Removing licenses from user accounts
- Delete a user from Microsoft 365
- How to use Get-MgUser cmdlet
That’s it. Thanks for visiting.
Not a reader? Watch this related video tutorial:


