
Table of Contents
This Graph API PowerShell article will show how to create a self-signed certificate on a Windows machine and upload it to an App Registration using Graph API.
The advantage of PowerShell with Graph API is that it handles the API requests and reduces the amount of code needed to contract API calls to the Service.
Before you begin
Before you begin, make sure the following requirements are met:
- You’ve Windows PowerShell 5.1 or PowerShell 7 installed.
- The Microsoft Graph PowerShell SDK in installed on your computer.
- An account with admin privileged (Global admin) in your Microsoft 365 tenant.
Create a Self Signed Certificate
1️⃣ The first step we need to take is creating a self-signed certificate on a Windows machine. To do it, Open a PowerShell console and run the following code.
Note
Make sure you note down the certificate name (in our case, the cert CN name is graphapi. You can use any CN as you need.
$params = @{
    Subject = 'CN=GraphApi'
    CertStoreLocation = 'cert:\LocalMachine\My'
    NotAfter = (Get-Date).AddYears(5)
    KeySpec = 'KeyExchange'
}
$mycert = New-SelfSignedCertificate @params
2️⃣ Get details about the newly created self-certificate. Take note the certificate thumbprint for later use.
PS C:\> $mycert

   PSParentPath: Microsoft.PowerShell.Security\Certificate::LocalMachine\My

Thumbprint                                Subject
----------                                -------
5F257B383DE9B3B6C1C32C9CD6DF4DFFC9AA2978  CN=GraphApi
For reference, you can check the certificate is created in the local certificate store.
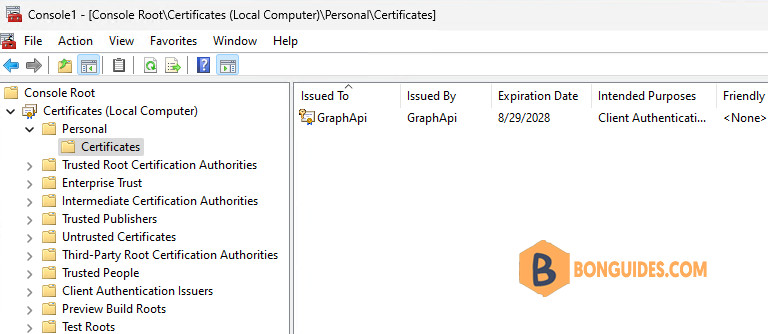
Upload Certificate to App Registration
Once the self-certificate has been created, the next step is connect to Microsoft Graph PowerShell then upload the certificate to an registered application.
1️⃣ Connect to Microsoft Graph PowerShell with required scopes. Once connected, you can verify the delegated permissions by Get-MgContext cmdlet.
Connect-MgGraph -Scopes "Application.ReadWrite.All","User.Read.All"PS C:\> Get-MgContext | select -ExpandProperty scopes
Application.Read.All
Application.ReadWrite.All
Group.ReadWrite.All
openid
profile
User.Read.All
email2️⃣ We assume you’ve created an app registration in Microsoft Entra admin center. To get the list of registered apps in your tenant, you can run Get-MgApplication cmdlet.
Get-MgApplication | select DisplayName, Id, AppIdDisplayName Id AppId
----------- -- -----
testapp 06a8af7d-381a-43a3-a391-c9047811c548 d80ccfc5-a78b-49e0-9795-75997a357d7a
BrowserStack 0a3c2014-9075-40f2-b6f6-4a5144a78e72 d7ccf457-4f55-46ba-bce7-968d3fffb211
Salesforce 0fb923ba-a245-49ad-b7c6-1c66c89dcc6e df387b96-2a5d-424a-bc99-7e45d1277791
LinkedIn 54fdad86-ef08-4993-9c61-3257e4e837eb b28c84bc-3a52-4194-9822-c69c68add95b
Box 69ae07d5-d795-41ed-ab95-c729a1132102 bb40b45c-4f15-464c-a405-31e6ed96406a
EXO_App2 856cd348-426b-4c93-aa14-7d7bcb8636b6 827a61b5-86f5-48ee-a938-730dacf05272From the output, write-down the id of the app (Object ID). It’s the object ID not AppID (Client ID).
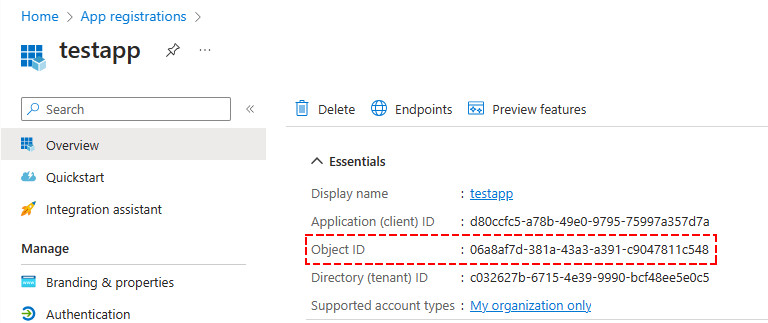
3️⃣ The final step will be to upload the certificate to an Azure App Registration. In the below codes, don’t forget to replace the subject (CN=GraphApi) and the Object Id of your app.
$cer = Get-ChildItem -Path Cert:\LocalMachine\my | Where-Object{$_.Subject -eq "CN=GraphApi"}
$objectId = '06a8af7d-381a-43a3-a391-c9047811c548' #Object ID not Application (client) ID

$CertCredentials = @(
    @{
        Type = "AsymmetricX509Cert"
        Usage = "Verify"
        Key = [byte[]]$cer.RawData
    }
)
Update-MgApplication -ApplicationId $objectId -KeyCredentials $CertCredentials -Verbose
For instance, after a few minutes, you can check the certificate has been uploaded.
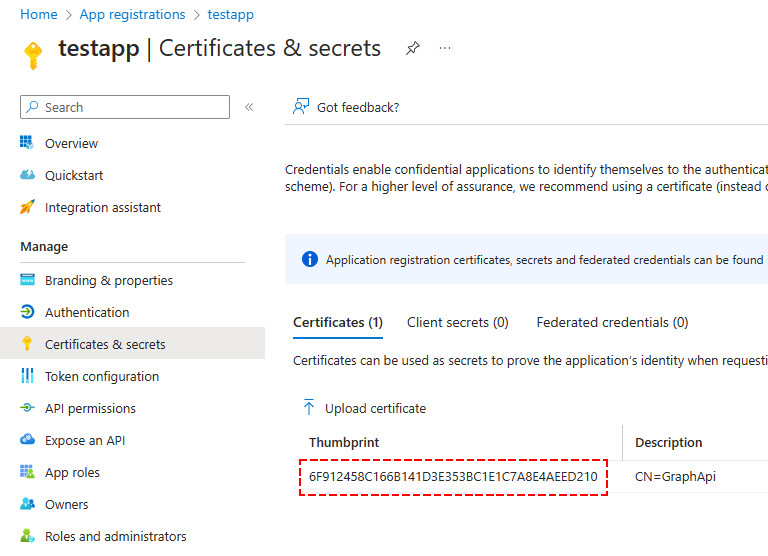
Connect to Microsoft Graph PoweShell
To verify it works, you can use the below script with your own client id, tenant id and certificate name or certificate thumbprint.
$connectparams = @{
    ClientId = 'd80ccfc5-a78b-49e0-9795-75997a357d7a'
    TenantId = 'c032627b-6715-4e39-9990-bcf48ee5e0c5'
    CertificateThumbprint = '6F912458C166B141D3E353BC1E1C7A8E4AEED210'
    #CertificateName = 'CN=GraphApi'
}
Connect-MgGraph @connectparams
In our case, we’ve connected to Microsoft Graph PowerShell using app-only authentication with certificate.
PS C:\> Get-MgContext

ClientId               : d80ccfc5-a78b-49e0-9795-75997a357d7a
TenantId               : c032627b-6715-4e39-9990-bcf48ee5e0c5
Scopes                 : {User.Read.All}
AuthType               : AppOnly
TokenCredentialType    : ClientCertificate
CertificateThumbprint  : 6F912458C166B141D3E353BC1E1C7A8E4AEED210
CertificateSubjectName :
Account                :
AppName                : testapp
ContextScope           : Process
Certificate            :
PSHostVersion          : 5.1.22621.1778

