Table of Contents
Create an Azure SQL Database throught Azure portal
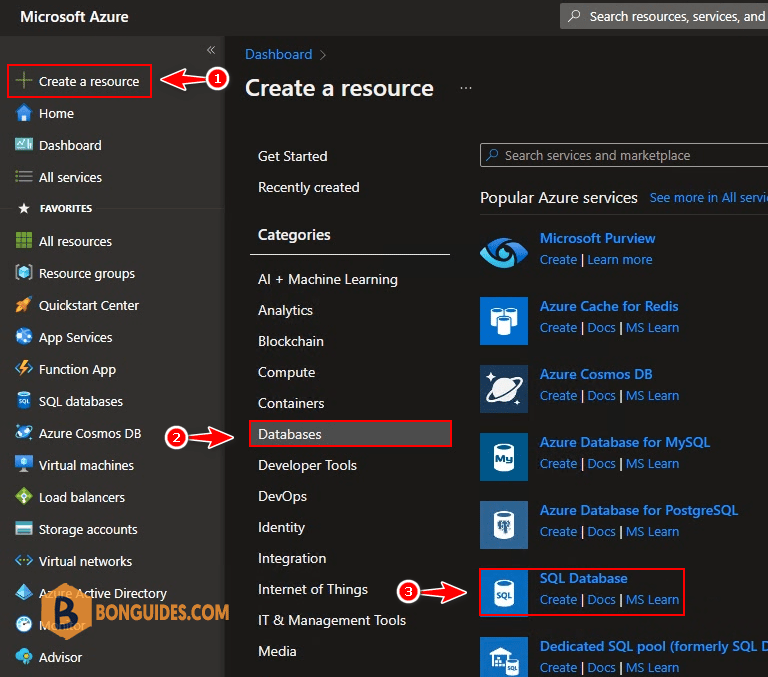
1. Visit https://portal.azure.com/#create/hub then create a Azure SQL Database.
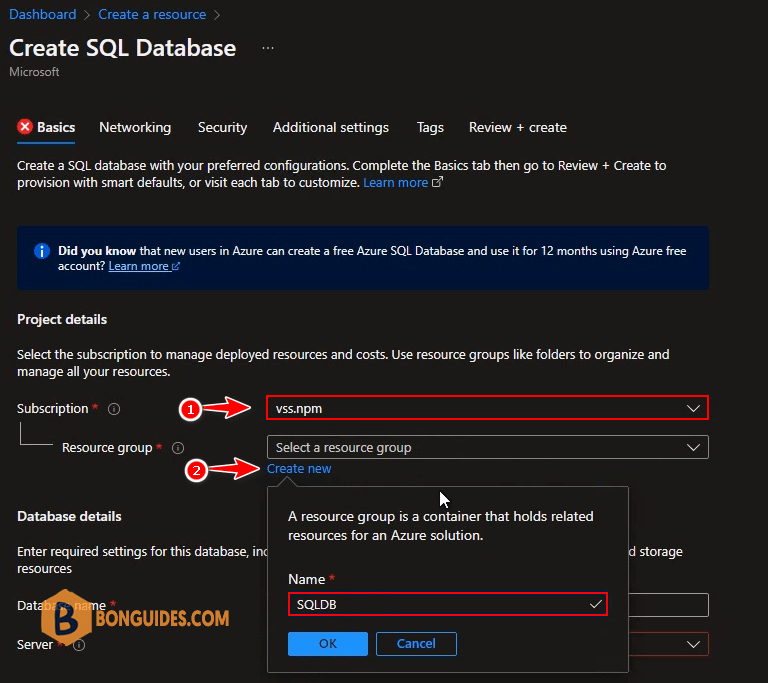
2. Select Subscription and Resource group to store the SQL Database. Or, you can create a new resource group for testing purpose.
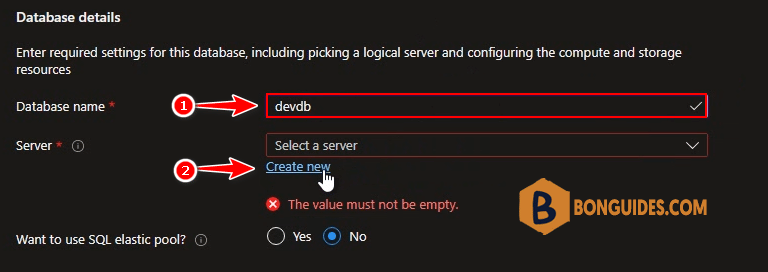
3. Next, enter the Database name then select a SQL Server to attach the SQL Database into it. In the first time, I’ll create a new SQL Server.
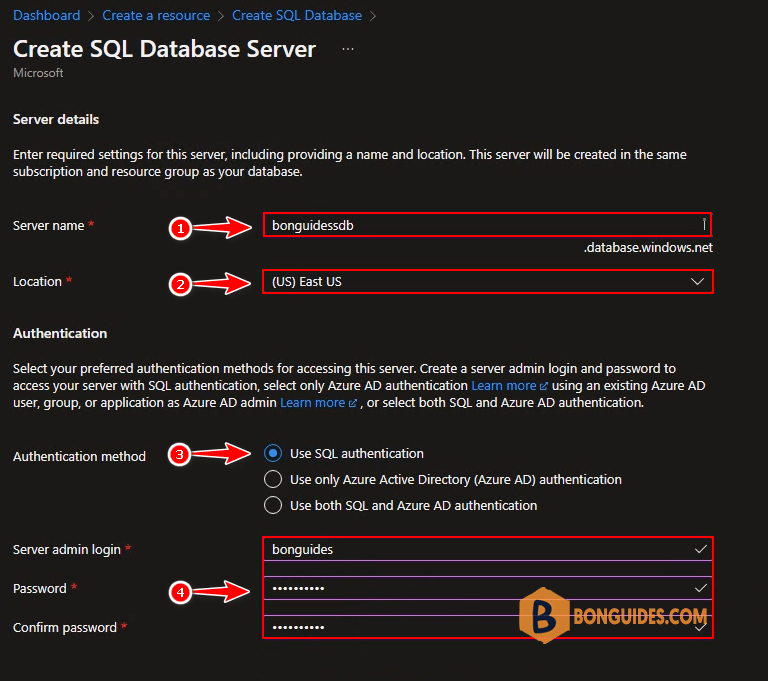
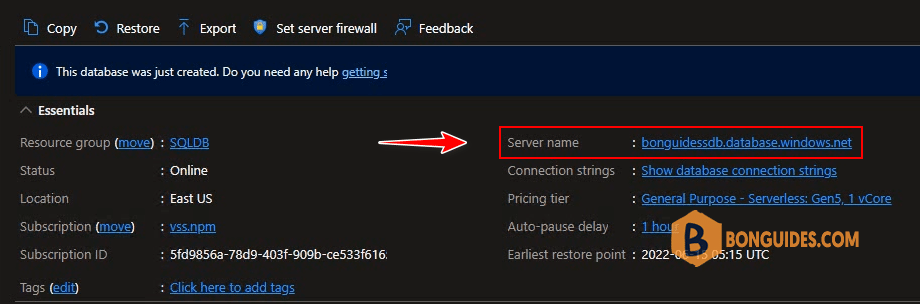
4. Enter SQL server name, it must be unique. For example, my SQL Server address is bonguidessdb.database.windows.net.
- Location: Select location for the SQL Server.
- Authentication method: Use SQL authentication.
- Server admin login: Create sa account for SQL authentication. We’ll using this account to login into SQL Server using SQL Management Studio.
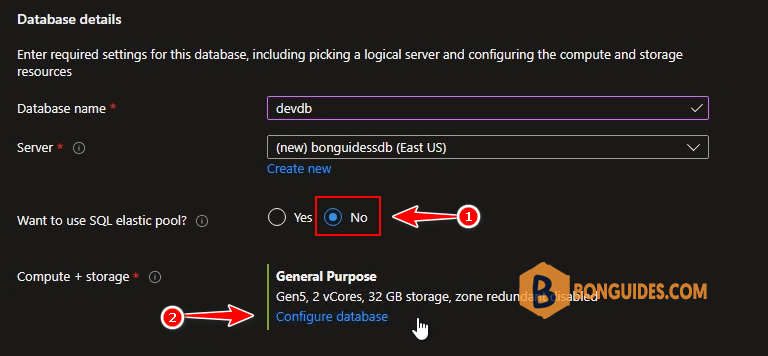
5. Database details
- Want to use SQL elastic pool: No.
- Compute and storage: Click Configure database.
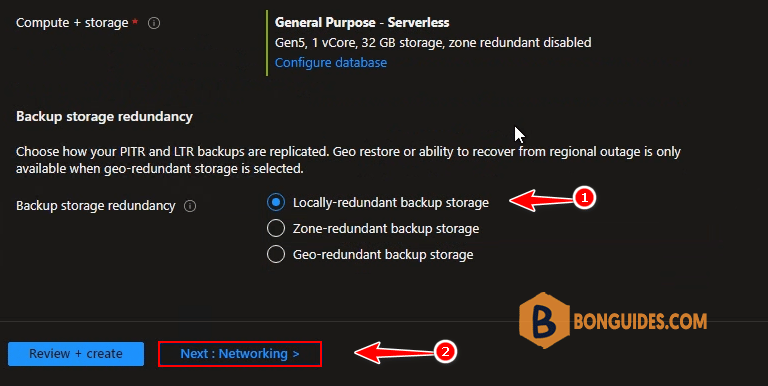
6. Service and compute tier: Select Serverless.

7. Backup storage redundancy: Select Local-redundant backup storage then click Next: Networking.
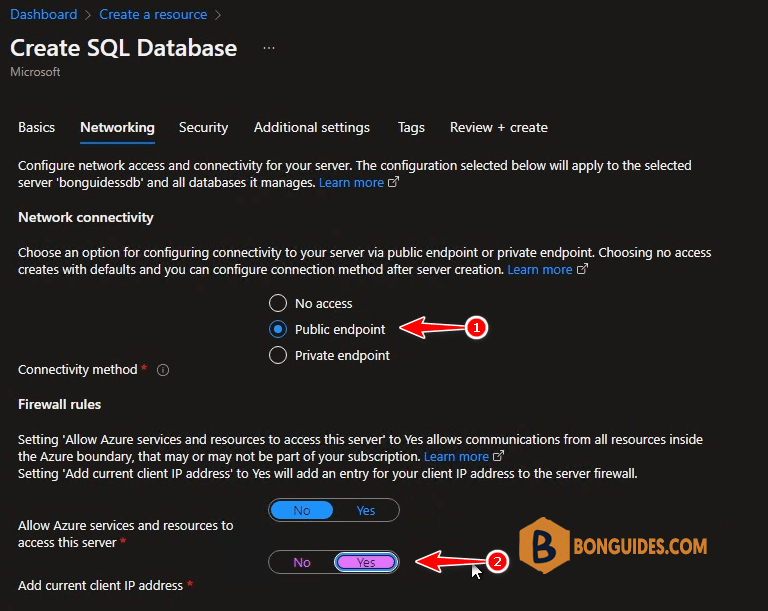
8. In Networking section, select Public endpoint then add your current client IP address to the firewall list to allow connect to your SQL Database.
9. Finally, click Create button to create the Azure SQL Database.

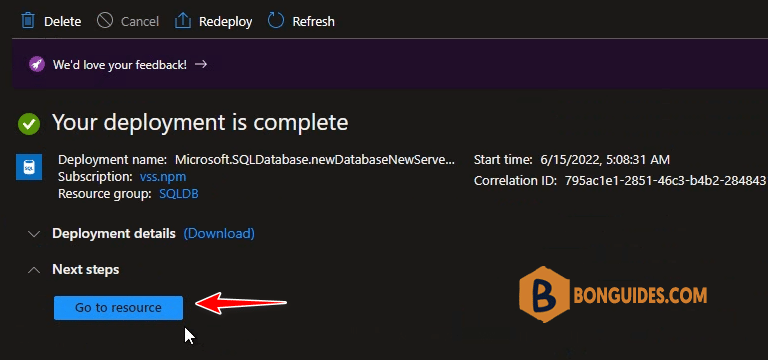
10. It could take several minutes to complete. Once done, click Go to resource to navigate to the SQL Database.
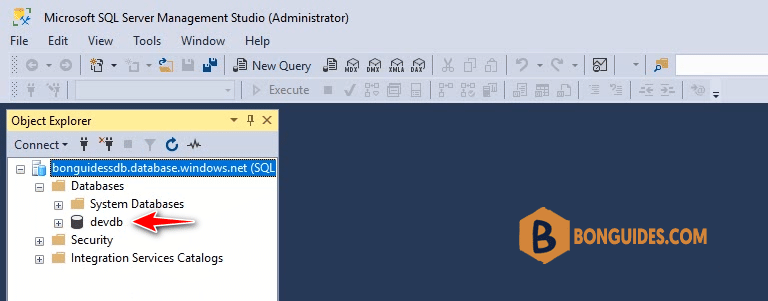
Connect to Azure SQL Database
11. In the SQL Database information page, take note the SQL Server name.
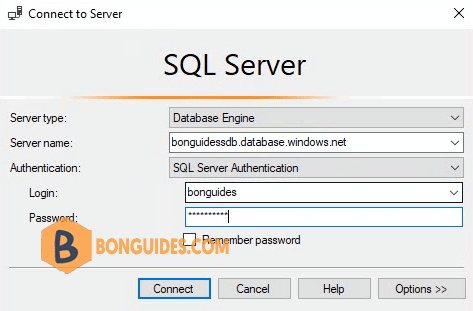
12. Open SSMS then connect to the SQL Database using SQL server name and the server admin login you’ve created in previous step.
13. Expand the Databases folder, and you can see your Azure SQL Database is listed.