Table of Contents
In some cases, you may have had to create a shared folder for Group Policy deployment. So that content could be shared with everyone. And some curious users can access and delete files from this share.
A hidden shared folder will ensure the shared directory is not visible to everyone on the network, only the people knowing the complete path can access it.
Create a Hidden Shared Folder
1️⃣ Open File Explorer and navigate to the folder you want to share, or simply create a new folder.
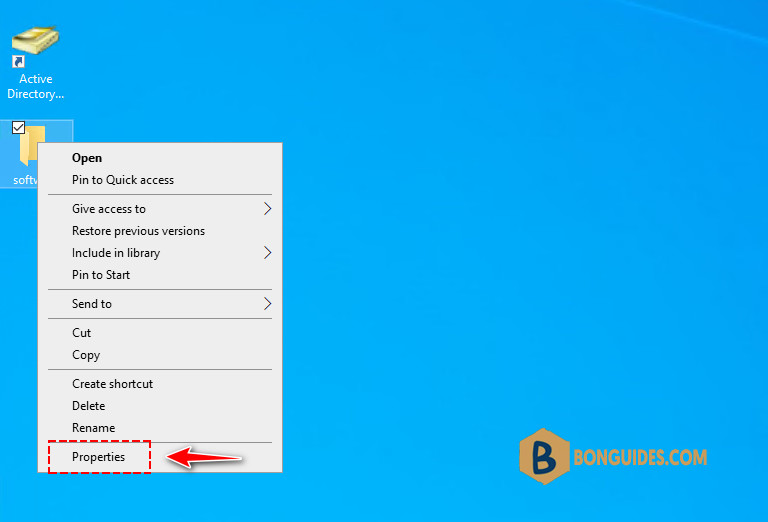
2️⃣ Right-click that folder, and then click Properties from the context menu.
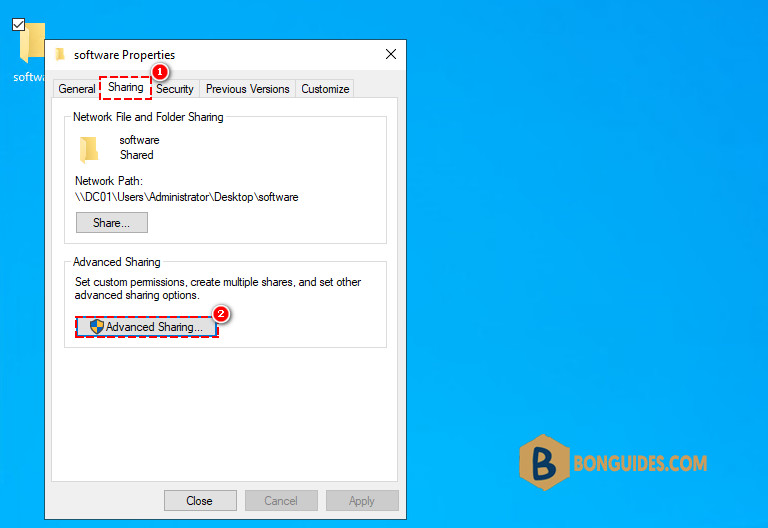
3️⃣ From the Properties window, switch to the Sharing tab and click Advanced sharing.
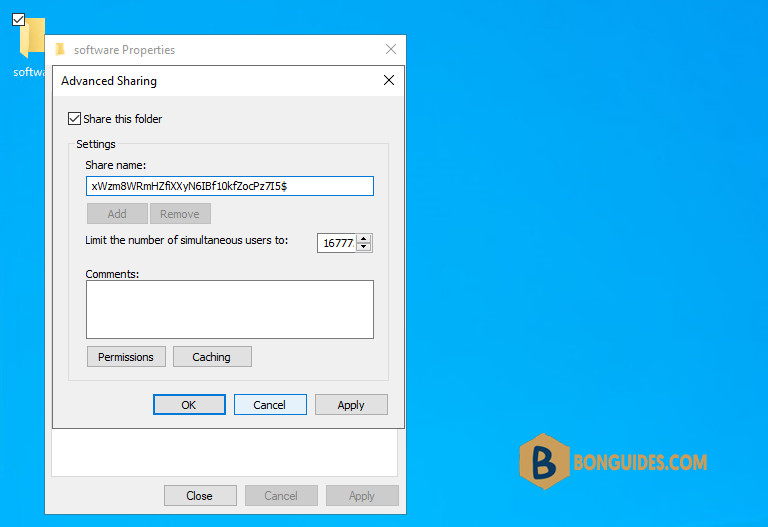
4️⃣ In the Advanced Sharing window, check the box next to “Share this folder.” Then, add a dollar “$” sign at the end of the Share name of the folder, then click Apply and OK.
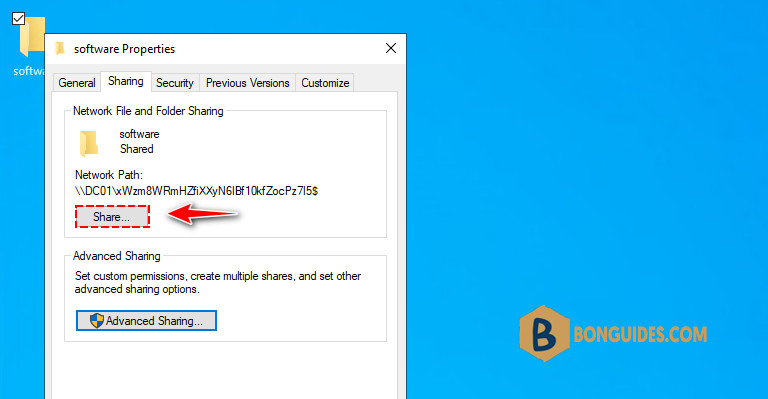
5️⃣ Back in the Properties window, click Share.
6️⃣ From the Network Access window, select the user you want to share the folder with and click Add. In this example, we allow everyone to full control this folder.
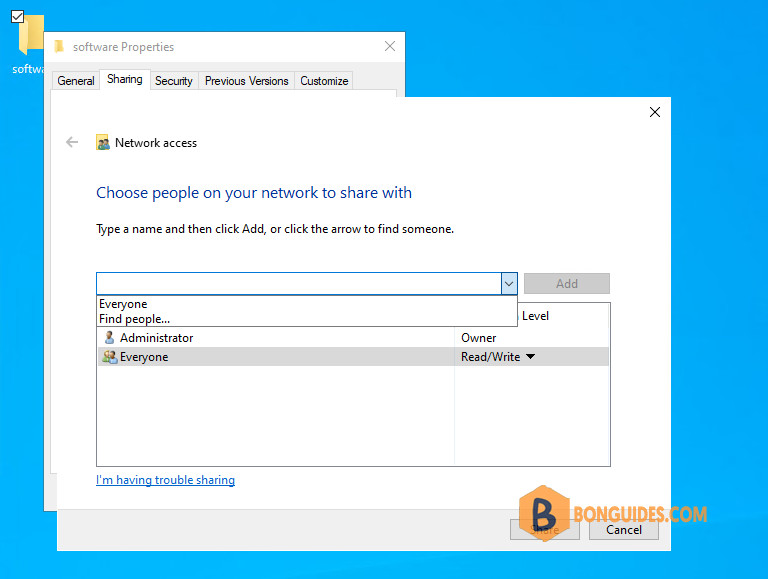
7️⃣ Once done, click the Share button at the bottom of the window. Now you have a hidden shared t folder.
How to Access Hidden Shared Folder
When an user access the server by hostname or IP directly, he cannot see the shared folder that you’ve created in the previous step.
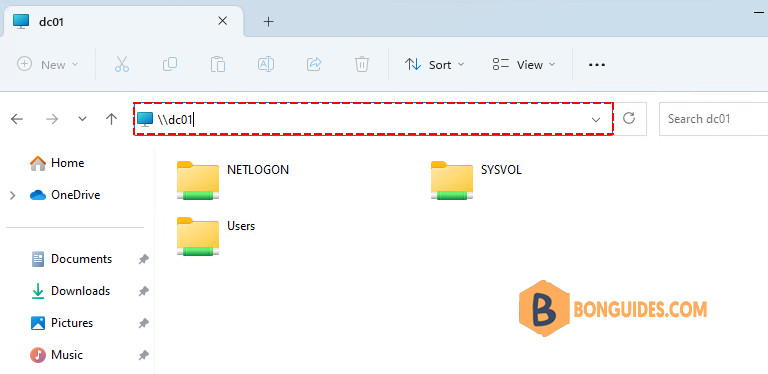
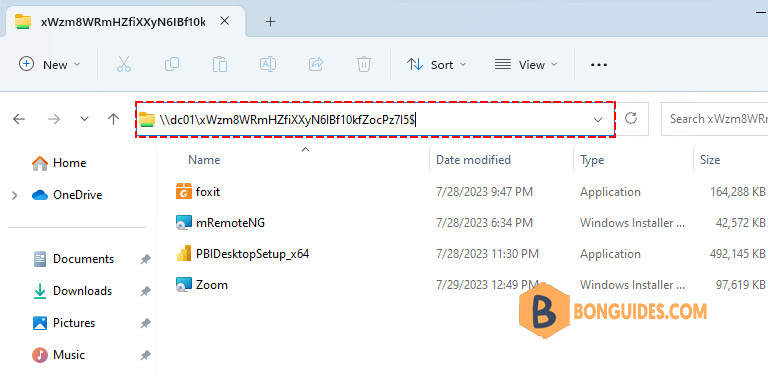
To access the hidden folder, he must enter either the name or IP address of your machine followed by the name of the following, which is then followed by the dollar ‘$’ sign, as in the image below:
Conclusion
The method we have discussed above is valid for all Windows versions and editions.
Creating a hidden shared folder allows you to add another layer of security to your computer, as well as the content to be shared with people on your network. Furthermore, you can assign a complex name to the shared folder to ensure that only the people with whom you have shared the information can access the folder.


