Table of Contents
Supported Centos Versions by Microsoft Azure
The CentOS image is available in Microsoft Azure and you can create a Ubuntu VM in Azure.
CentOS server version in Azure Marketplace:
- CentOS 6.x
- CentOS 7.x
- CentOS 8.x
Create a CentOS VM in Azure Portal
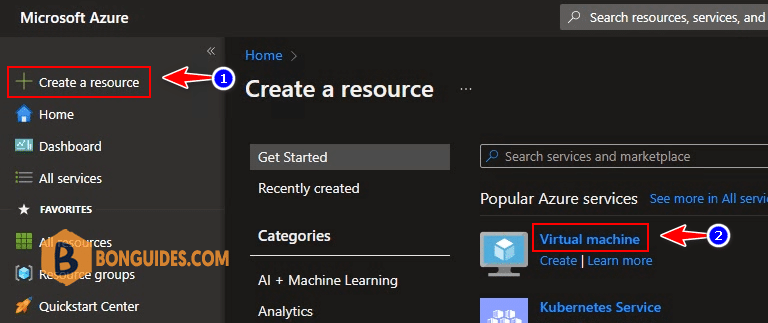
1. You can try the following steps to create a CentOS VM in Azure:
- Sign in to the Azure portal at https://portal.azure.com.
- Click Create a resource then select Virtual Machine.
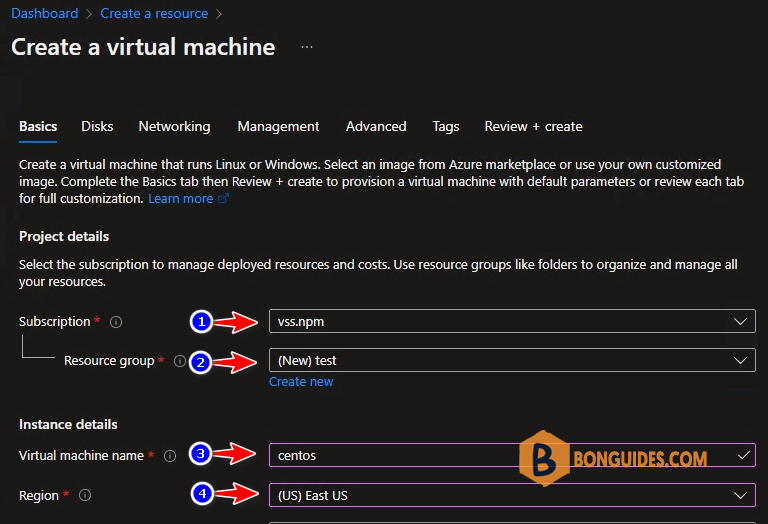
2. On the Create a virtual machine window, select the following.
- Subscription – Select your Azure subscription.
- Resource Group – Select the Azure resource group for CentOS VM or you can create a new one.
- Virtual Machine Name – Specify the VM name. This will be the computer name after you image VM with CentOS .
- Region – Select the region.
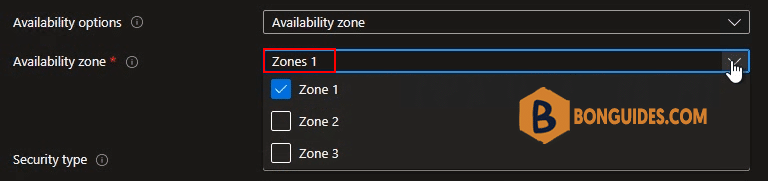
3. Availability options: Selecting multiple zones will create one VM per zone.
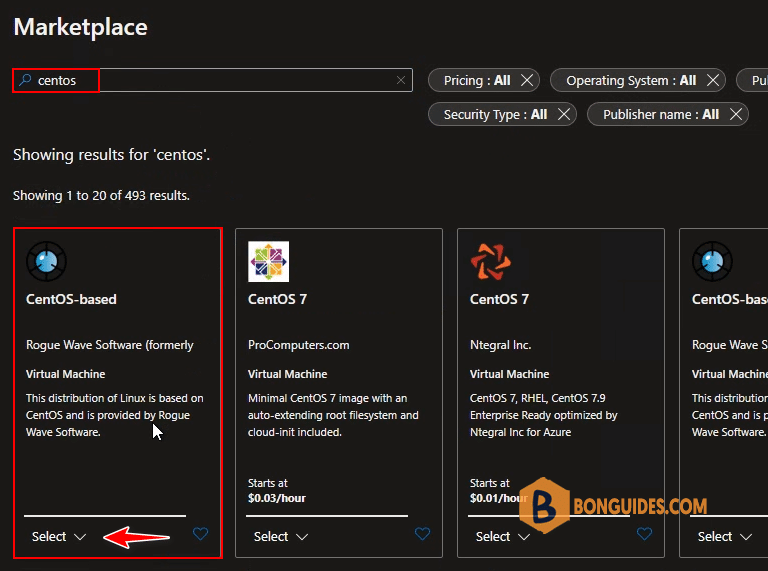
4. Image – Select the drop-down and select CentOS as image. If you don’t see the CentOS option, then select See all images.

5. On the Marketplace window, type CentOS as the search term and press Enter key. From the results, select CentOS and now select CentOS edition.
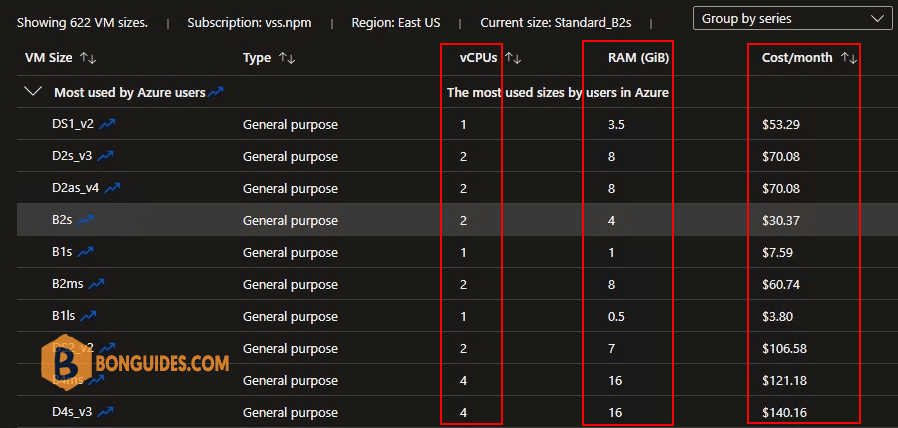
6. Size: You can custom VM size to increase or reduce RAM and CPU for the VM.
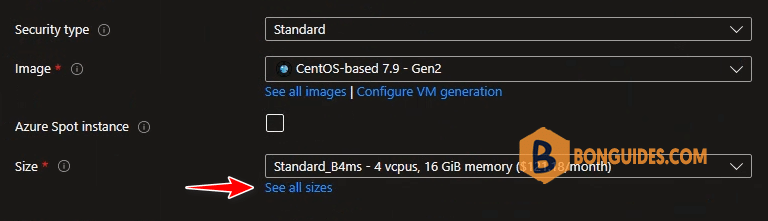
7. Select VM Size as you need, depending on RAM, CPU and Cost.
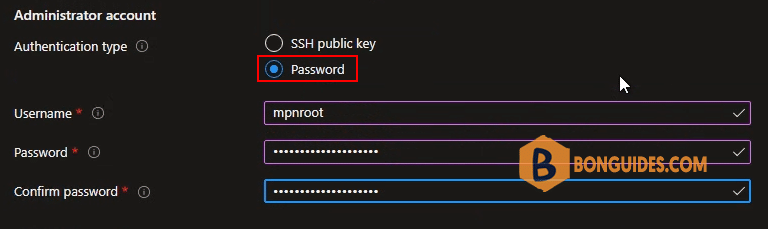
8. By default, Microsoft recommended you use SSH public key authentication type. It’s more secure but for demo purpose, i’ll using the traditional way with clear text password. How to connect to a Linux VM in Azure using SSH public key authentication.
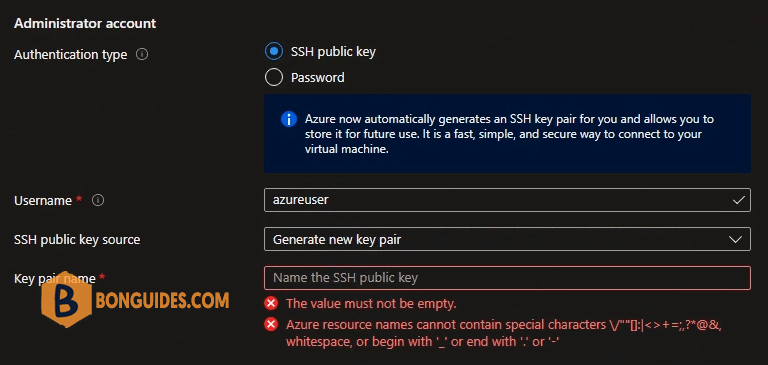
Create an account to connect to Linux VM using SSH.
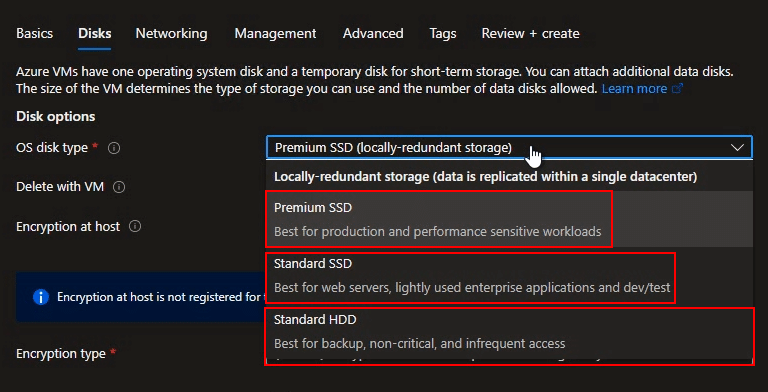
9. Select OS disk type: You can select Premium SSD, Stardard SSD or Standard HDD.
| Premium SSD | Standard SSD | Standard HDD | |
|---|---|---|---|
| Disk type | SSD | SSD | HDD |
| Scenario | Production and performance sensitive workloads | Web servers, lightly used enterprise applications and dev/test | Backup, non-critical, infrequent access |
| Max disk size | 32,767 GiB | 32,767 GiB | 32,767 GiB |
| Max throughput | 900 MB/s | 750 MB/s | 500 MB/s |
| Max IOPS | 20,000 | 6,000 | 2,000 |
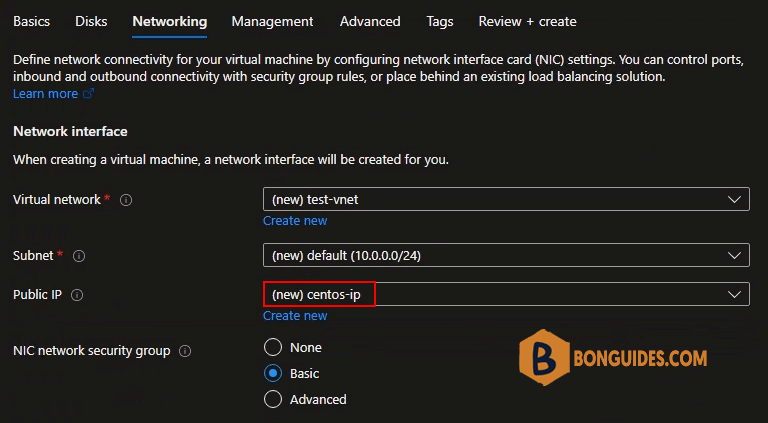
10. Network configuration: By default, an IP public will created with the VM. We’ll connect to this VM over SSH using this IP.
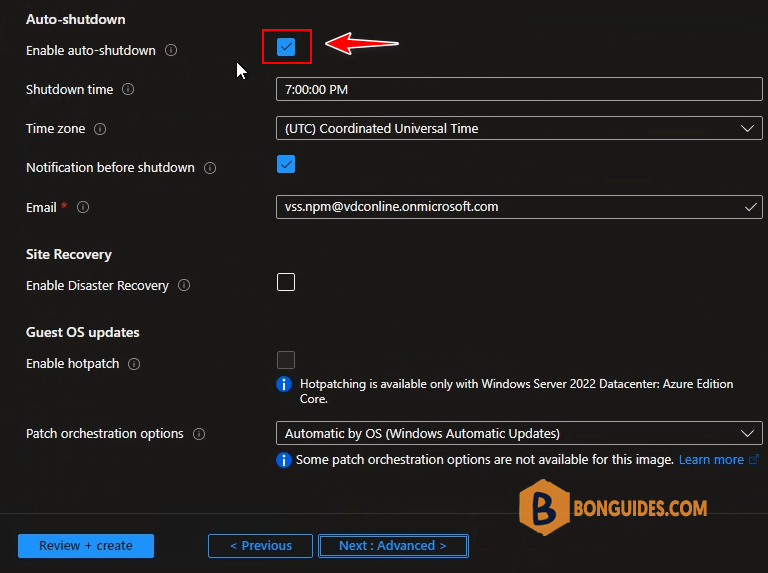
11. Management: Disable auto-shutdown feature by uncheck the checkbox.
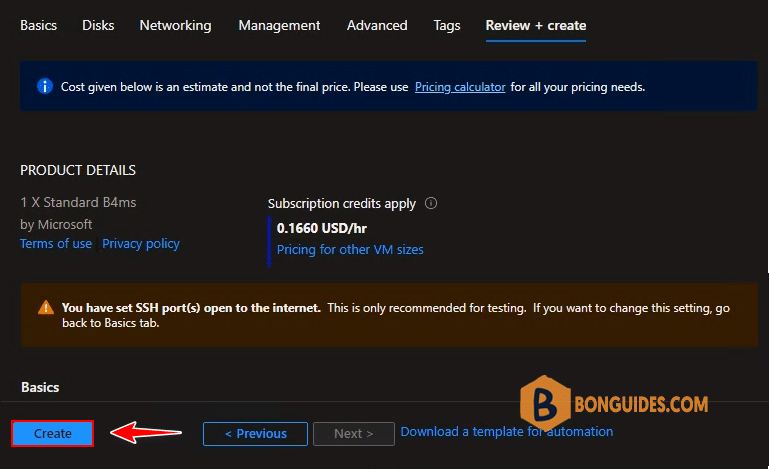
12. Once you see Validation passed, create the CentOS virtual machine by selecting button.
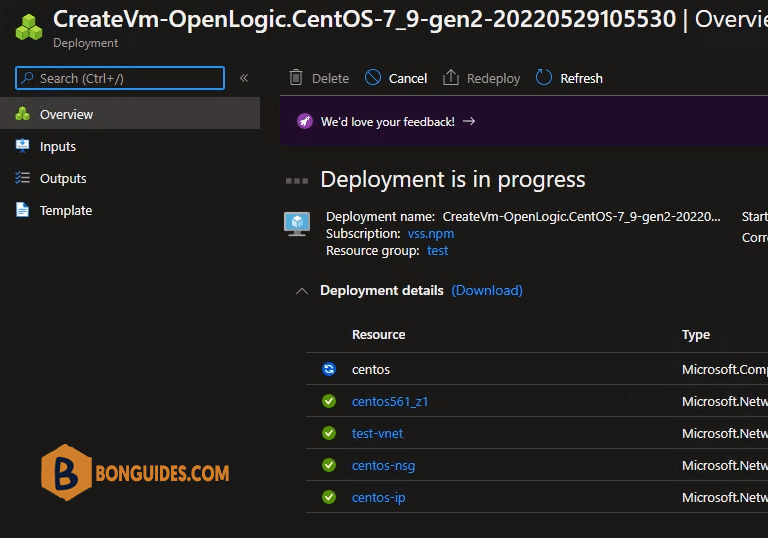
13. The CentOS Virtual Machine is now being created. You see the status as deployment is in progress. Wait for a few minutes while the VM is created.
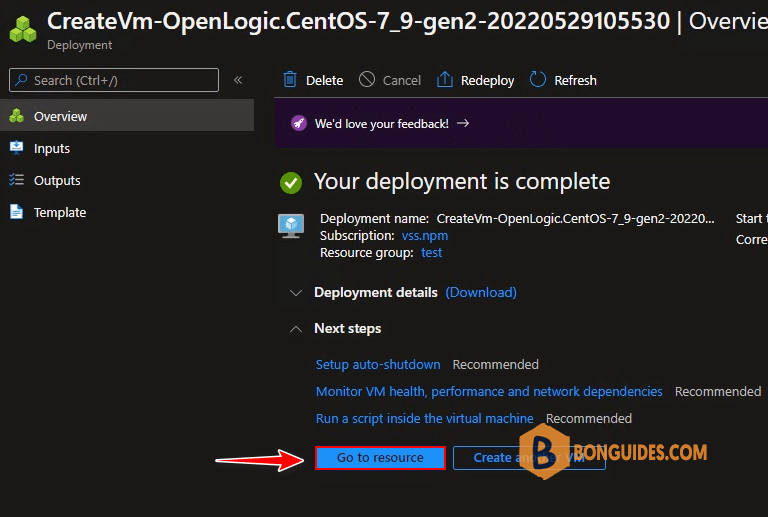
14. Your Deployment is complete – Congratulations, you have successfully created CentOS VM in Azure. From the same screen, you can download deployment details. Select Go to Resource.
Connect to CentOS VM in Azure SSH
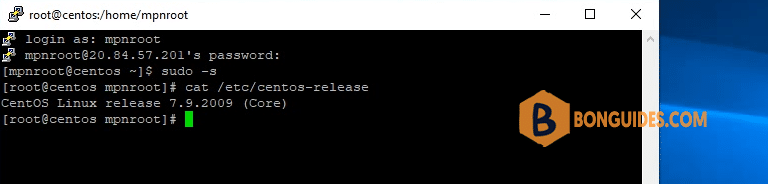
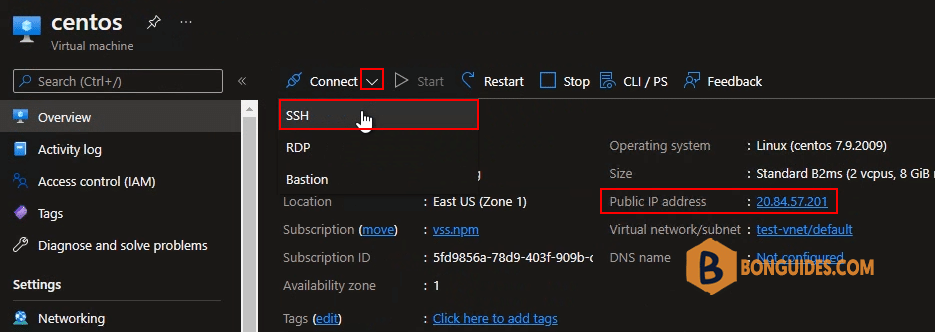
15. Once you create a CentOS VM in Azure, you can connect to the virtual machine and access it via SSH (22) using IP Public. On the VM resource window, select Connect then select SSH.
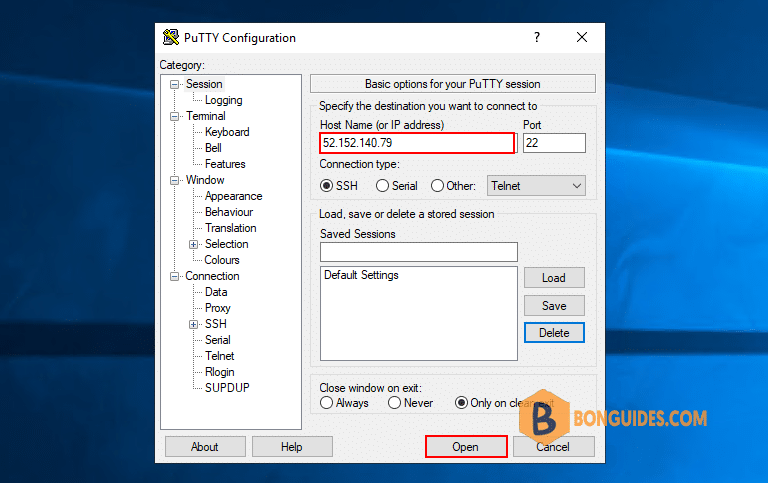
16. In this page, Microsoft guides you how to SSH to the VM using a public key. If you using password authentication type, let open PuTTY or Windows PowerShell to connect to the VM.
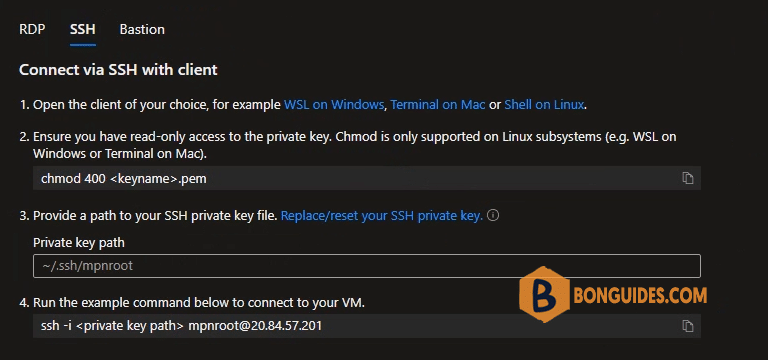
Connect to the VM using PowerShell. How to SSH using PowerShell.
Windows PowerShell
Copyright (C) Microsoft Corporation. All rights reserved.

PS C:\Users\mpnadmin> ssh [email protected]
[email protected]'s password:
Last login: Sun May 29 10:37:00 2022 from 20.232.18.206
[mpnroot@imapsync ~]$
Connect to the VM using PuTTY. How to connect to a Linux server using PuTTY.

Finally, your CentOS VM is ready in minutes.