Table of Contents
This bash script will install LEMP stack on your Ubuntu 20 LTS and configure it to maximize its performance of website serving.
Features
- All-in-one one “click” installation of the LEMP environment.
- Nginx will be installed with the ability to dynamically load or disable any preloaded module.
- OPcache is enabled and configured for PHP-FPM.
Before you begin, let’s take a look this bash script.
Usage
1. SSH into your Ubuntu Linux server.
2. Run the following commands at once to install wget, download the script, make it executable then execute it.
sudo apt install -y wget
sudo wget "https://filedn.com/lOX1R8Sv7vhpEG9Q77kMbn0/scripts/debian/install_lemp_ubuntu20.sh"
sudo chmod +x "install_lemp_ubuntu20.sh"
sudo sed -i 's/\r//' "install_lemp_ubuntu20.sh"
sudo /bin/bash "install_lemp_ubuntu20.sh"
Verification
Once done, you can verify the installation with the info.php file or using the following commands:
# nginx -v
nginx version: nginx/1.18.0 (Ubuntu)

# php -v
PHP 7.4.3 (cli) (built: Aug 17 2022 13:29:56) ( NTS )
Copyright (c) The PHP Group
Zend Engine v3.4.0, Copyright (c) Zend Technologies
    with Zend OPcache v7.4.3, Copyright (c), by Zend Technologies

# mariadb -V
mariadb  Ver 15.1 Distrib 10.3.34-MariaDB, for debian-linux-gnu (x86_64) using readline 5.2
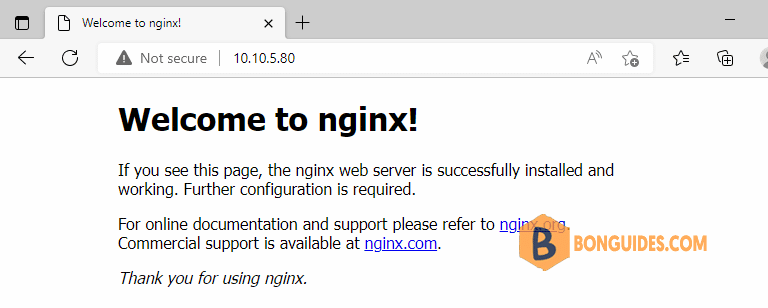
Or you can type the IP address of your Ubuntu server in a browser address bar to access the default welcome page.

Removal
You can remove the downloaded script from your Linux server when the LEMP is installed.
# ls -l
-rwxr-xr-x 1 root root 1987 Oct 27 01:32 install_lemp_ubuntu20.sh
drwx------ 3 root root 4096 Oct 25 13:01 snap
rm -f "install_lemp_ubuntu20.sh"Manually
If you don’t want to download the script from the internet, you can create a script then run it manually on your server.
sudo nano installer.shchmod +x installer.sh
./installer.shCopy then paste all below lines into the installer.sh file that you have created.
#/bin/sh
###Update Software Packages
sudo apt -y update && sudo apt -y upgrade

###Install Nginx Web Server
sudo apt install nginx -y
sudo systemctl enable nginx && sudo systemctl start nginx
sudo chown www-data:www-data /usr/share/nginx/html -R

#### Install Packages for MariaDB
sudo apt -y install nginx mariadb-server mariadb-client
sudo systemctl enable mariadb && sudo systemctl start mariadb
sudo mysql_secure_installation

#### Open firewall port for http/https
sudo ufw allow http && sudo ufw allow https

####Install PHP and increase file size
sudo apt -y install php7.4 php7.4-fpm php7.4-mysql php7.4-readline
sudo apt -y install php7.4-cli php7.4-common php7.4-json php7.4-opcache
sudo apt -y install php7.4-mbstring php7.4-xml php7.4-gd php7.4-curl
systemctl enable php7.4-fpm && sudo systemctl start php7.4-fpm

####Download and extract latest WordPress Package
sudo rm /etc/nginx/sites-enabled/default

####Create a Nginx Server Block
cat << EOF >> /etc/nginx/conf.d/default.conf
# BEGIN
server {
  listen 80;
  listen [::]:80;
  server_name _;
  root /usr/share/nginx/html/;
  index index.php index.html index.htm index.nginx-debian.html;

  location / {
    try_files \$uri \$uri/ /index.php;
  }

  location ~ \.php\$ {
    fastcgi_pass unix:/run/php/php7.4-fpm.sock;
    fastcgi_param SCRIPT_FILENAME \$document_root\$fastcgi_script_name;
    include fastcgi_params;
    include snippets/fastcgi-php.conf;
  }

 # A long browser cache lifetime can speed up repeat visits to your page
  location ~* \.(jpg|jpeg|gif|png|webp|svg|woff|woff2|ttf|css|js|ico|xml)\$ {
       access_log        off;
       log_not_found     off;
       expires           360d;
  }

  # disable access to hidden files
  location ~ /\.ht {
      access_log off;
      log_not_found off;
      deny all;
  }
}
# END
EOF

#### Restart all services
systemctl restart nginx && systemctl restart php7.4-fpm && systemctl restart mariadb.service
systemctl --type=service | grep 'nginx\|mariadb\|php'


