Table of Contents
Staring at your Mac screen for too long in a dark room can be hard on your eyes. Instead of subjecting yourself to bright colors and blinding white menus, you can turn on dark mode. The feature has been available since the release of macOS Mojave in 2018
Enable Dark Mode Using Control Center
1. The first way to enable Dark Mode, head to the Control Center on the top right corner on your Mac. Select Display option.
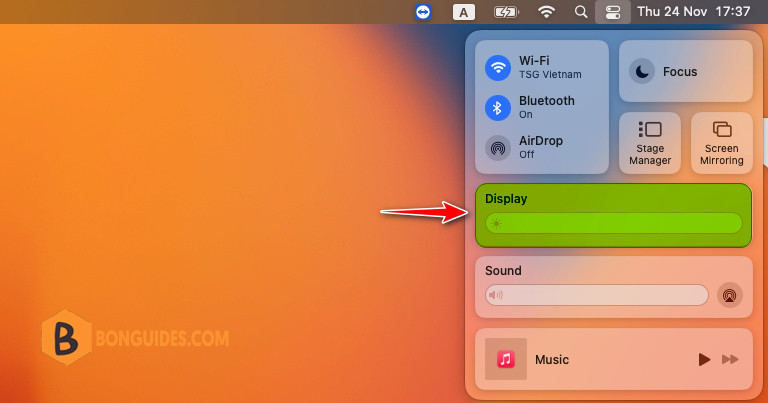
2. Then click Dark Mode to enable it. You can turn off Dark Mode anytime from your Control Center the same way.

Enable Dark Mode Using System Settings
On macOS Venture or later:
1. Click on the Apple icon in the top-left corner of your screen and select System Settings...

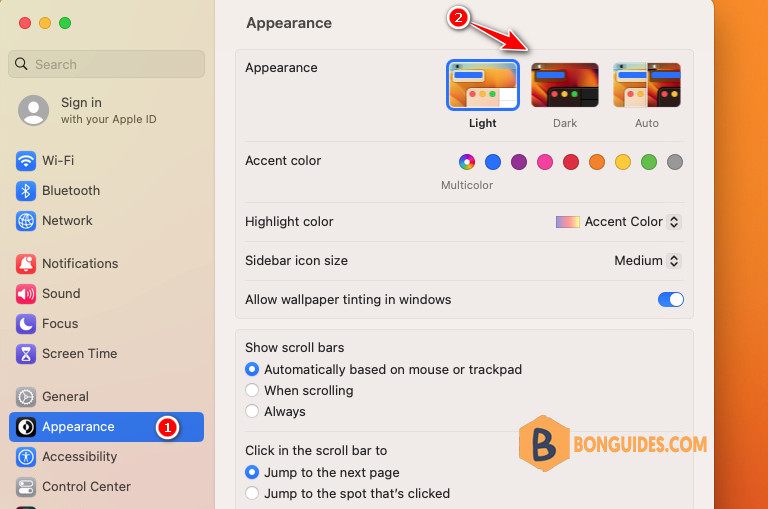
2. Select Appearance in the sidebar then select Dark mode to enable it in the right area.
Enable Dark Mode Using System Settings
On the earlier version of macOS:
1. Click on the Apple icon in the top-left corner of your screen and select System Preferences.

2. Select General option.
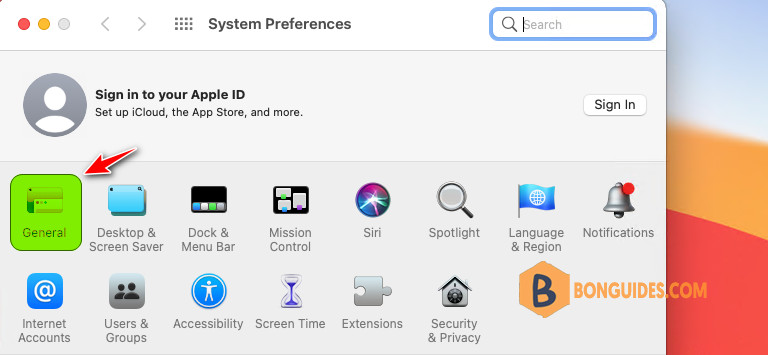
3. Here, you can choose the Dark theme for your Mac.
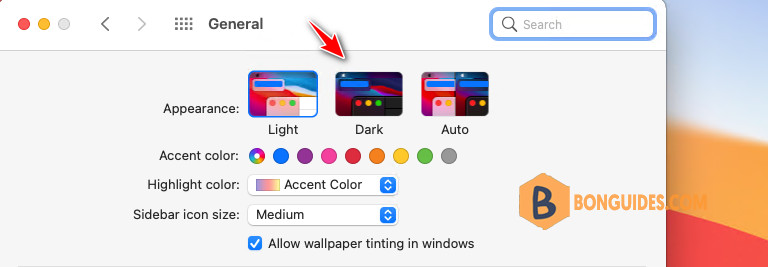
Turn on Dark Mode Automatically
In addition to Light and Dark, you’ll notice that an Auto option is in the General section of System Preferences. This allows you to enable Dark Mode on a convenient schedule automatically. If you select Auto, you can then set the schedule for Dark Mode in the Night Shift settings.
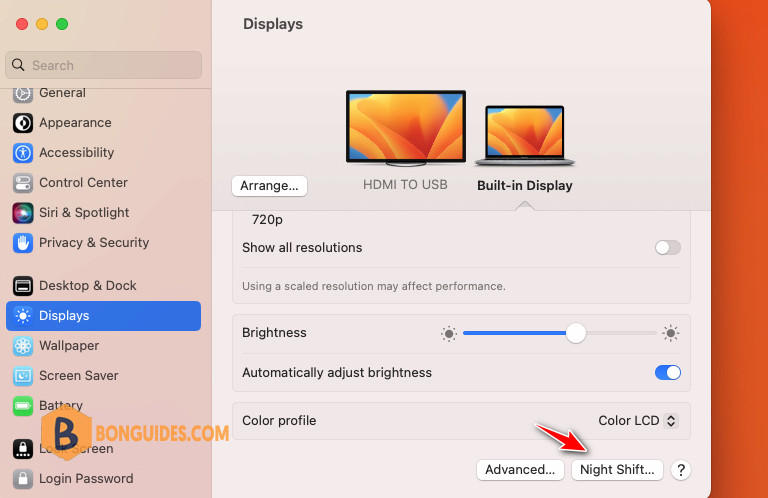
Go to System Preferences > Displays and click the Night Shift.
Use the drop-down box next to Schedule to turn it on from Sunset to Sunrise or set up a Custom schedule.
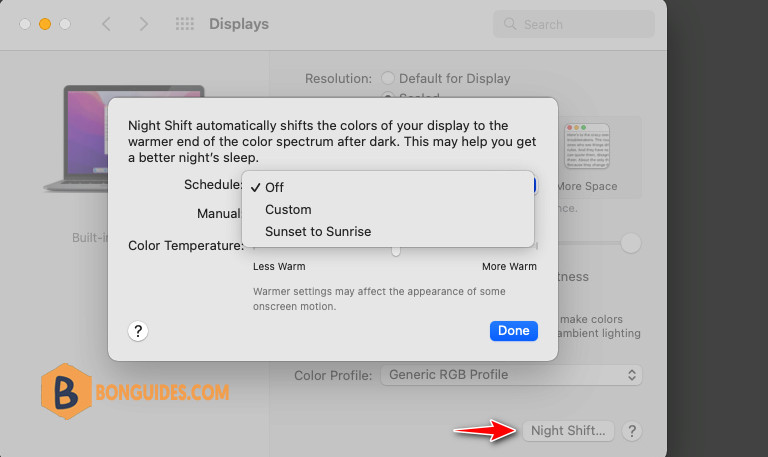
In macOS Ventura and later, you can access the Night Shift option from System Setting | Display | Night Shift.
