Table of Contents
I frequently utilize Windows Sandbox to test Endpoint Manager packages and software. Occasionally, I need to launch it with particular options, such as connecting a folder from my hard drive or initiating it without a network connection. Typically, this requires creating a custom configuration file (.wsb) with the desired settings. However, this blog post demonstrates how to initiate Windows Sandbox using PowerShell with parameters, eliminating the need for multiple configuration files.
What is Windows Sandbox?
Windows Sandbox offers a lightweight desktop environment for safely running applications in isolation. Software installed in the Windows Sandbox environment stays ‘sandboxed’ and operates independently from the host machine. The sandbox is temporary, once closed, all software, files, and state are deleted.
You can install it by adding it as a Windows Feature using Add/Remove programs or by running:
Enable-WindowsOptionalFeature -Online -FeatureName:Containers-DisposableClientVM -NoRestart:$TrueHow the script works
I utilized all the options detailed at the official Microsoft documentation to develop a Start-Sandbox function that generates a .wsb file, which is essentially an XML file. It creates a basic file if no parameters are specified, but it includes additional lines if more parameters are provided.
Once the .wsb file is created, the script initiates Windows Sandbox with this file and subsequently removes the configuration file from the temporary directory.
Below are all the parameters that you can use in the Start-Sandbox function:
- vGPUdisable: Use this to disable vGPU sharing, making the Windows Sandbox use software rendering.
- AudioInputDisable: Use this to disable the microphone access in Windows Sandbox.
- ClipboardRedirectionDisable: Use this to completely disable the copy/paste function between your computer and Windows Sandbox (In and outgoing).
- LogonCommand: Specify the path to the executable or script that should be started when the Windows Sandbox is running.
- MappedFolder: Use this to specify a local folder you want to see in your Windows Sandbox session, for example, D:\temp.
- MappedFolderWriteAccess: Use this to switch from Read-Only mode to Read-Write mode for the MappedFolder you specified.
- MemoryInMB: Use this to specify the amount of RAM in MBS that Windows Sandbox should use. Specifying something below 2Gb will show a warning telling you that Windows Sandbox could allocate more memory if needed.
- NetworkingDisable: Use this to disable networking in Windows Sandbox, it could be a good thing when testing software that you’re not entirely sure about 😉
- PrinterRedirectionEnable: Use this to connect your local printers in Windows Sandbox.
- ProtectedClientEnable: Use this so that Windows Sandbox will run with extra security mitigations enabled.
- VideoInputEnable: Use this to enable video input in Windows Sandbox.
Below is the script for the Start-Sandbox function:
function Start-Sandbox {
    param(
        [parameter(Mandatory = $false)][string]$MappedFolder,
        [parameter(Mandatory = $false)][string]$MemoryInMB,
        [parameter(Mandatory = $false)][string]$LogonCommand,
        [switch]$vGPUdisable,
        [switch]$AudioInputDisable,
        [switch]$ClipboardRedirectionDisable,
        [switch]$MappedFolderWriteAccess,
        [switch]$NetworkingDisable,
        [switch]$PrinterRedirectionEnable,
        [switch]$ProtectedClientEnable,
        [switch]$VideoInputEnable
    )

    #Validate if $mappedfolder exists
    if ($MappedFolder) {
        if (Test-Path $MappedFolder -ErrorAction SilentlyContinue) {
            Write-Host ("Specified {0} path exists, continuing..." -f $MappedFolder) -ForegroundColor Green
        }
        else {
            Write-Host ("Specified {0} path doesn't exist, exiting..." -f $MappedFolder) -ForegroundColor Red
            return
        }
    }
    #Set Read-Only or Read-Write
    if ($MappedFolderWriteAccess) {
        $WriteAccess = 'false'
    }
    else {
        $WriteAccess = 'true'
    }
    #Create .wsb config file
    $wsb = @()
    $wsblocation = "$($env:Temp)\sandbox.wsb"
    $wsb += "<Configuration>"
    if ($vGPUdisable) {
        $wsb += "<VGpu>Disable</VGpu>"
    }

    if ($AudioInputDisable) {
        $wsb += "<AudioInput>Disable</AudioInput>"
    }

    if ($ClipboardRedirectionDisable) {
        $wsb += "<ClipboardRedirection>Disable</ClipboardRedirection>"
    }

    if ($MappedFolder) {
        $wsb += "<MappedFolders>"
        $wsb += "<MappedFolder>"
        $wsb += "<HostFolder>$($MappedFolder)</HostFolder>"
        $wsb += "<ReadOnly>$($WriteAccess)</ReadOnly>"
        $wsb += "</MappedFolder>"
        $wsb += "</MappedFolders>"
    }

    if ($null -ne $MemoryInMB) {
        $wsb += "<MemoryInMB>$($MemoryInMB)</MemoryInMB>"
        if ($MemoryInMB -le 2048) {
            Write-Host "$($MemoryInMB) Mb(s) specified, Windows Sandbox will automatically allocate more if needed..." -ForegroundColor Yellow
        }
    }

    if ($NetworkingDisable) {
        $wsb += "<Networking>Disable</Networking>"
    }

    if ($LogonCommand) {
        $wsb += "<LogonCommand>"
        $wsb += "<Command>$($LogonCommand)</Command>"
        $wsb += "</LogonCommand>"
    }

    if ($PrinterRedirectionEnable) {
        $wsb += "<PrinterRedirection>Enable</PrinterRedirection>"
    }

    if ($ProtectedClientEnable) {
        $wsb += "<ProtectedClient>Enable</ProtectedClient>"
    }

    if ($VideoInputEnable) {
        $wsb += "<VideoInput>Enable</VideoInput>"
    }

    $wsb += "</Configuration>"

    #Create sandbox .wsb file in $env:\temp and start Windows Sandbox using it
    $wsb | Out-File $wsblocation -Force:$true
    Write-Host ("Starting Sandbox...") -ForegroundColor Green
    Invoke-Item $wsblocation
    #Wait for Windows Sandbox to start and delete the sandbox config file
    Start-Sleep -Seconds 5
    Remove-Item -Force:$true -Confirm:$false -Path $wsblocation
    Write-Host ("Done!") -ForegroundColor Green
}
Adding the Start-Sandbox function to the PowerShell profile
To make the Start-Sandbox function load automatically every time you open a new PowerShell you can add it to your PowerShell profile.
1. Open PowerShell as administrator then run the below command to create a PowerShell profile.
New-Item -Type File -Path $profile -ForceDirectory: C:\Users\mpnadmin\Documents\WindowsPowerShell
Mode LastWriteTime Length Name
---- ------------- ------ ----
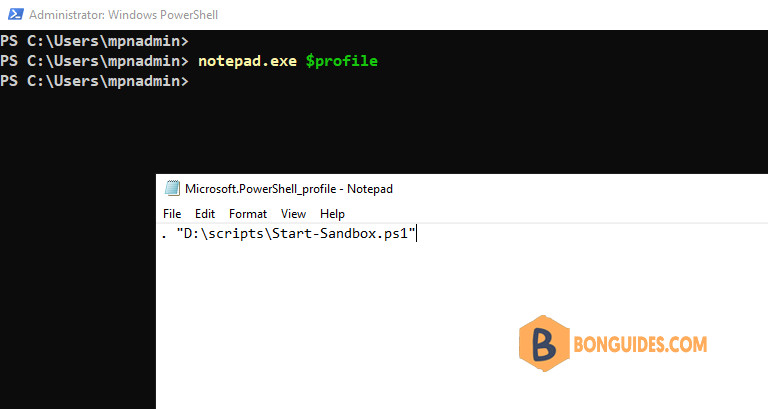
-a---- 5/28/2024 9:51 AM 0 Microsoft.PowerShell_profile.ps12. Open the newly created PowerShell profile using the Notepad.
notedpad.exe $profile3. Adding the following line into the $profile. Don’t forget to change the path of the PowerShell script to fit with yours
. "D:\scripts\Start-Sandbox.ps1"
Using the Start-Sandbox function
From now on, to start a new Windows Sandbox instance, you just need to run the below command. When running the command without any parameters, the instance will start with the default configuration.
Start-SandboxThe command below will start a new Windows Sandbox instance with 8GB of RAM.
Start-Sandbox -MemoryInMB '8192' And if you want to start an instance with 8GB of RAM and automatically map a folder from the host to the instance. Execute the command below:
Start-Sandbox -MappedFolder 'D:\temp' -MappedFolderWriteAccess -MemoryInMB '8192'In the example below, I use the following command line to start an 8Gb RAM Windows Sandbox, printers connected, D:\temp directory connected in Read-Write mode, and an automatically started the Notepad.
Start-Sandbox `
    -MappedFolder 'D:\temp' `
    -MappedFolderWriteAccess `
    -PrinterRedirectionEnable `
    -MemoryInMB '8192' `
-LogonCommand 'C:\Windows\system32\notepad.exe'Not a reader? Watch this related video tutorial:


