Table of Contents
A virtual machine (VM) is automatically assigned a private IP address from a range that you specify. This range is based on the subnet in which the VM is deployed. Assign a static IP address to the VM if you want a specific IP address in the subnet.
if you change IP address in machine directly, Azure network will not be aware of that IP address. That can disrupt your access to virtual machine over virtual machine public IP.

Set static private IP address from Azure portal
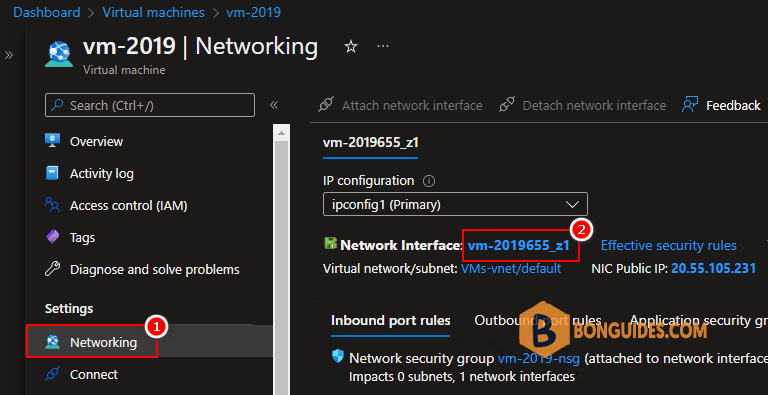
1. From the vm blade, select Networking tab then select the Network Interface for this VM.
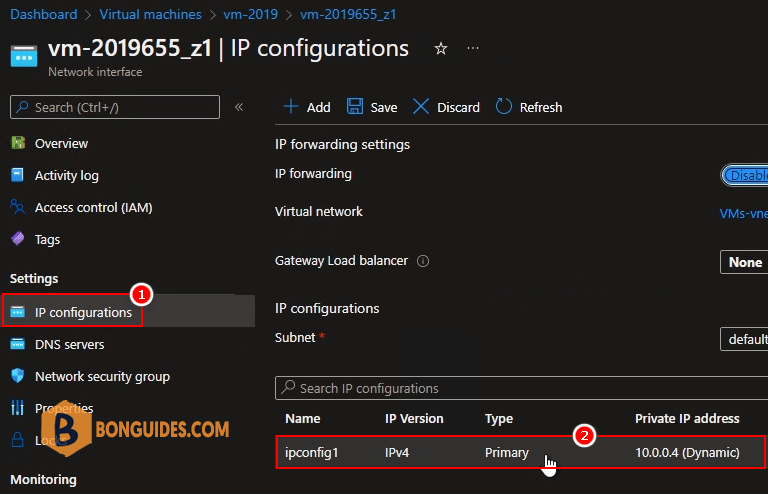
2. In the NIC configurations blade, select IP configurations. You can see the private IP address of the VM, select on it.
3. Under Assignment, change from Dynamic to Static then save the change.
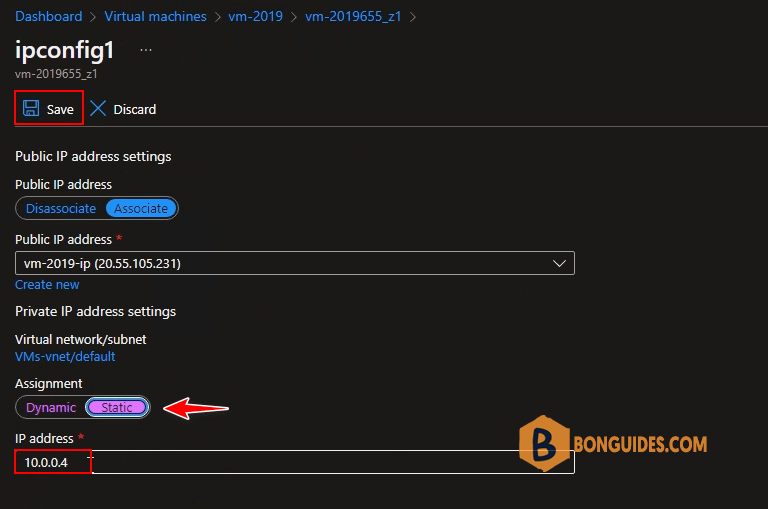
Assign static private IP for VM
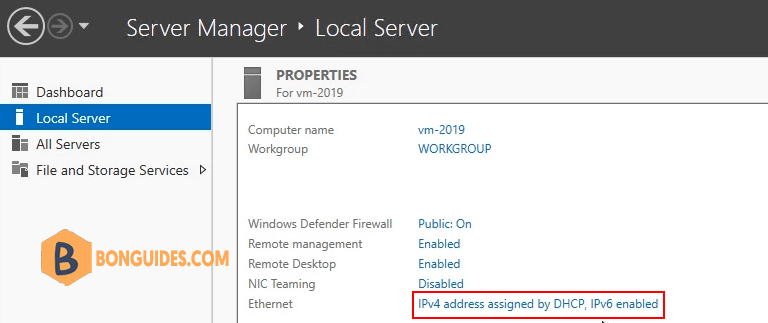
After set assignment is Static in the Azure portal, the IP address inside the VM when you connect using RDP remote desktop still remain in dynamic.
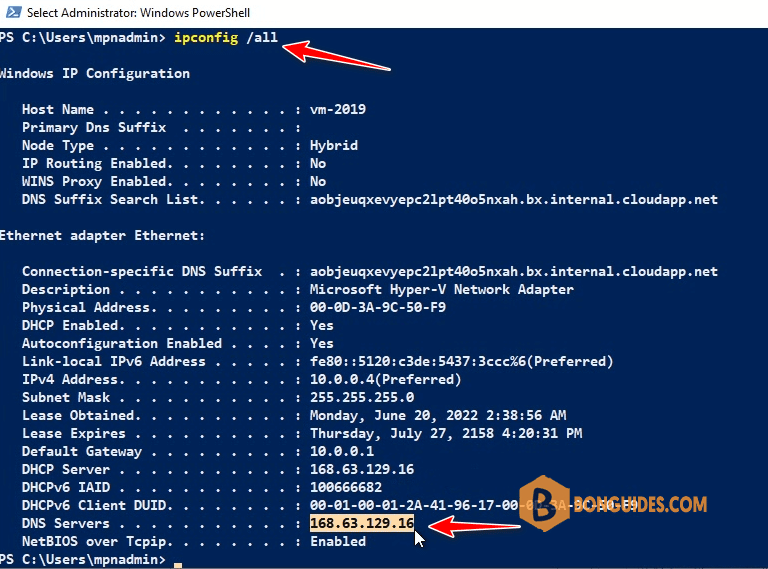
4. Run command ipconfig /all to get all information of the NIC. Take note:
- IPv4 Address
- Subnet Mask
- Default Gateway
- DNS Server
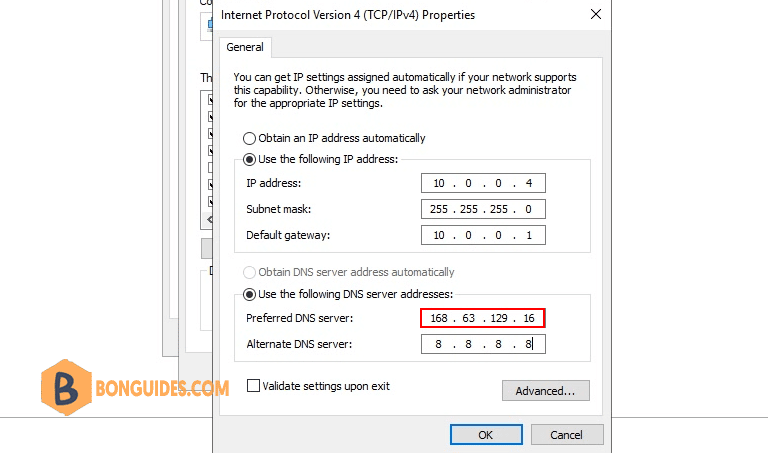
5. Now, change the IP of your VM with the static IP address that you configured in the Azure portal.
Not a reader? Watch this related video tutorial:


