Table of Contents
Prerequisites
To complete this tutorial, you need to:
- Have SQL Server 2016 or later.
- Enable the TCP/IP protocol, which is disabled by default during SQL Server Express installation, by following the instructions in the article How to Enable Remote Connections to SQL Server using IP address.
- Create a database in Azure SQL Database, which you do by following the details in the article How to Create an Azure SQL Database Single Database in Microsoft Azure.

Install DMA Data Migration Assistant
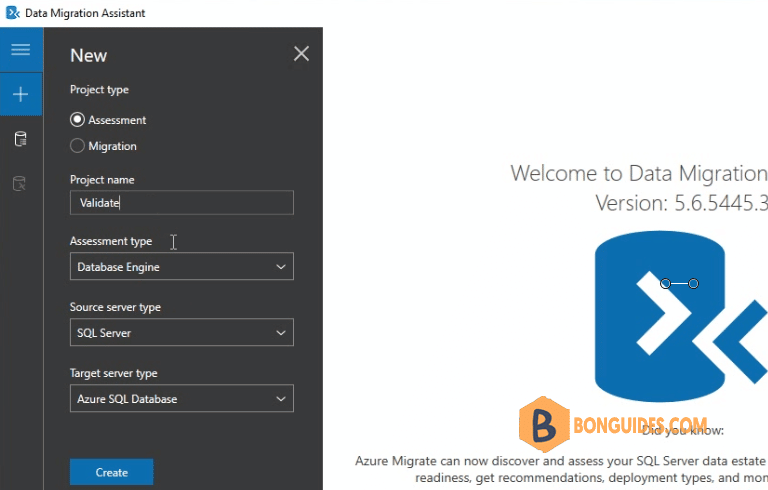
1. Download and install the latest version of the Data Migration Assistant. Open DMA then create a new Assessment project.
- Assessment type: Database Engine
- Source server type: SQL Server
- Target server type: Azure SQL Database
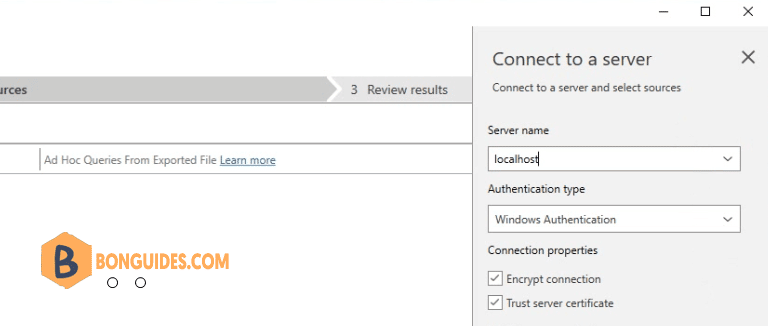
2. We’ve install DMA on SQL Server, so in this step, server name is localhost. If you install DMA on a client, let enter your SQL server name to connect to a server.
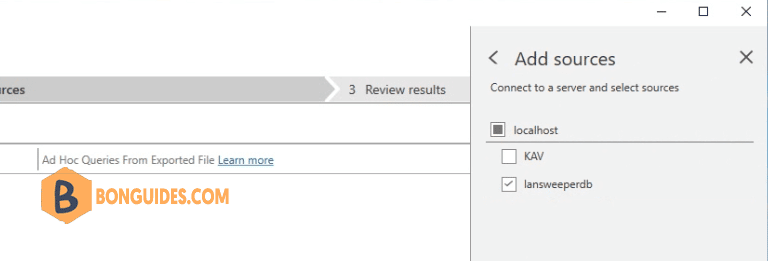
3. Select the database you want to migrate to Azure SQL database.
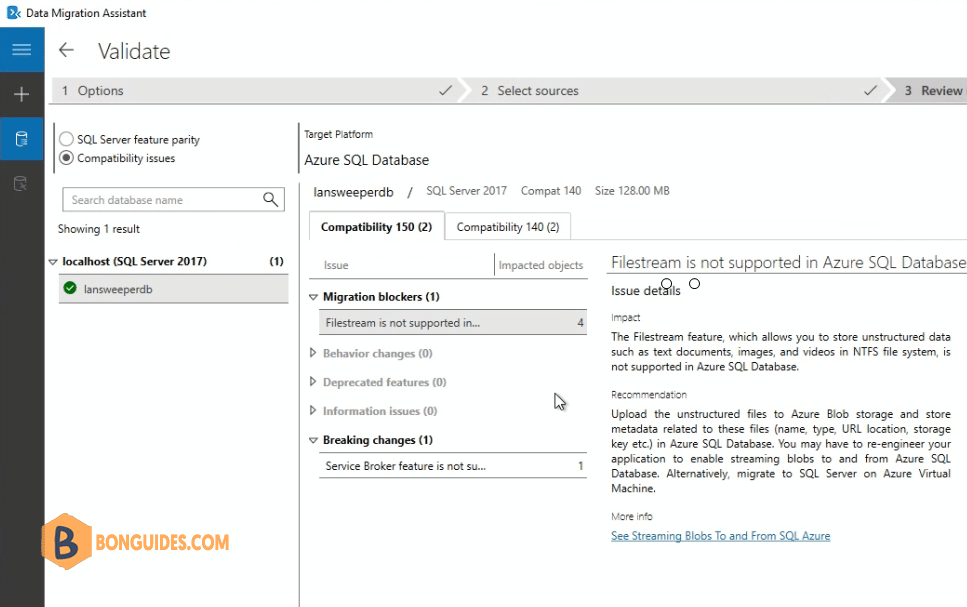
For databases in Azure SQL Database, the assessments identify feature parity issues and migration blocking issues for deploying to a single database or pooled database.
- The SQL Server feature parity category provides a comprehensive set of recommendations, alternative approaches available in Azure, and mitigating steps to help you plan the effort into your migration projects.
- The Compatibility issues category identifies partially supported or unsupported features that reflect compatibility issues that might block migrating SQL Server database(s) to Azure SQL Database. Recommendations are also provided to help you address those issues.
Migrate Schema using DMA
After you’re comfortable with the assessment and satisfied that the selected database is a viable candidate for migration to a single database or pooled database in Azure SQL Database, use DMA to migrate the schema to Azure SQL Database.
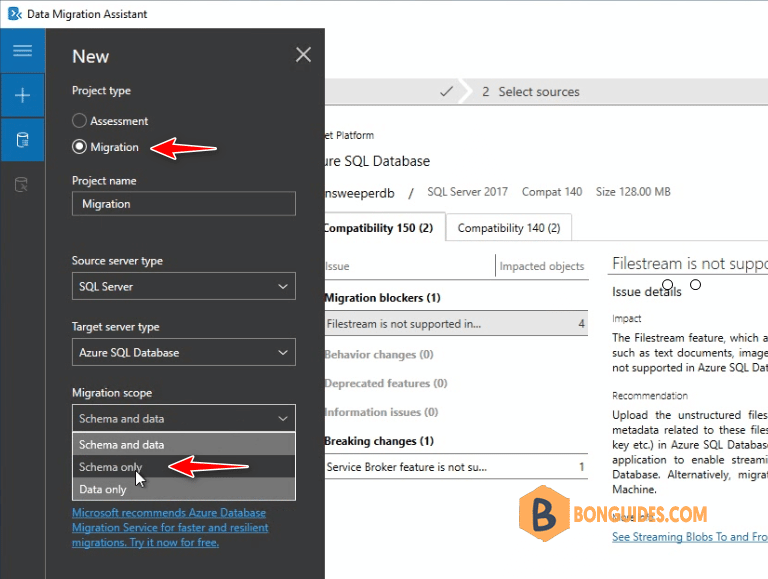
5. Create a new Migration project in DMA:
- Project type: Migration
- Migration scope: Schema only.
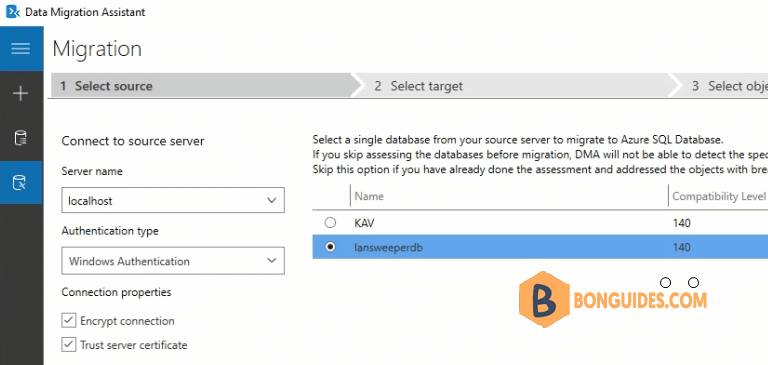
6. In the Data Migration Assistant, specify the source connection details for your SQL Server, then select the database.
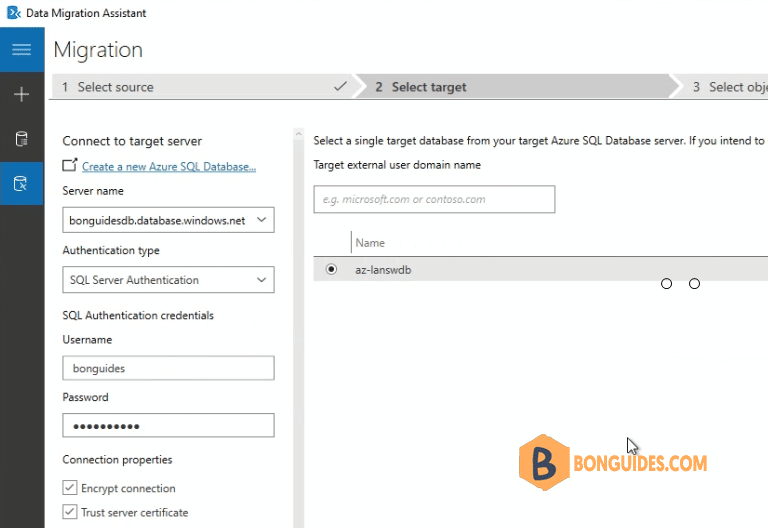
6. Specify the target connection details for your Azure SQL Server, then select the target database that you want to migrate to.
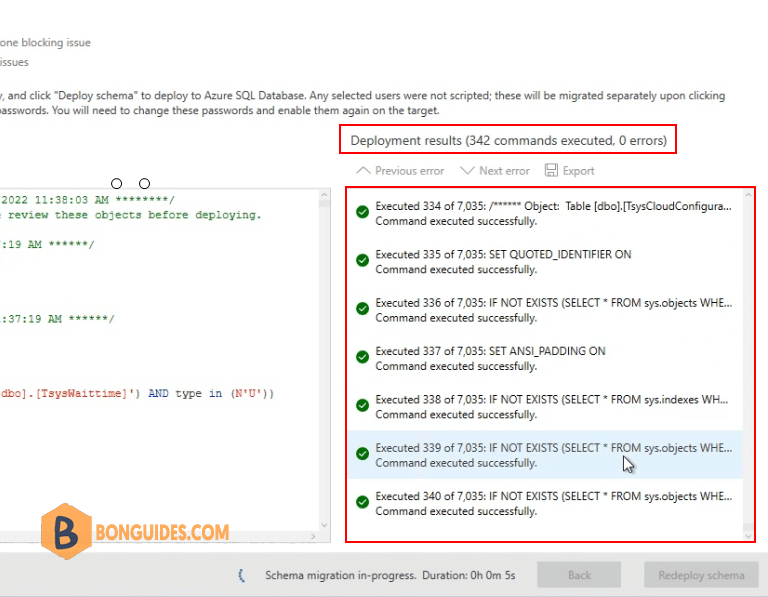
7. Generate SQL script to create the SQL scripts, then deploy the schema to Azure SQL Database.
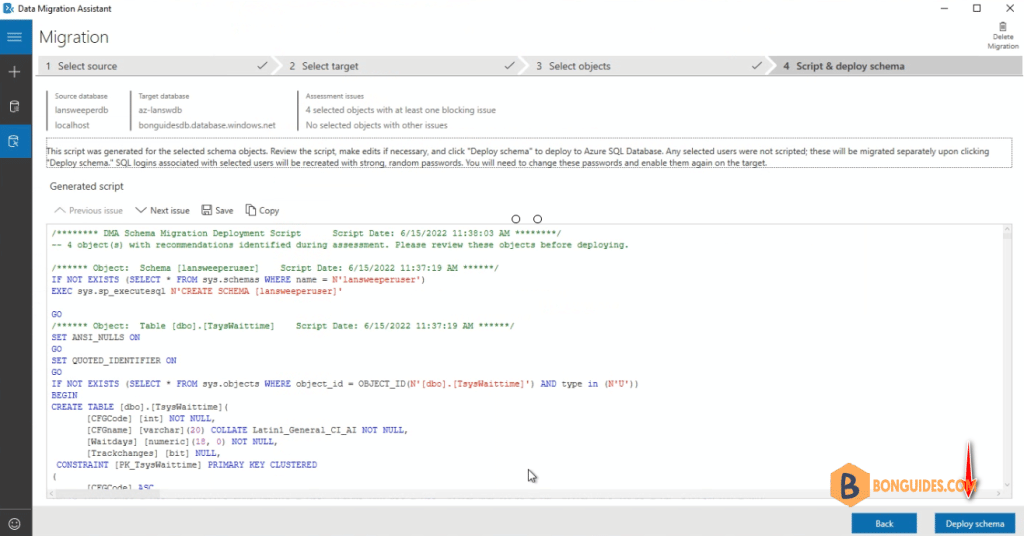
8. It could take several minutes to complete, let keep it running then move to the next step.
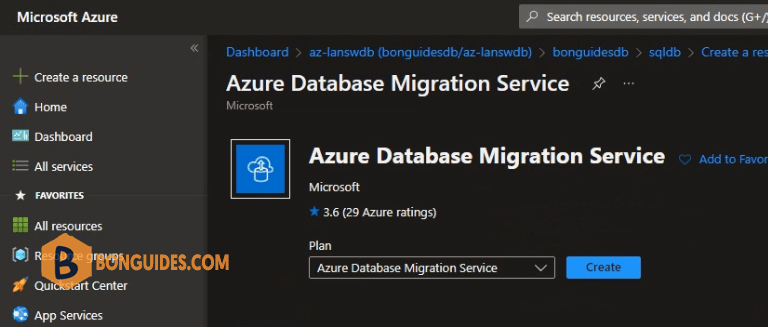
Create Azure Database Migration Service
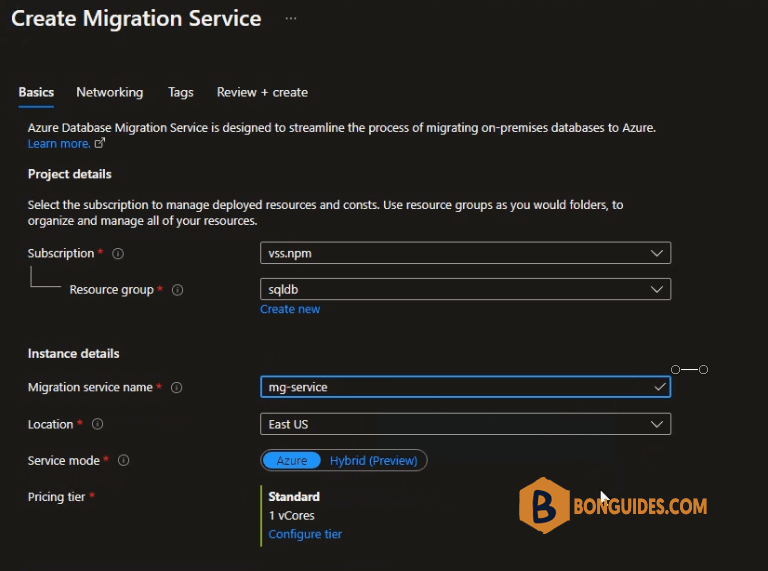
9. Navigate to Azure portal then create a Azure Database Migration Service in the same resource group that you’ve created a Azure SQL Database.
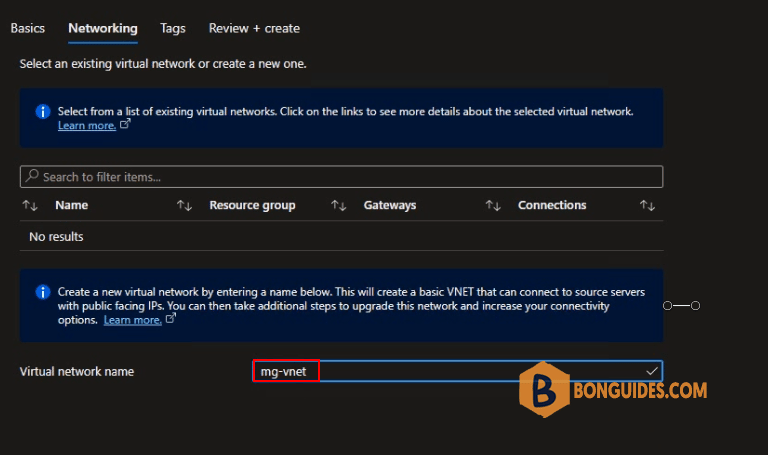
10. Enter Virtual network name for Azure Database Migration Service.
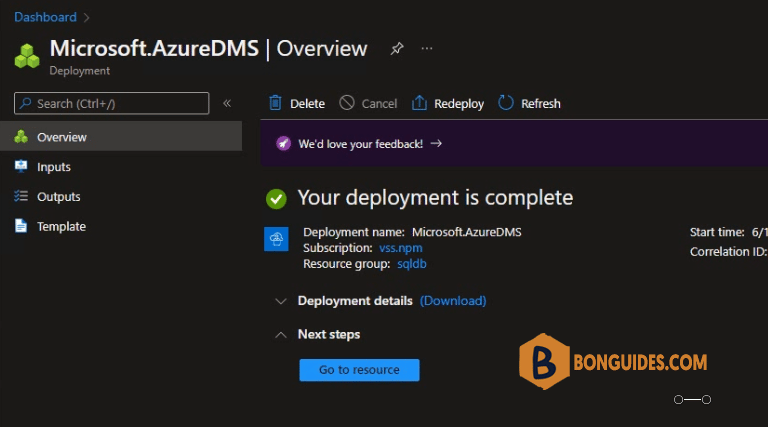
11. Once done, click Go to resource button to navigate to Azure Database Migration Service homepage.
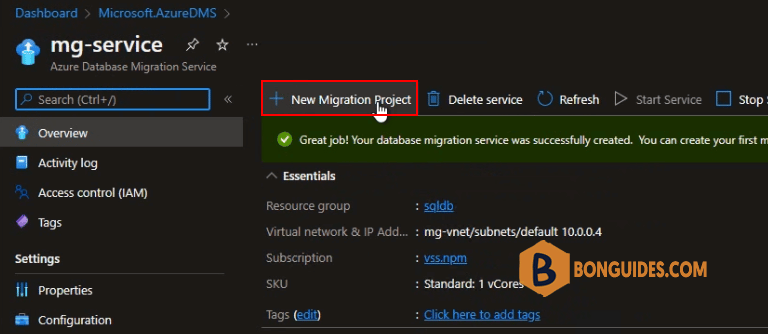
Create a New Migration Project
12. Now, create a new migration project for SQL migration.
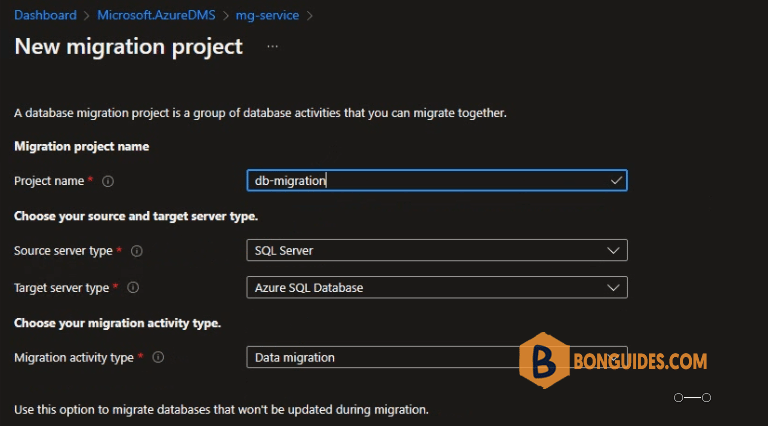
13. Enter desire project name, in the Source server type text box, select SQL Server, in the Target server type text box, select Azure SQL Database, and then for Choose Migration activity type, select Data migration.
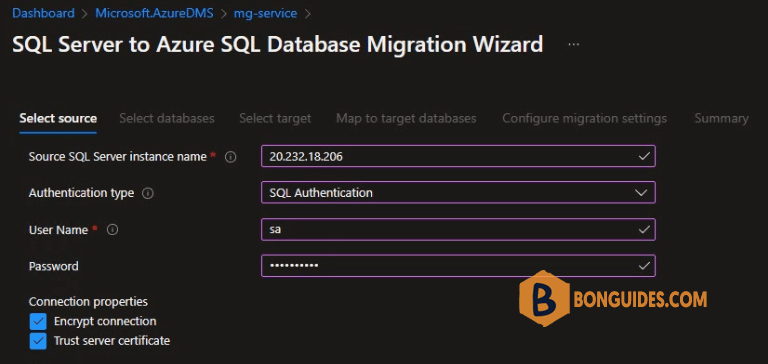
Specify source database
14. On the Select source screen, specify the connection details for the source SQL Server instance.
Make sure to use a Fully Qualified Domain Name (FQDN) for the source SQL Server instance name. You can also use the IP Address for situations in which DNS name resolution isn’t possible.
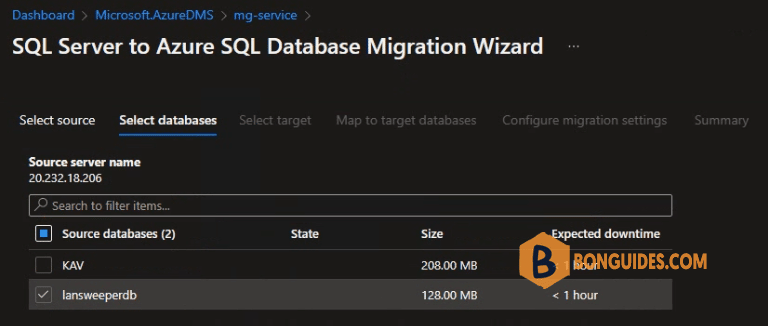
15. Select databases that you want to migrate to Azure SQL Database and review the expected downtime.
Specify target details
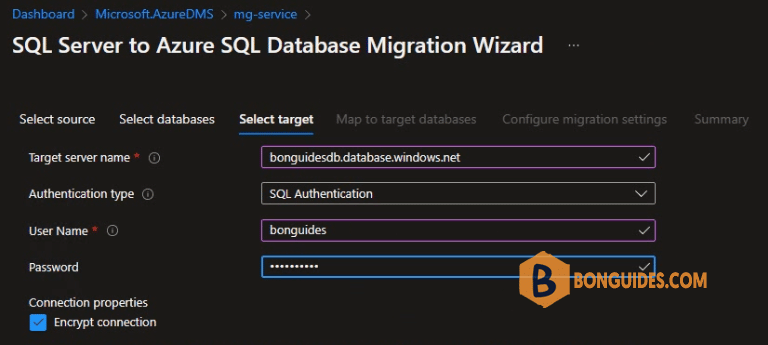
16. On the Select target screen, provide authentication settings to your Azure SQL Database.
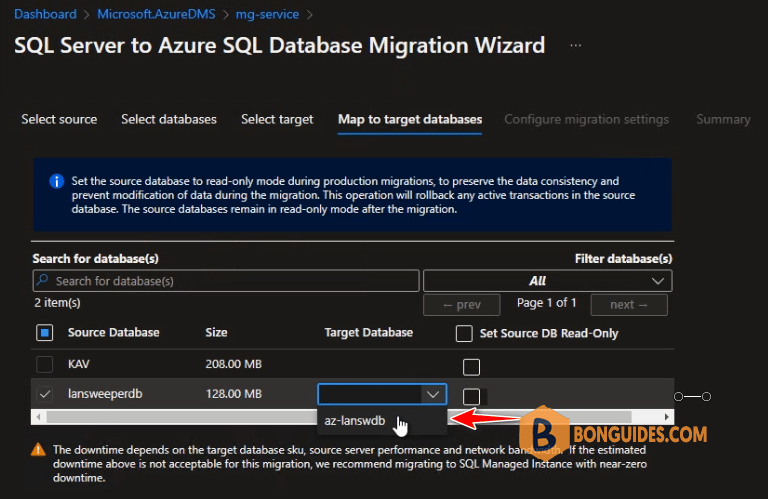
17. In the Map to target databases screen, map the source and the target database for migration.
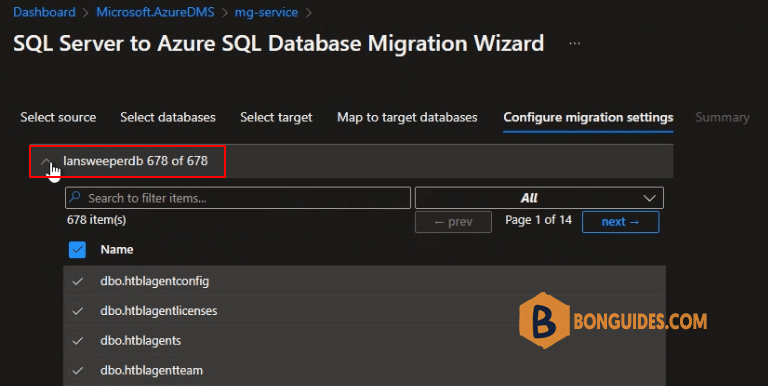
18. Configuration migration settings, expand the table listing, and then review the list of affected fields.
Azure Database Migration Service auto selects all the empty source tables that exist on the target Azure SQL Database instance. If you want to remigrate tables that already include data, you need to explicitly select the tables on this blade.
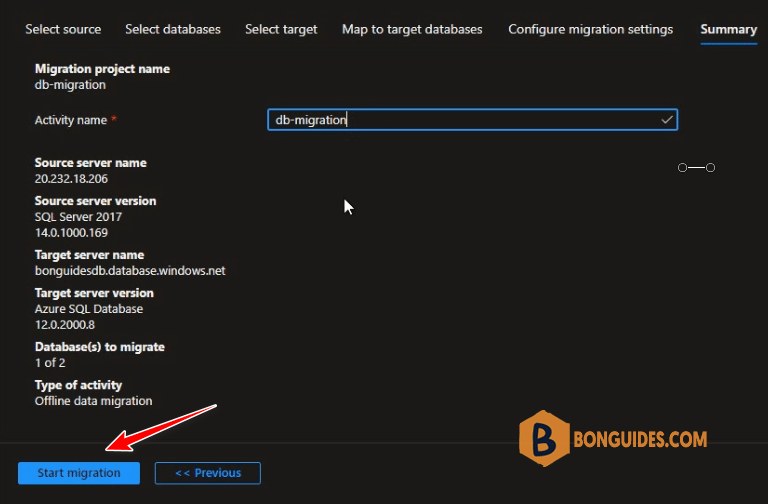
19. Summary, review the migration configuration and in the Activity name text box, specify a name for the migration activity. Select Start migration.
Monitor the migration
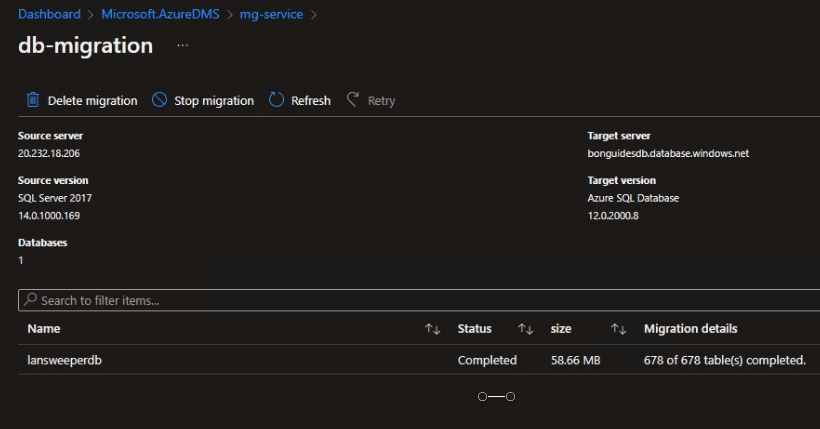
20. On the migration activity screen, select Refresh to update the display until the Status of the migration shows as Completed.
Finally, you can change the configuration of your app. webapp.. to use the SQL database in Azure to verify it works.


