Table of Contents
This post discusses how to install WordPress with the Nginx web server paired with PHP v7.4 and MariaDB database or more popularly abbreviated as LEMP (Linux Nginx MySQL/MariaDB PHP) on CentOS 7 Linux.
Configure SELinux and Firewall
1. By default, SELinux is enabled on CentOS 7 server. It is always recommended to disable the SELinux. To disable the SELinux, edit the /etc/selinux/config file:
vi /etc/selinux/config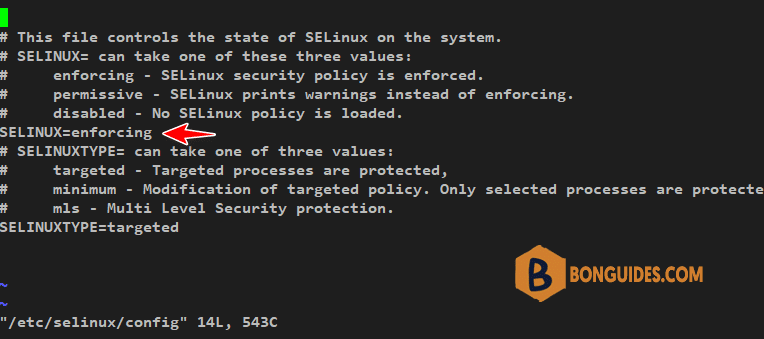
2. Change the line to . Save and close the file then restart your system to apply the changes.
sudo reboot3. Next, you will also need to allow HTTP and HTTPS service through the firewall. You can allow them by running the following command then reload the firewall daemon to apply the changes:
firewall-cmd --permanent --zone=public --add-service=http
firewall-cmd --permanent --zone=public --add-service=https
firewall-cmd --reload
Update the CentOS 7 System
1. Once the CentOS server restarted, let’s SSH to your Centos 7 server using a root account.
2. Update CentOS 7 and install the EPEL repository using the following commands:
yum update -y
yum install wget vim epel-release -y
yum -y install https://dl.fedoraproject.org/pub/epel/epel-release-latest-7.noarch.rpm
yum -y install https://rpms.remirepo.net/enterprise/remi-release-7.rpm
3. Verify the results of installing the REMI repository, see the contents of the yum.repos.d directory
ls -l /etc/yum.repos.d [root@banqr]# ls -l /etc/yum.repos.d/
total 112
...
-rw-r--r-- 1 root root 456 Sep 2 09:05 remi-php54.repo
-rw-r--r-- 1 root root 1314 Sep 2 09:05 remi-php70.repo
-rw-r--r-- 1 root root 1314 Sep 2 09:05 remi-php71.repo
-rw-r--r-- 1 root root 1314 Oct 24 06:03 remi-php72.repo
-rw-r--r-- 1 root root 1314 Sep 2 09:05 remi-php73.repo
-rw-r--r-- 1 root root 1314 Oct 24 08:43 remi-php74.repo
-rw-r--r-- 1 root root 1314 Sep 2 09:05 remi-php80.repo
...Install nginx and php on CentOS 7 server
1. Enable REMI PHP7.4 repository.
sudo yum -y install yum-utils
sudo yum-config-manager --enable remi-php74
2. Install nginx and php 7.4 along with the required extensions for WordPress.
yum update -y
yum install nginx php php-cli -y
yum install php-fpm php-gd php-json php-mbstring php-mysqlnd php-xml php-xmlrpc php-opcache -y
3. Check the installed PHP using command.
[root@banqr]# php -v
PHP 7.4.32 (cli) (built: Sep 28 2022 09:09:55) ( NTS )
Copyright (c) The PHP Group
Zend Engine v3.4.0, Copyright (c) Zend Technologies
    with Zend OPcache v7.4.32, Copyright (c), by Zend Technologies
4. Configure php-fpm using the following command:
vim /etc/php-fpm.d/www.confChange the options as below.
...
user = nginx
...
group = nginx
...
listen = /run/php-fpm/www.sock
...
listen.owner = nginx
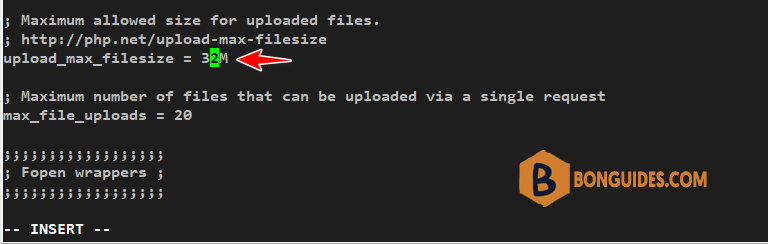
listen.group = nginx5. Increase upload and post max size and memory for php. Change the value in megabyte to fit with yours.
vi /etc/php.ini...
upload_max_filesize = 32M
...
post_max_size = 64M
...
memory_limit = 128M
...
6. Start php-fpm service and enable the service on boot.
systemctl enable php-fpm && systemctl start php-fpm && systemctl status php-fpm[root@banq]# systemctl status php74-php-fpm
● php74-php-fpm.service - The PHP FastCGI Process Manager
Loaded: (/usr/lib/systemd/system/php74-php-fpm.service; enabled; vendor preset: disabled)
Active: active (running) since Mon 2022-10-24 08:51:58 UTC; 8min ago
Main PID: 893 (php-fpm)
Status: "Processes active: 0, idle: 6, Requests: 6, slow: 0, Traffic: 0req/sec"
CGroup: /system.slice/php74-php-fpm.service
├─ 893 php-fpm: master process (/etc/opt/remi/php74/php-fpm.conf)
├─1001 php-fpm: pool www
├─1002 php-fpm: pool www
├─1003 php-fpm: pool www
├─1004 php-fpm: pool www
├─1005 php-fpm: pool www
└─1737 php-fpm: pool wwwCreate Nginx Server Block
1. Creating a server block configuration file for nginx.
vi /etc/nginx/conf.d/bonguides.me.confInsert the following lines into the block configuration file.
server {
    listen 80;
    server_name bonguides.me www.bonguides.me;
    root /var/www/bonguides.me;
    index index.php index.html index.htm;

    location / {
        try_files $uri $uri/ /index.php?$query_string;
    }

    location ~ \.php$ {
        try_files $fastcgi_script_name =404;
        include fastcgi_params;
        fastcgi_pass                   unix:/run/php-fpm/www.sock;
        fastcgi_index                  index.php;
        fastcgi_param DOCUMENT_ROOT    $realpath_root;
        fastcgi_param SCRIPT_FILENAME  $realpath_root$fastcgi_script_name;
    }

    access_log /var/log/nginx/bonguides.me.access.log;
    error_log /var/log/nginx/bonguides.me.error.log;
}
2. Create root directory and info.php file.
mkdir /var/www/bonguides.me
echo "<?php phpinfo(); ?>" > /var/www/bonguides.me/info.php
# ls /var/www/bonguides.me/
info.php3. Test the configuration, restart the Nginx service and enable nginx on boot.
nginx -t
systemctl start nginx && systemctl enable nginx
systemctl status nginx
nginx: configuration file /etc/nginx/nginx.conf test is successful
[root@ct7 php-fpm]# systemctl start nginx && systemctl enable nginx
[root@ct7 php-fpm]# systemctl status nginx
● nginx.service - The nginx HTTP and reverse proxy server
Loaded: loaded (/usr/lib/systemd/system/nginx.service; enabled; vendor preset: disabled)
Active: active (running) since Mon 2022-10-24 23:29:43 EDT; 9min ago
Main PID: 1638 (nginx)
CGroup: /system.slice/nginx.service
├─1638 nginx: master process /usr/sbin/nginx
├─1639 nginx: worker process
├─1640 nginx: worker process
└─1641 nginx: worker process
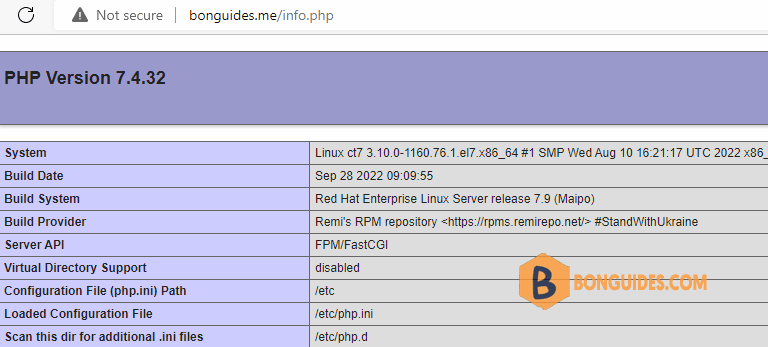
4. Test whether Nginx is able to run php scripts by accessing info.php.
Browse http://bonguides.me/info.php.
Install MariaDB on CentOS 7 Linux
1. Create file MariaDB 10.4 repository.
vi /etc/yum.repos.d/mariadb.repo cd /tmp
curl -LsS -O https://downloads.mariadb.com/MariaDB/mariadb_repo_setup
sudo bash mariadb_repo_setup --mariadb-server-version=10.82. Insert the script for mariadb.repo.
# MariaDB 10.4 CentOS repository list - created 2020-06-22 11:29 UTC
# http://downloads.mariadb.org/mariadb/repositories/
[mariadb]
name = MariaDB
baseurl = http://yum.mariadb.org/10.4/centos7-amd64
gpgkey=https://yum.mariadb.org/RPM-GPG-KEY-MariaDB
gpgcheck=1
3. Install MariaDB.
yum install MariaDB-server MariaDB-client -y 4. Enable on boot and start the MariaDB service.
systemctl enable mariadb && systemctl start mariadb && systemctl status mariadb[root@banqr]# systemctl status mariadb
● mariadb.service - MariaDB 10.3.36 database server
Loaded: loaded (/usr/lib/systemd/system/mariadb.service; enabled; vendor preset: disabled)
Drop-In: /etc/systemd/system/mariadb.service.d
└─migrated-from-my.cnf-settings.conf
Active: active (running) since Mon 2022-10-24 08:51:59 UTC; 15min ago
Docs: man:mysqld(8)
https://mariadb.com/kb/en/library/systemd/
Process: 1180 ExecStartPost=/bin/sh -c systemctl unset-environment _WSREP_START_POSITION (code=exited, status=0/SUCCESS)
Process: 945 ExecStartPre=/bin/sh -c [ ! -e /usr/bin/galera_recovery ] && VAR= || VAR=`cd /usr/bin/..; /usr/bin/galera_recovery`; [ $? -eq 0 ] && systemctl set-environment _WSREP_START_POSITION=$VAR || exit 1 (code=exited, status=0/SUCCESS)
Process: 920 ExecStartPre=/bin/sh -c systemctl unset-environment _WSREP_START_POSITION (code=exited, status=0/SUCCESS)
Main PID: 982 (mysqld)
Status: "Taking your SQL requests now..."
CGroup: /system.slice/mariadb.service
└─982 /usr/sbin/mysqld5. Secure the installation of MariaDB.
sudo mariadb-secure-installation6. Answer the questions displayed.
Enter current password for root (enter for none): ENTER
Switch to unix_socket authentication [Y/n] y
Change the root password? [Y/n] y
Remove anonymous users? [Y/n] y
Disallow root login remotely? [Y/n] y
Remove test database and access to it? [Y/n] y
Reload privilege tables now? [Y/n] y
7. Log in to MariaDB.
mysql -u root -p8. Creating database, user and password, and granting database access rights to user.
create database DBNAME;
create user 'DBUSER'@'localhost' identified by 'DBPASS';
grant all privileges on DBNAME.* to 'DBUSER'@'localhost';
flush privileges;
exit;
[root@ct7 php-fpm]# mysql -u root -p
Enter password:
Your MariaDB connection id is 18
Server version: 10.4.26-MariaDB MariaDB Server
MariaDB [(none)]> create database DBNAME;
Query OK, 1 row affected (0.001 sec)
MariaDB [(none)]> create user 'DBUSER'@'localhost' identified by 'DBPASS';
Query OK, 0 rows affected (0.001 sec)
MariaDB [(none)]> grant all privileges on DBNAME.* to 'DBUSER'@'localhost';
Query OK, 0 rows affected (0.001 sec)
MariaDB [(none)]> flush privileges;
Query OK, 0 rows affected (0.000 sec)
MariaDB [(none)]> exit;
ByeInstall WordPress on CentOS 7 server
1. Download the latest WordPress package then extract the downloaded file to a temporary directory.
cd /tmp
wget https://wordpress.org/latest.tar.gz
tar xf latest.tar.gz
2. Copy the contents of the WordPress directory to the root directory then change owner and root directory permissions.
sudo mv /tmp/wordpress/* /var/www/bonguides.me/
sudo chown -R nginx: /var/www/bonguides.me
# ls /var/www/bonguides.me/
index.php readme.html wp-blog-header.php wp-content wp-links-opml.php wp-mail.php wp-trackback.php
info.php wp-activate.php wp-comments-post.php wp-cron.php wp-load.php wp-settings.php xmlrpc.php
license.txt wp-admin wp-config-sample.php wp-includes wp-login.php wp-signup.php3. Edit the WordPress configuration file.
cd /var/www/bonguides.me
cp wp-config-sample.php wp-config.php
vi wp-config.php
4. Enter database name, username and password that you’ve created in the previous step then save the configuration file.
// ** Database settings - You can get this info from your web host ** //
/** The name of the database for WordPress */
define( 'DB_NAME', 'DBNAME' );

/** Database username */
define( 'DB_USER', 'DBUSER' );

/** Database password */
define( 'DB_PASSWORD', 'DBPASS' );

/** Database hostname */
define( 'DB_HOST', 'localhost' );

/** Database charset to use in creating database tables. */
define( 'DB_CHARSET', 'utf8' );

/** The database collate type. Don't change this if in doubt. */
define( 'DB_COLLATE', '' );
5. Restart all services.
systemctl restart nginx && systemctl restart php-fpm && systemctl restart mariadb.serviceConfigure WordPress via a browser
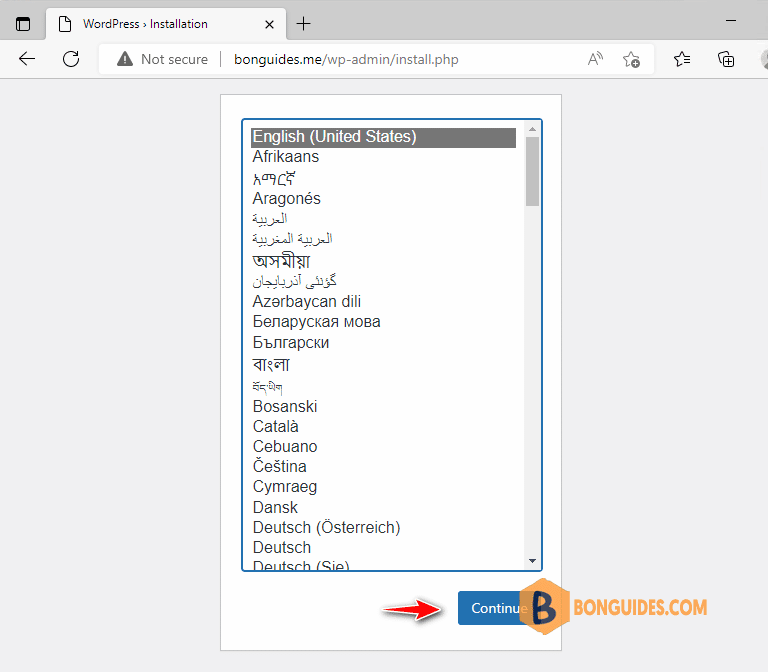
1. Browse http://bonguides.me using any browser.
2. In the first time, the installer will run to setup your site, let’s select the favorite language then click Continue button.
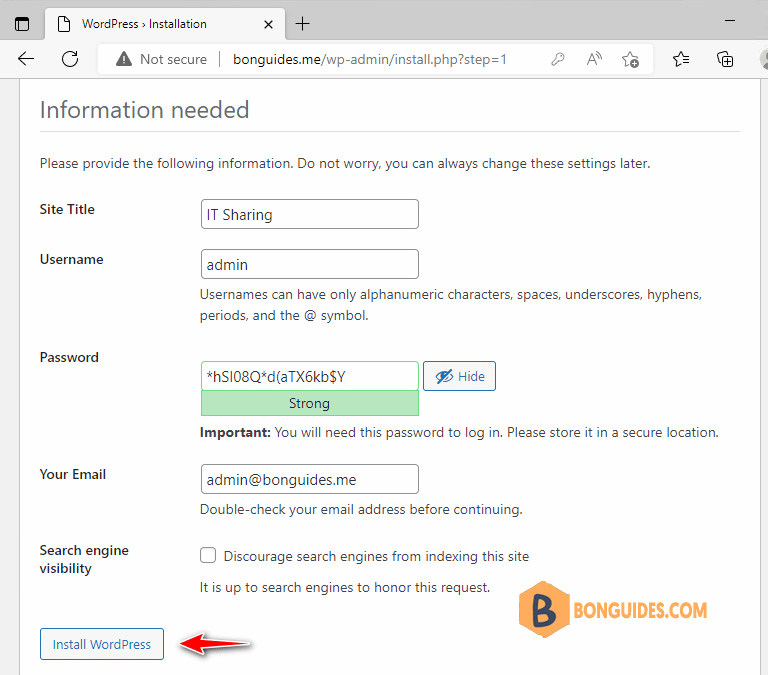
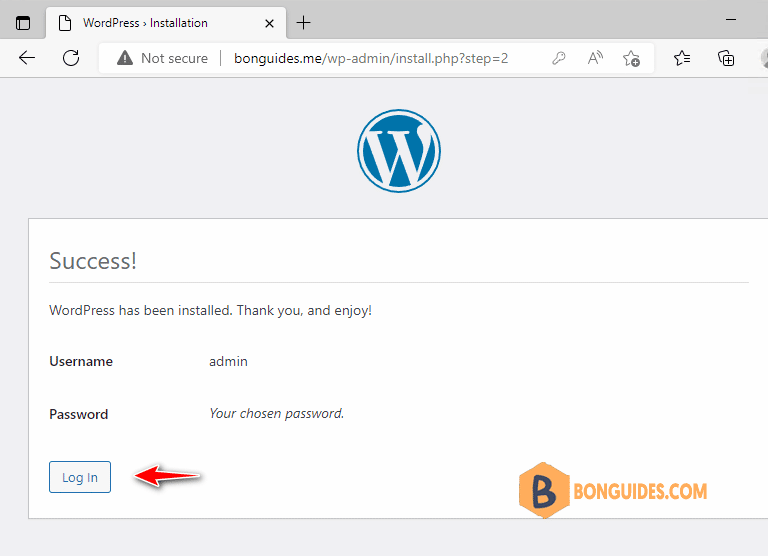
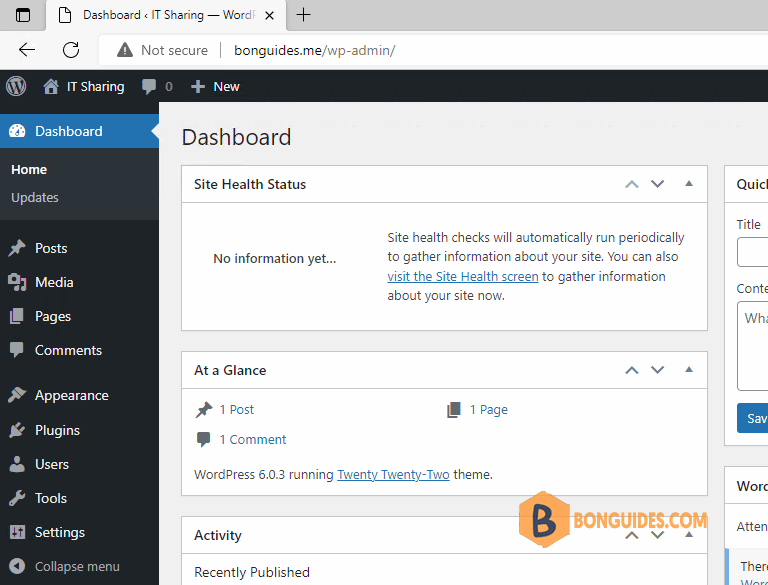
Finally, the WordPress site is already.