Table of Contents
This post helps you download, install, and configure Symantec Endpoint Protection Manager on Windows Server.
Preinstall: Check system requirements
Before you install Symantec Endpoint Protection Manager or the Symantec Endpoint Protection clients, perform the following steps:
- Download SymDiag and run the preinstall check to ensure the computer(s) meet system requirements.
- Review the release notes and system requirements for Symantec Endpoint Protection.
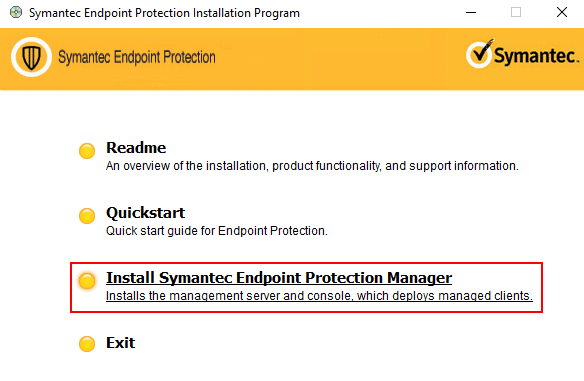
Install the Symantec Endpoint Protection Manager
1. Download the latest version of Symantec software and tools, retrieve license keys, and activate your product through the Broadcom Support Portal.
2. In the folder where you downloaded the Symantec Endpoint Protection installation file, double-click the file to extract all files then the installation wizard automatically launches.
After the installation wizard launched, just click Next and keep everything as default.
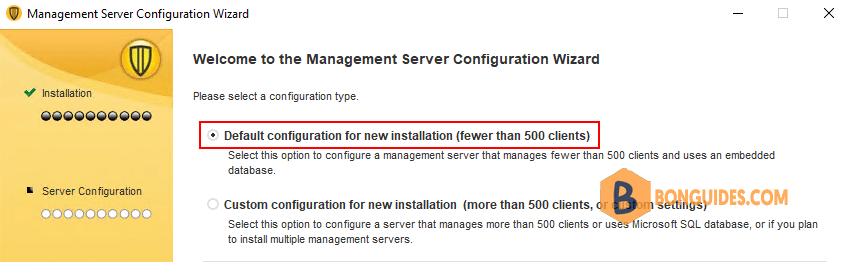
3. On the Welcome to the Management Server Configuration Wizard panel, click Default configuration, and then click Next.
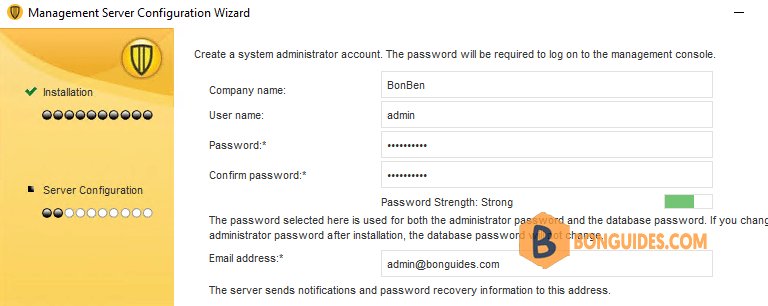
4. Fill out the required fields to create the system administrator account and email address.
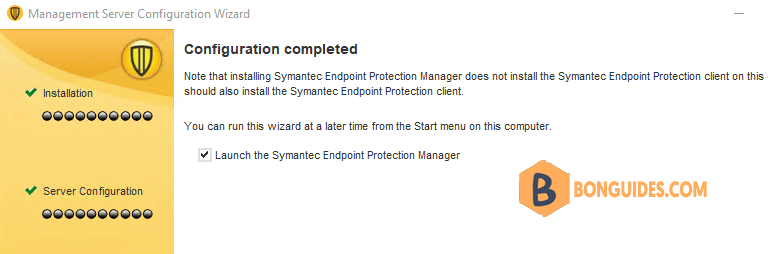
5. On the Configuration completed panel, click Finish to launch Symantec Endpoint Protection Manager.
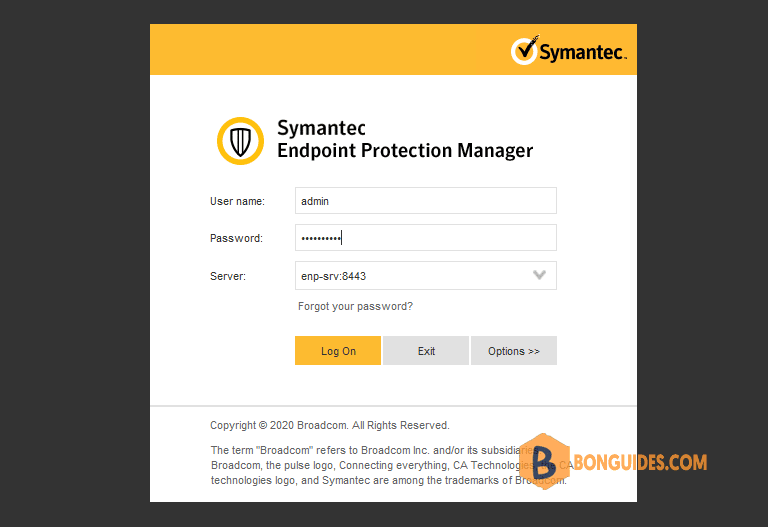
6. On the Symantec Endpoint Protection Manager logon screen, type the username and password that you created earlier in step 4 and confirm that you can log on. Your username is admin by default.
Add a group for clients
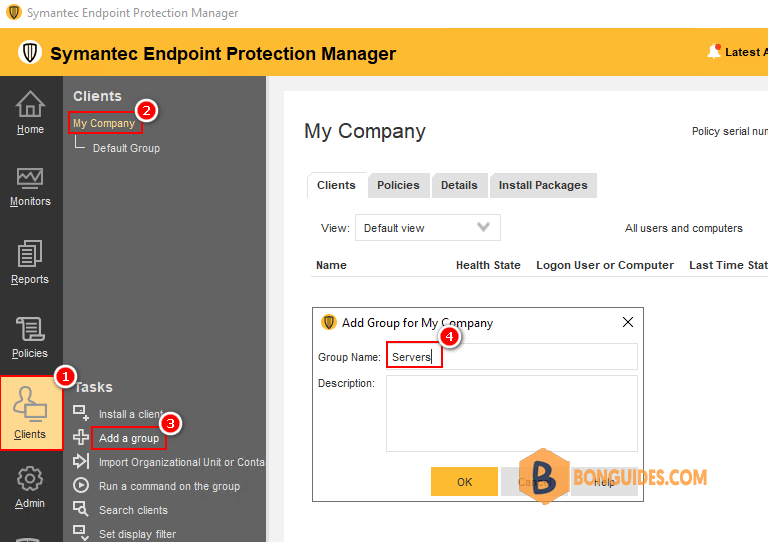
Symantec recommends that you create separate groups for desktops, laptops, and servers. In the Symantec Endpoint Protection Manager, in the left pane, click Clients.
- Under Clients, click My Company.
- Under Tasks, click Add a group.
- In the Add Group for My Company dialog box, type the group name and a description, and then click OK.
Install the Symantec Endpoint Protection clients
Before you install the clients by using Symantec Endpoint Protection Manager, check the following items:
- Make sure that the computers can be accessed through the network.
- Make sure that you have administrator credentials for the computers to which you want to deploy.
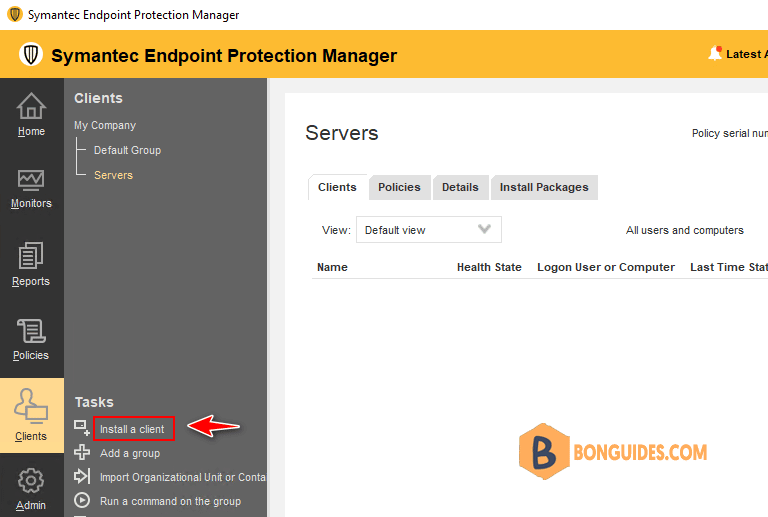
1. In Symantec Endpoint Protection Manager, in the left pane, click Clients.
- Under Clients, select the group you created previously.
- Under Tasks, click Install a client.
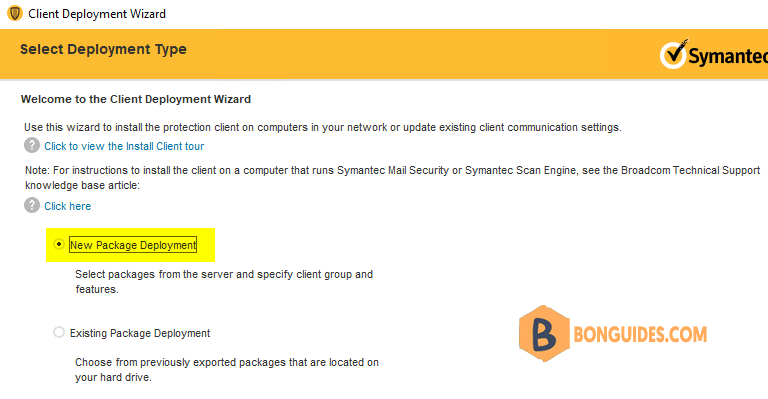
2. In the Welcome to the Client Deployment Wizard panel, click New Package Deployment, and then click Next.
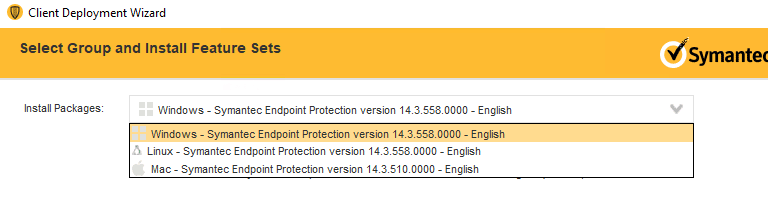
3. In the Install Packages drop-down list, select the operating system that matches the operating system of the client computers.
4. Choose the following options depending on the operating system you selected in the previous step.
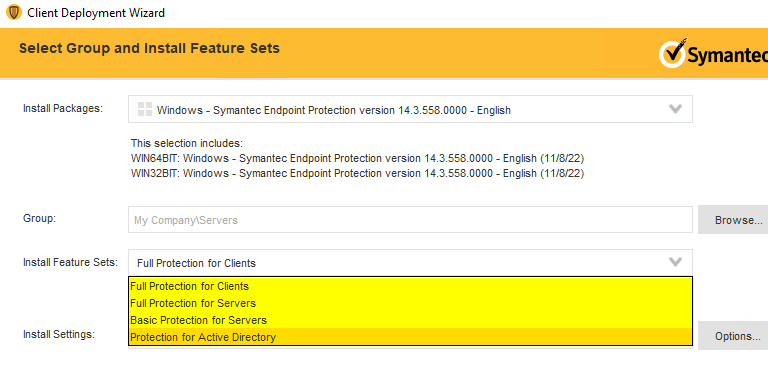
Windows install package:
- In the Install Feature Sets drop-down list, keep the default setting of Full Protection for Clients.
- In the Install Settings drop-down list, keep the default setting of Default Standard client installation settings for Windows.
- Choose whether to include virus definitions next to Content Options, and then click Next
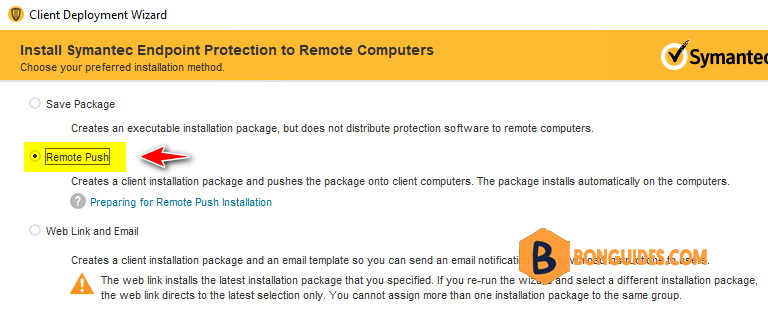
5. Click Remote Push, and then click Next.
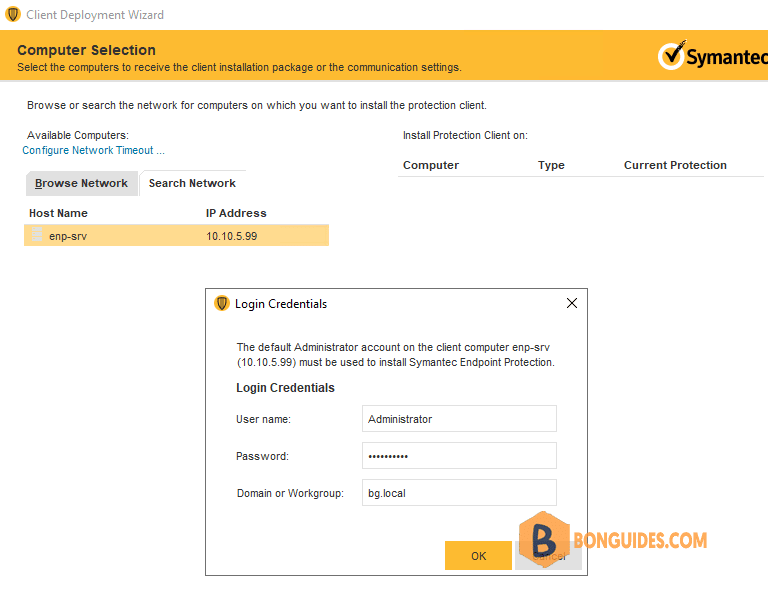
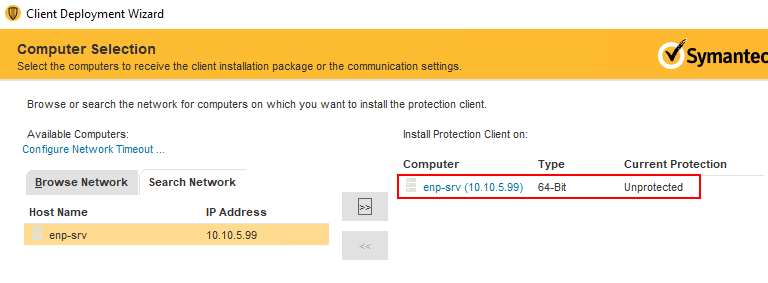
6. On the Browse Network tab, browse to your workgroup or domain and select the computers you want to push the Symantec Endpoint Protection client to. After you select the computers, click the option to add them to the right pane.
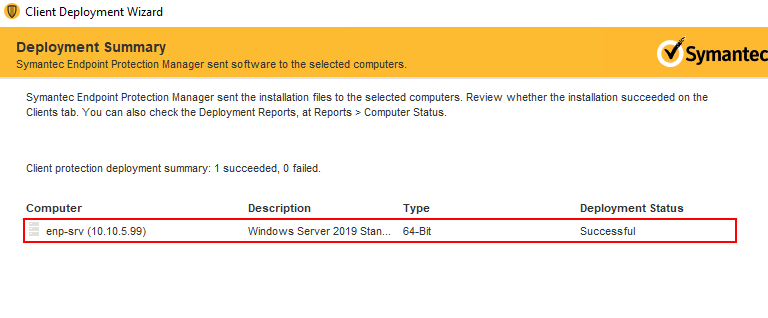
7. Click Next then click Send to initiate the process. After the push installation has finished, you see a Deployment Summary window with the results of the push.
8. Click Next, and then click Finish to exit the wizard. This window indicates that the install files were successfully copied.
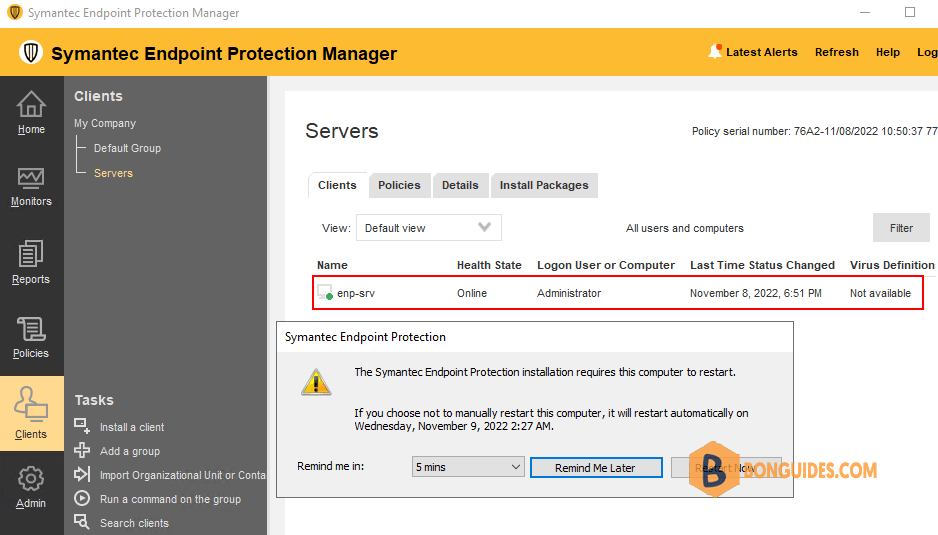
9. To confirm that the client was successfully installed, check that the client exists in the client group that you added in the Clients pane.
Check that the latest definitions are installed
In Symantec Endpoint Protection Manager, in the left pane, click Home. In the Endpoint Status box, under Windows Definitions, compare the dates for Latest on Manager and Latest from Symantec.
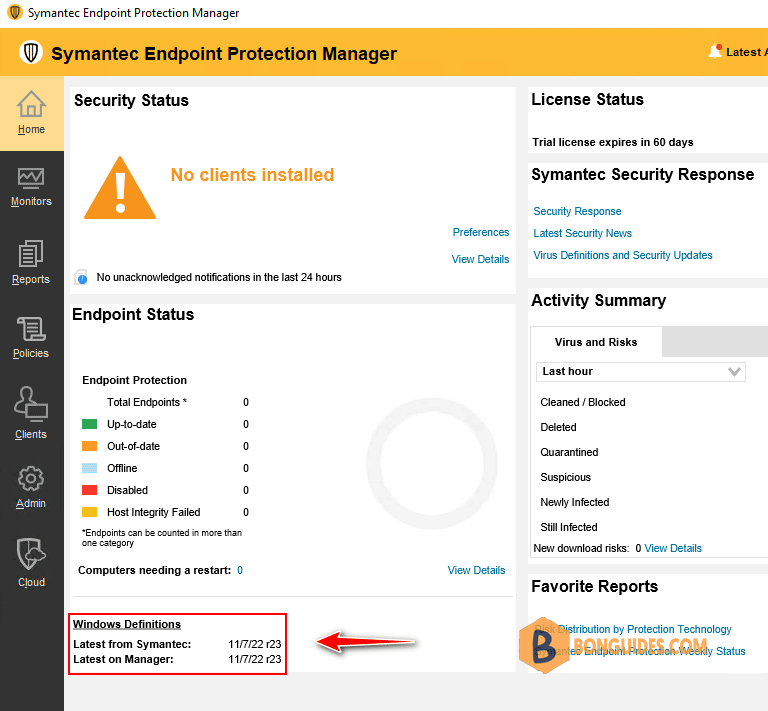
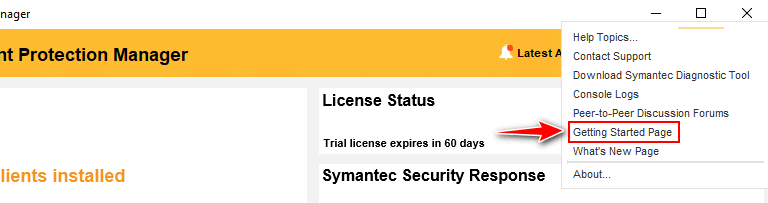
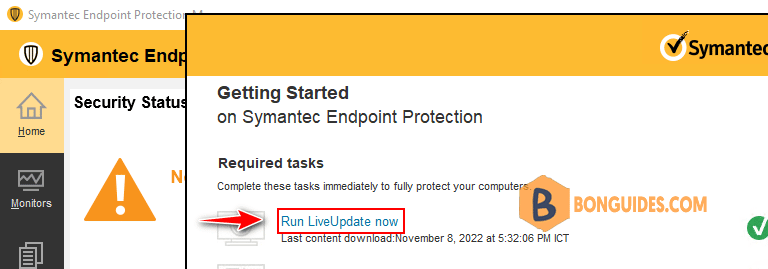
If the dates do not match, click Help > Getting Started Page, click Run LiveUpdate now, and then click Download.
Check the database backup settings
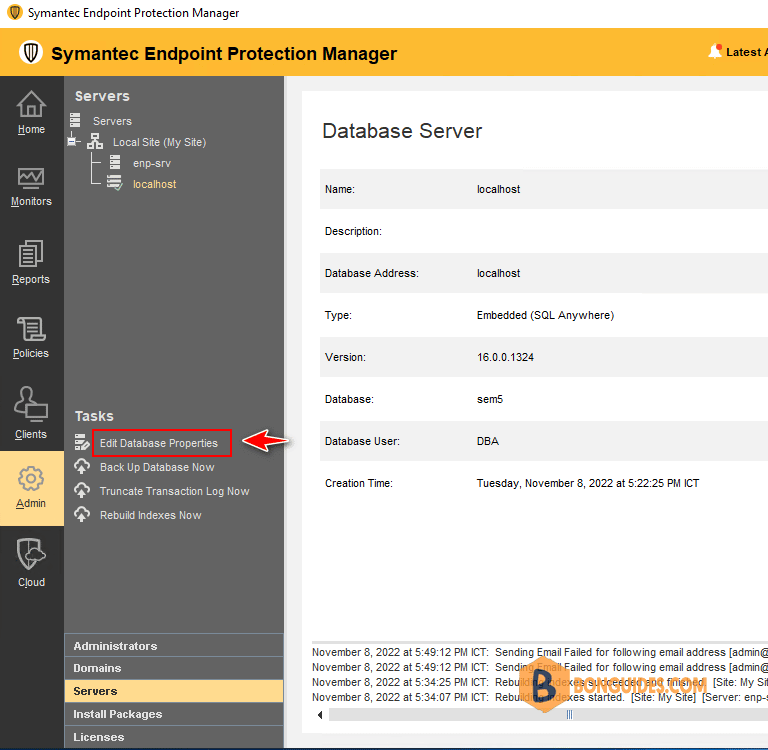
1. In Symantec Endpoint Protection Manager, in the left pane, click Admin > Servers.
2. Under Servers, click Local Site (My Site) > localhost.
3. Under Tasks, click Edit Database Properties.
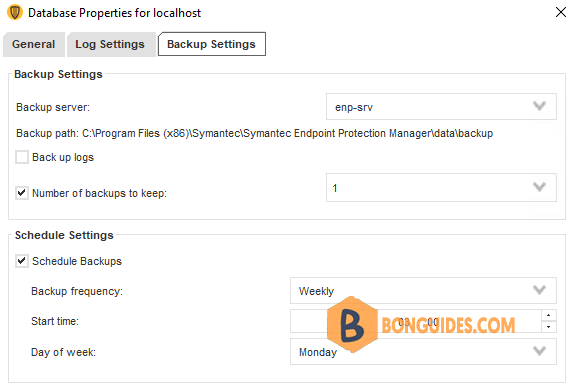
4. On the Backup Settings tab, make any necessary adjustments and then click OK. By default, a backup is saved once a week.
Conclusion
This post shows how to install Symantec Protection Manager on Windows Server. This is a part of the Symantec Endpoint Protection series. You can click on the hyperlink to read more guides.


