Learning and Sharing
  • Home
  • Blog
  • Linux
  • macOS
  • Virtualization
    • VMware
    • VirtualBox
  • Windows
    • Windows 11
    • Windows 10
    • Windows Server
  • Series
    • Symantec
    • Intune
    • Microsoft Azure
    • Powershell
    • VirtualBox
    • VMware
    • PowerShell Learning
    • Microsoft Graph
  • More
    • Auto Installation
    • AEC Installation
  • Contact
No Result
View All Result
No Result
View All Result

How to Install a Desktop Environment on an Ubuntu Server

November 28, 2022
in Blog, Linux, Ubuntu
0
ADVERTISEMENT

Table of Contents

Prerequisites

  • Ubuntu 20.04 Server
  • User with root (sudo) privileges

Install and set up Display Manager

1. Refresh the repository and package lists, and perform the necessary upgrades with the following command:

sudo apt update -y && sudo apt upgrade -y

2. In this step, we will install the display manager. A display manager is an application that starts the display server, launches the desktop, and manages user authentication. The default GDM3 is a resource-intensive display manager. To conserve system resources, consider a lighter tool, such as SLiM or LightDM.

This guide uses SLiM to illustrate the rest of the GUI installation process. Run command below to install it:

sudo apt install slim -y
Note Tip: If you prefer to install the LightDM display manager instead, type:

Install GUI on Ubuntu Server

With a display manager installed, proceed to install a GUI. The sections below contain instructions for the most common Linux desktop environments.

Ubuntu Desktop

The default Ubuntu Desktop is a modified version of the GNOME desktop environment.

1. To install Ubuntu Desktop by running the following command:

sudo apt install ubuntu-desktop -y

If asked, confirm slim as the default desktop manage
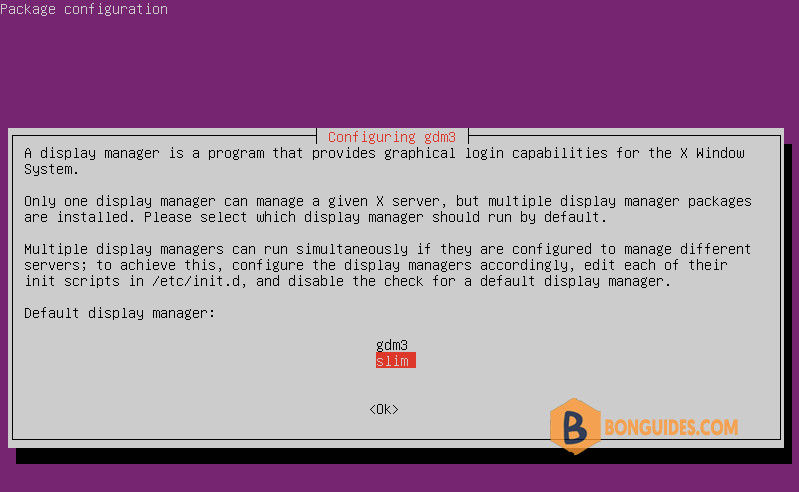
2. Reboot the system when the installation finishes or you can start Slim immediately.

sudo service slim start

After the system reboots, a graphical login screen appears. The default display manager generates this screen.
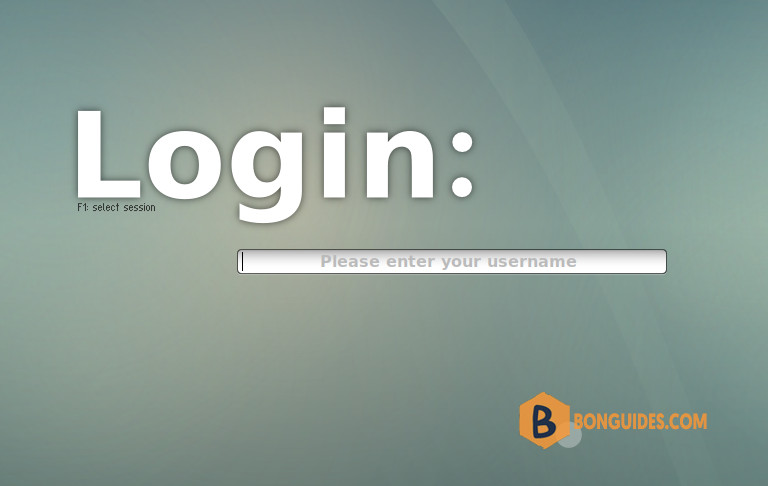
3. Type your username in the field and press Enter to reveal the password field. Enter your password to access the desktop environment.
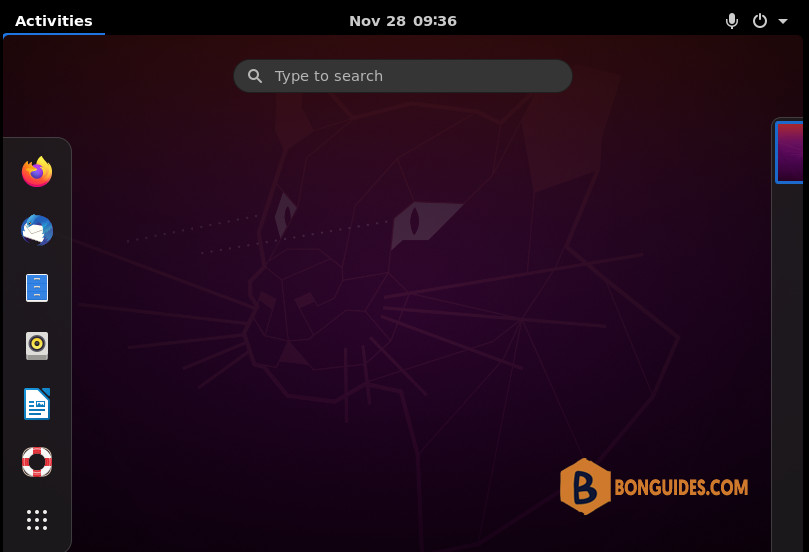
Optional: For the vanilla GNOME experience, install the following packages:

sudo apt install vanilla-gnome-desktop vanilla-gnome-default-settings

KDE Plasma

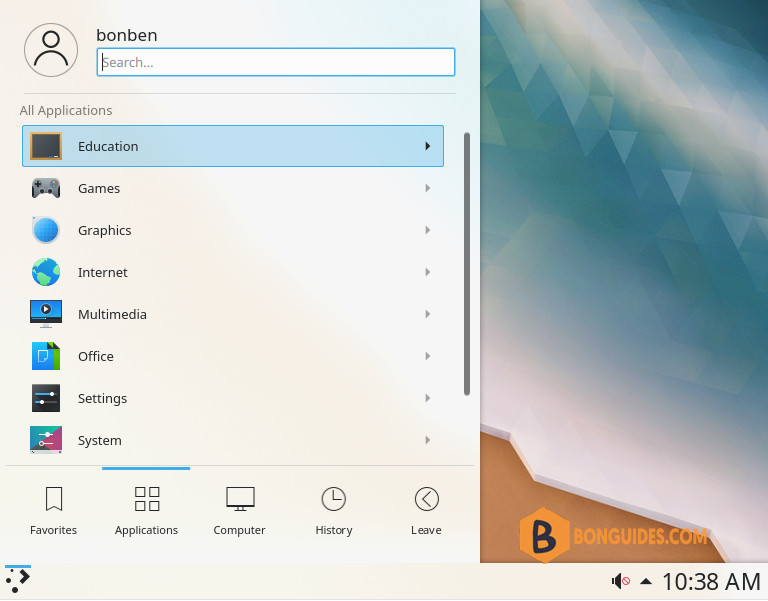
KDE Plasma is a flexible and customizable desktop environment that provides visual consistency and style while remaining fast and responsive. To install KDE Plasma, use the following command:

sudo apt install kde-plasma-desktop

Reboot the system and log in to access the KDE environment.
XFCE

The XFCE desktop environment is designed to be lightweight and user-friendly. The main package, xfce4-session, provides a bare-bone environment. If you want the full experience, install the xfce4-goodies package as well.

Install the packages with the following command:

sudo apt-get install xfce4-session xfce4-goodies

After you reboot the system and log in, the XFCE desktop appears.

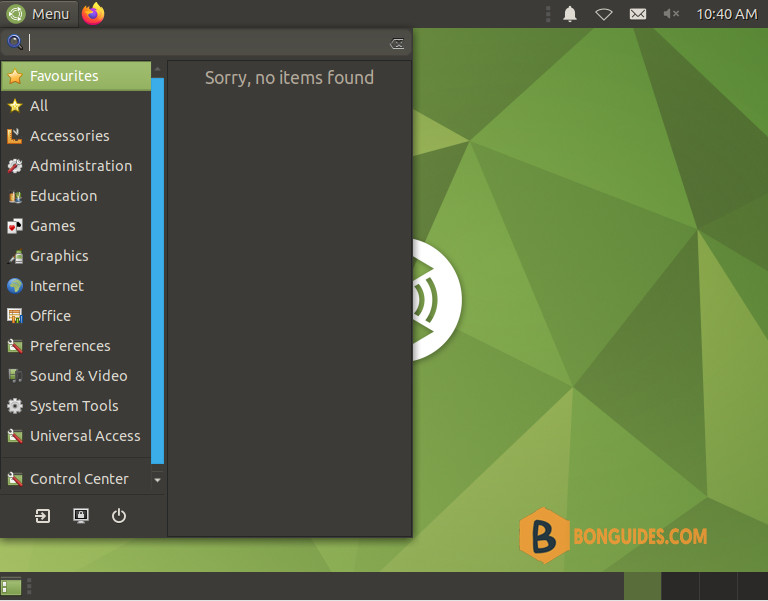
MATE

MATE is a fork of GNOME 2 and a popular graphical interface designed to be light on resource consumption. Install it by executing the following command:

sudo apt install ubuntu-mate-desktop -y
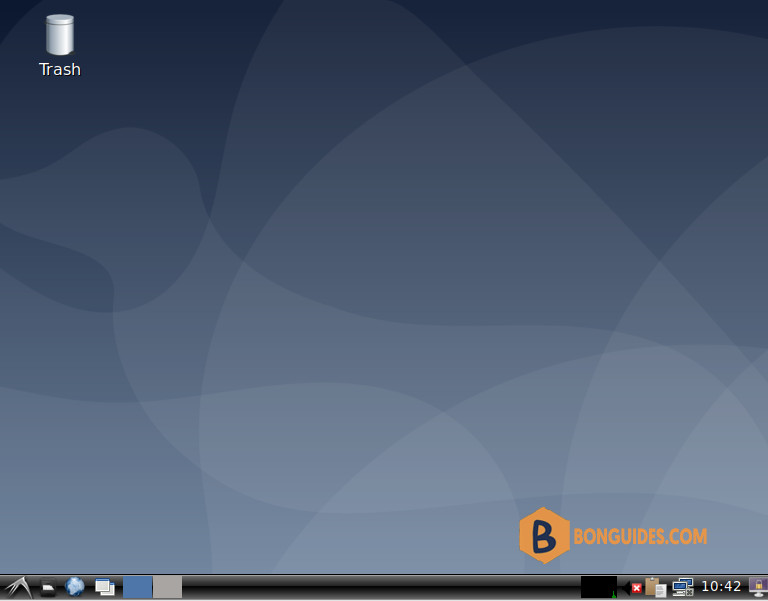
LXDE

LXDE is a desktop environment with a very lightweight GUI. Use LXDE if you need a graphical interface but want to minimize the impact on system memory and CPU.

sudo apt install lxde -y
Switching between GUI
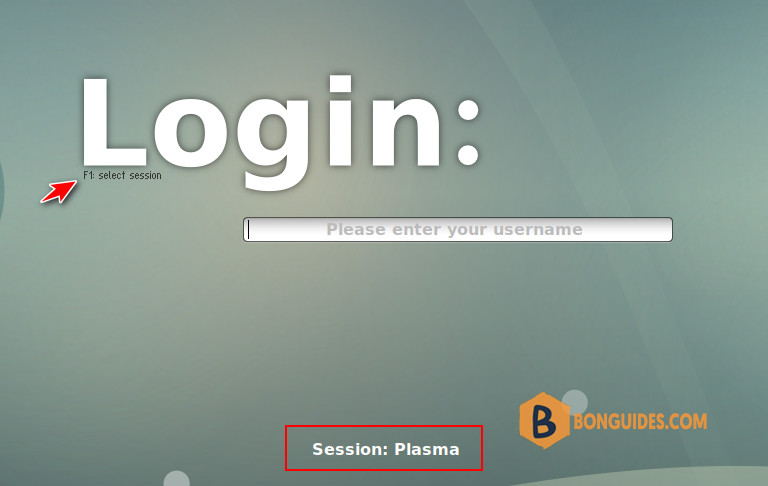
If you install more than one desktop environment, you can switch between different GUIs from your display manager screen. Slim, for example, lets you cycle through the installed environments by pressing repeatedly. The name of the currently toggled environment is visible at the bottom of the screen.

Log in once you toggle the GUI you want to use.

Removing the GUI and Display Manager

To revert to the command line interface and remove the packages related to the display manager and the desktop environments:

Open the terminal, and enter:

sudo apt remove [display-manager] [desktop-environment]

For example, to remove SLiM and LXDE, type:

sudo apt remove slim lxde -y

Reboot the system and log back in.

3. Finish by removing orphaned or unnecessary dependencies with autoremove:

sudo apt autoremove
ADVERTISEMENT
5/5 - (1 vote)
Previous Post

Black Screen Remote Desktop to Ubuntu from Windows with XRDP

Next Post

How to Create a New Sudo User on Ubuntu Linux Server

Related Posts

Running Hyper-V and VMware Workstation on The Same Machine

August 15, 2024

How to Uninstall All Autodesk Products At Once Silently

July 29, 2024
Ftr5

How to Uninstall the Autodesk Genuine Service on Windows

July 29, 2024
Ftr19

How to Fix Windows Cannot Read the ProductKey From the Unattend Answer File in VirtualBox

July 26, 2024
Ftr25

How to Update Windows Terminal in Windows 10/11

July 26, 2024

How to Disable The Beep Sound in WSL Terminal on Windows

July 26, 2024

Leave a Reply Cancel reply

Your email address will not be published. Required fields are marked *

Recent Posts

  • How To Turn On uBlock Origin Extension in Chrome (2025)
  • Images Hidden Due To Mature Content Settings In CivitAI
  • Azure OpenAI vs Azure AI Hub, How to Choose the Right One for Your Needs

Categories

Stay in Touch

Discord Server

Join the Discord server with the site members for all questions and discussions.

Telegram Community

Jump in Telegram server. Ask questions and discuss everything with the site members.

Youtube Channel

Watch more videos, learning and sharing with Leo ❤❤❤. Sharing to be better.

Newsletter

Join the movement and receive our weekly Tech related newsletter. It’s Free.

General

Microsoft Windows

Microsoft Office

VMware

VirtualBox

Technology

PowerShell

Microsoft 365

Microsoft Teams

Email Servers

Copyright 2025 © All rights Reserved. Design by Leo with ❤

No Result
View All Result
  • Home
  • Linux
  • Intune
  • macOS
  • VMware
  • VirtualBox
  • Powershell
  • Windows 10
  • Windows 11
  • Microsoft 365
  • Microsoft Azure
  • Microsoft Office
  • Active Directory

No Result
View All Result
  • Home
  • Linux
  • Intune
  • macOS
  • VMware
  • VirtualBox
  • Powershell
  • Windows 10
  • Windows 11
  • Microsoft 365
  • Microsoft Azure
  • Microsoft Office
  • Active Directory