Table of Contents
Globally Change the Font in a WordPress Site
WordPress Templates have a default font applied to them. When you want to change the font globally throughout the site, you will need to edit the CSS that applies to that theme.
The change can be made in the styles.css file, but subsequent updates to the theme will remove the modification. You would have to create a child theme to avoid the losing when update the theme.
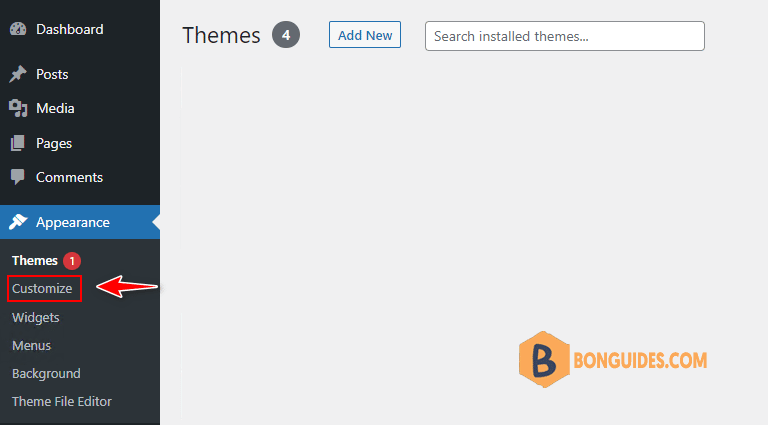
1. Head to the WordPress admin area. Then, go to Appearance | Customize.

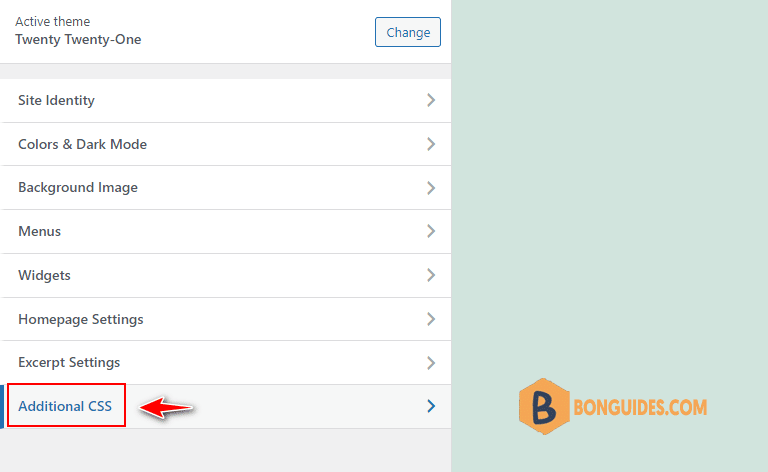
2. Scroll down until you find the option for Additional CSS. Click on this option to proceed.

3. Scroll down the left-hand side of the page and find the field to add the additional CSS code, then add your font family code. Here’s an example of the code you can add:
* {font-family:'Roboto', Courier, monospace}
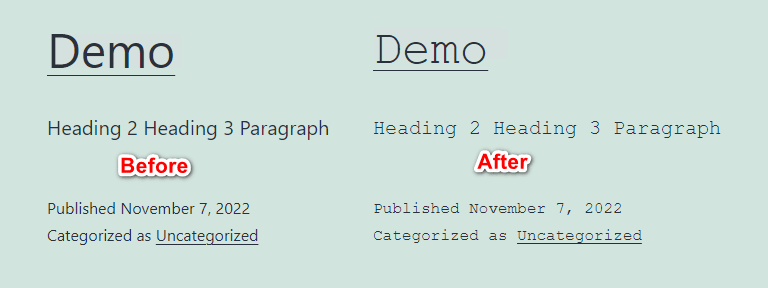
Effect of changing global font displayed.

Note: When you’re adding or changing fonts to a website you will need to be familiar with the fonts that are available to you. Some fonts require additional code before you can use them. For example, Google Fonts use an API that you need to reference in your HTML code before you can use them. Read more: How to Add a Custom Font into Your WordPress Website.
Not a reader? Watch this related video tutorial:


