Table of Contents
Disable Auto Suspend of VM on VMWare
You have noticed an annoying feature in the VMWare Workstation hypervisor. If you don’t use a virtual machine for some time, it is automatically suspended by the built-in Auto-Suspend feature. To continue using the VM, you have to click the Resume this virtual machine button.
Automatically suspend feature is enabled by default in VMWare Workstation Player/Fusion. It allows to save host resources by automatically freezing the VM state without shutting it down.

VMWare Workstation can suspend the VM automatically or when it detects that a guest OS is in sleep/hibernate mode. For example, Windows 10 puts the device into sleep mode after 30 minutes of inactivity.
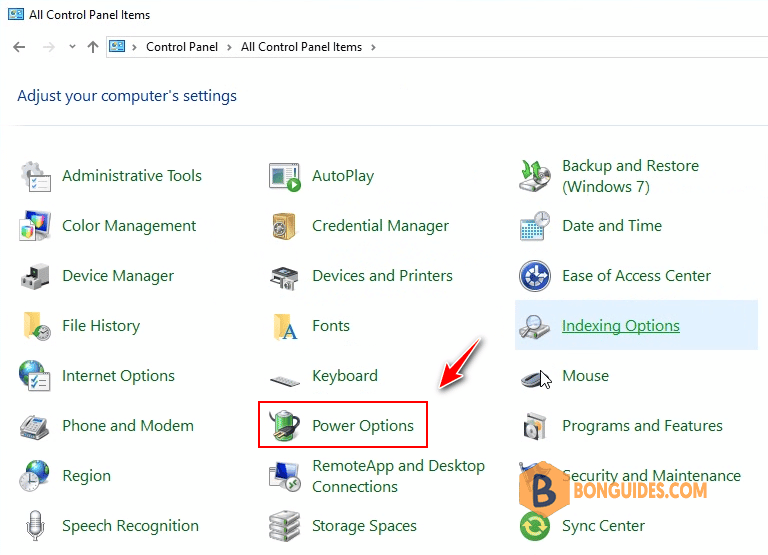
1. Start your Windows VM then open Control Panel | Navigate to the Power Options.
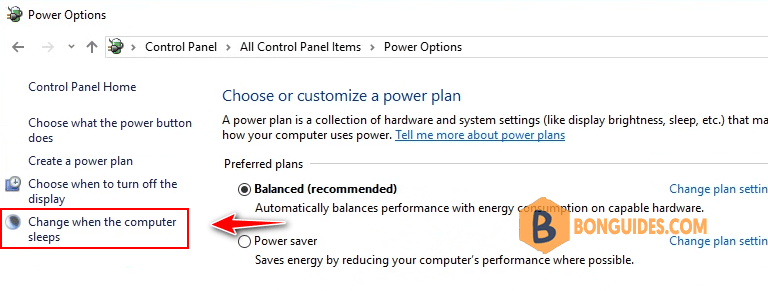
2. Select Change when the computer sleeps option in the left side.
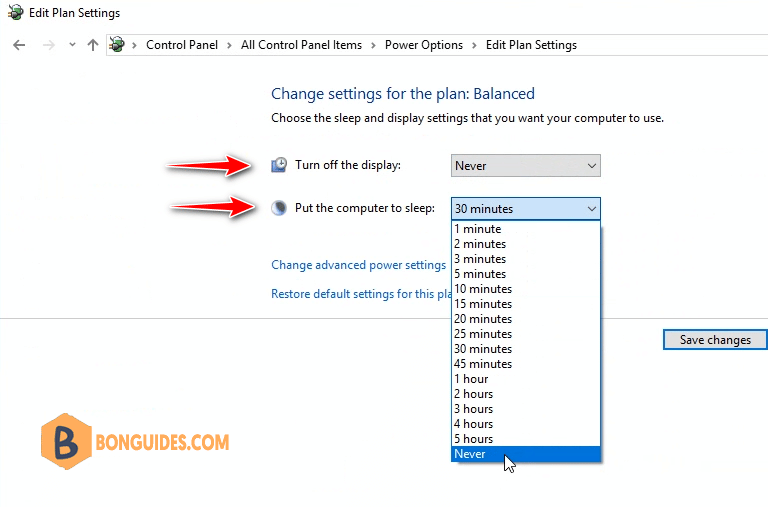
3. Change the Turn off the display and Put the computer to sleep to Never to stop auto suspend.
Disable Auto Suspend using configuration file
Alternatively, you can prevent a hypervisor from suspending the specific VM in VMX config file settings.
1. Shutdown the virtual machine.
2. Find the path to its VMX configuration file in the VM properties.

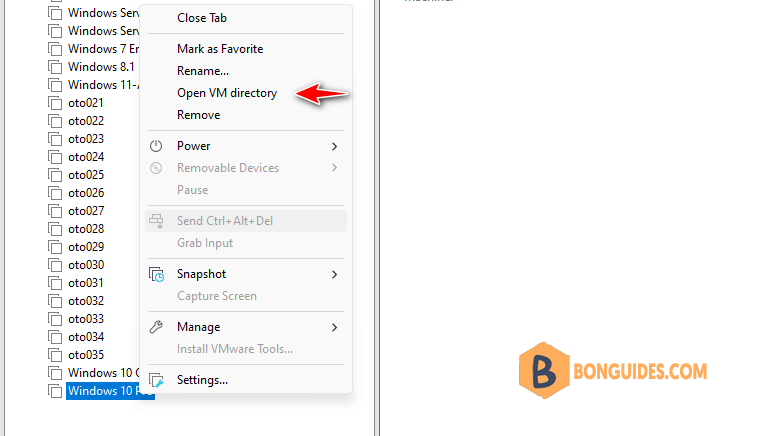
Or you can right click on the VM then select Open VM directory.
3. Open the VMX file in any text editor and add the line suspend.disabled = “TRUE” to the end of the file. Then save it.
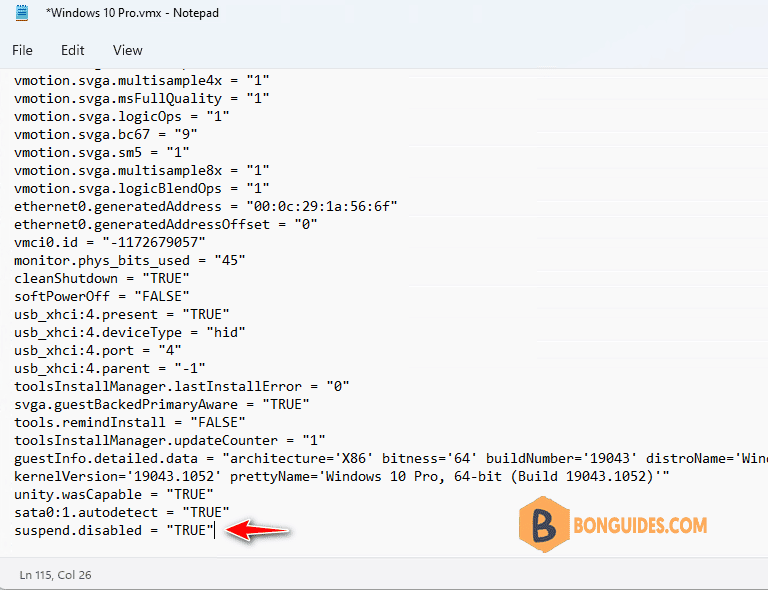
4. Start the VM and make sure that your VMWare Workstation hypervisor no longer suspends the VM.
Add-Content "H:\Windows 10 Pro\Windows 10 Pro.vmx" 'suspend.disabled = "TRUE"'Make sure that the line was successfully added to the VM VMX file:
Get-Content "H:\Windows 10 Pro\Windows 10 Pro.vmx" | Select-String "suspend"PS C:\Users\admin> Get-Content "H:\Windows 10 Pro\Windows 10 Pro.vmx" | Select-String "suspend"
powerType.suspend = "soft"
suspend.disabled = "TRUE"


