Table of Contents
Access Multi-Factor Authentication settings
You can access a web page with the MFA status for all users in four ways:
Disable MFA for a user using Entra ID
1. Visit this link then login using Global Admin account https://account.activedirectory.windowsazure.com/UserManagement/MultifactorVerification.aspx?BrandContextID=O365
Disable MFA for a user using Microsoft 365 admin center
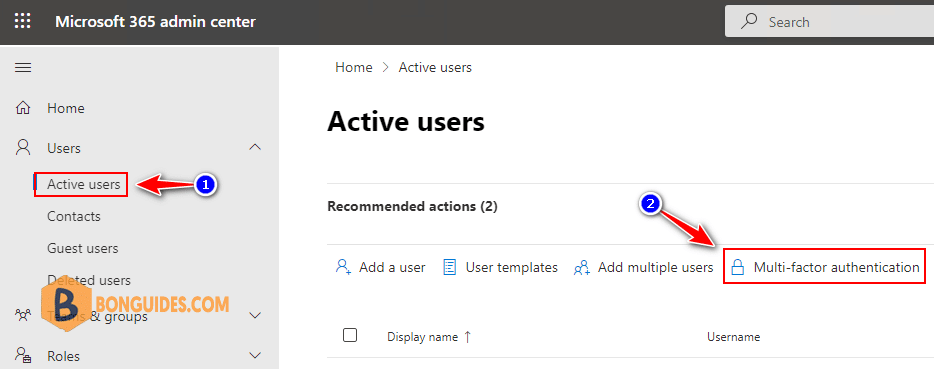
2. Login into Microsoft 365 Admin Center -> Active Users -> Multi-factor authentication.

Disable MFA for a user using Per-user MFA in Entra ID
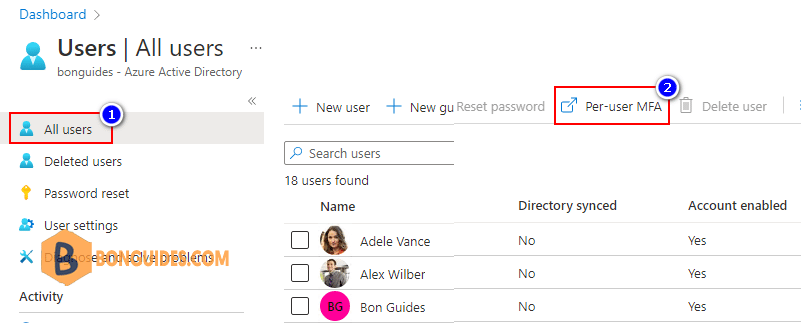
3. Azure Activte Directory | Users | Per-user MFA.

Disable MFA for a single user
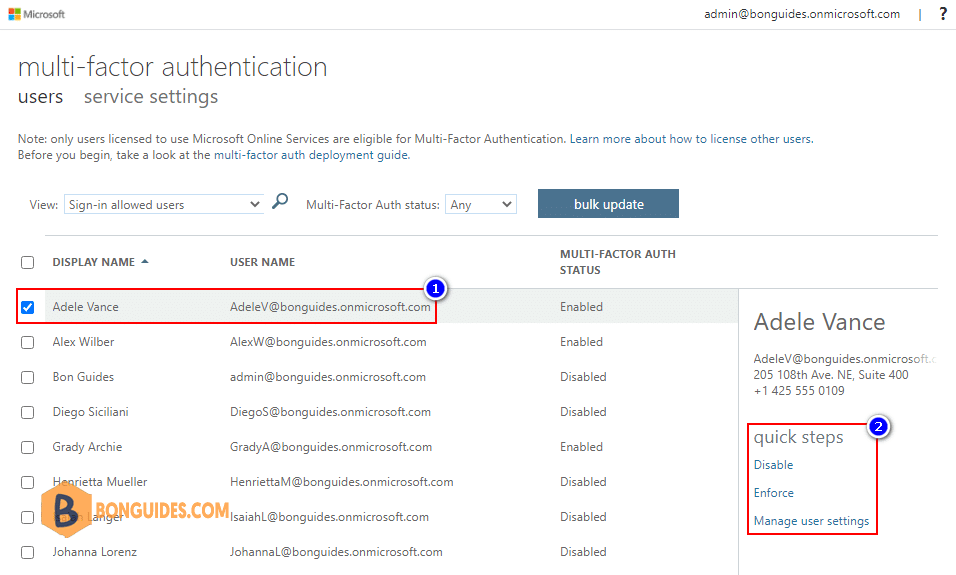
You will see a list of all users in your tenant and the MFA status for each of them. Available MFA statuses are:
- Disabled – multi-factor authentication is disabled (by default, for all new users);
- Enabled – MFA is enabled, but a user is still using standard authentication until they select the MFA method themselves;
- Enforced – a user will be forced to register a second MFA factor at the next logon.
You can enable, disable, reset, or configure MFA for each user using buttons in the Quick Steps panel on the right.

Disable MFA for a user using PowerShell
PS C:\> Connect-MsolService2. Disable MFA for a sing user.
PS C:\> Get-MsolUser -UserPrincipalName "[email protected]" | Set-MsolUser -StrongAuthenticationRequirements @()3. Optional: Disable MFA for all account:
PS C:\> Get-MsolUser -All | Set-MsolUser -StrongAuthenticationRequirements @()
5/5 - (2 votes)


