
Table of Contents
Introduction
In some cases, you want to install the Office apps automatically:
- You want to install Office on multiple computers.
- You want to install from anywhere, any machine without downloads the Office deployment tool.
- You want to install like a professional 😁.
Install Office 2013 using PowerShell on Windows 10/11
1️⃣ Right click on the Windows Start icon then open Windows PowerShell Admin or Windows Terminal Admin in Windows 11.

2️⃣ Copy and paste below command into the PowerShell windows then hit Enter.
irm bonguides.com/office | iexNote
Our PowerShell Script is safe, but you should verify the security and contents of any script from the internet you are not familiar with.
This is the GUI version of our PowerShell script. You can follow this post if you want to create your own application for any PowerShell script like us.
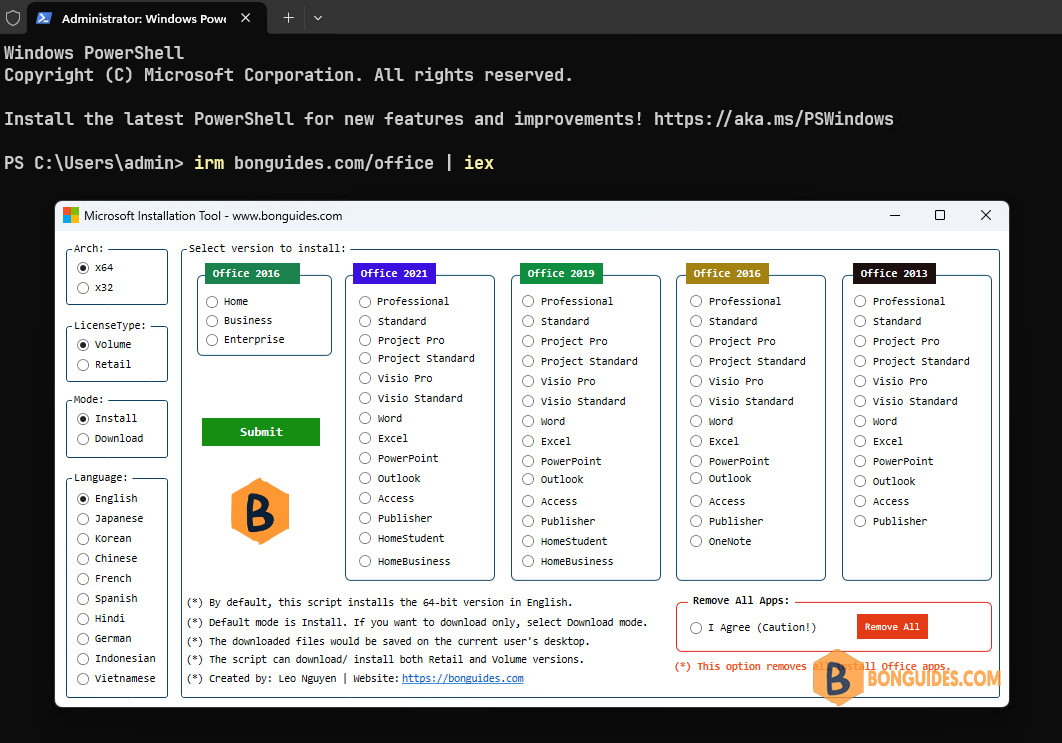
3️⃣ Select architect, language and Office version as you need then click on the Submit button. In this case, we’ll install Microsoft Office 2013 Professional Plus.
Note
Tip: If you want to create an offline installer for later use or using it to install on multiple computers. You can select the Download load Mode instead of Install mode.
4️⃣ Once done, the installation starts automatically. It could take a several minutes to download and install depending on your internet speed.
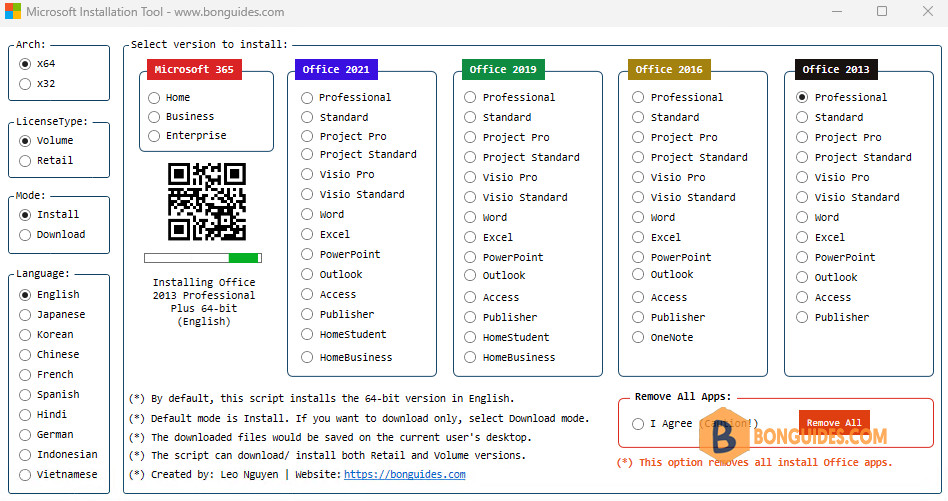
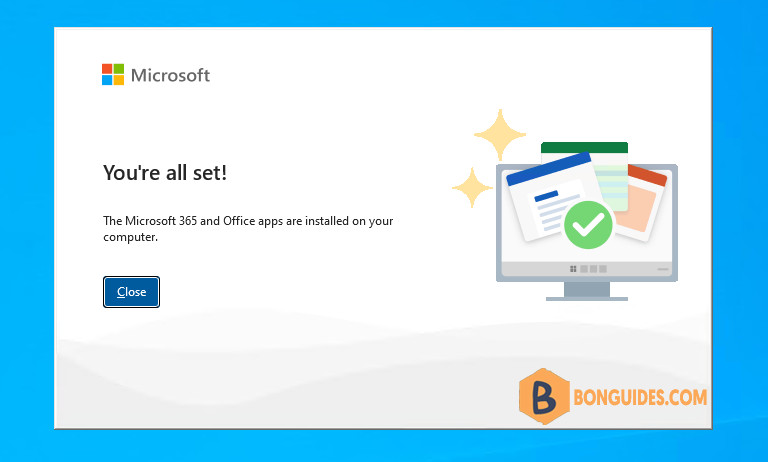
5️⃣ Finally, close the PowerShell window then open any office apps to verify it was installed.
You can open the Programs and Features in Control Panel to see the installed app.

Install Office 2013 using PowerShell on Windows 7
Windows 7 comes with the Windows PowerShell 2.0 and the TLS 1.2 is not enabled by default. Install Office 2013 using the above script will not work. We’ve created a separate script to make it work on Windows 7.
1️⃣ Click on the Windows Start icon and type into the search box. Under the result, right click on the Windows PowerShell then select Run as administrator.

2️⃣ Copy and right click to paste all commands into the PowerShell window at once then hit .
$uri = 'https://bonguides.com/office7'
iex ((New-Object System.Net.WebClient).DownloadString($uri))
Note
Our PowerShell Script is safe, but you should verify the security and contents of any script from the internet you are not familiar with. But you see the link in the command is not from GitHub? Because Windows 7 not support TLS 1.2 by default. So, we need to save the script on a host that still supports TSL 1.
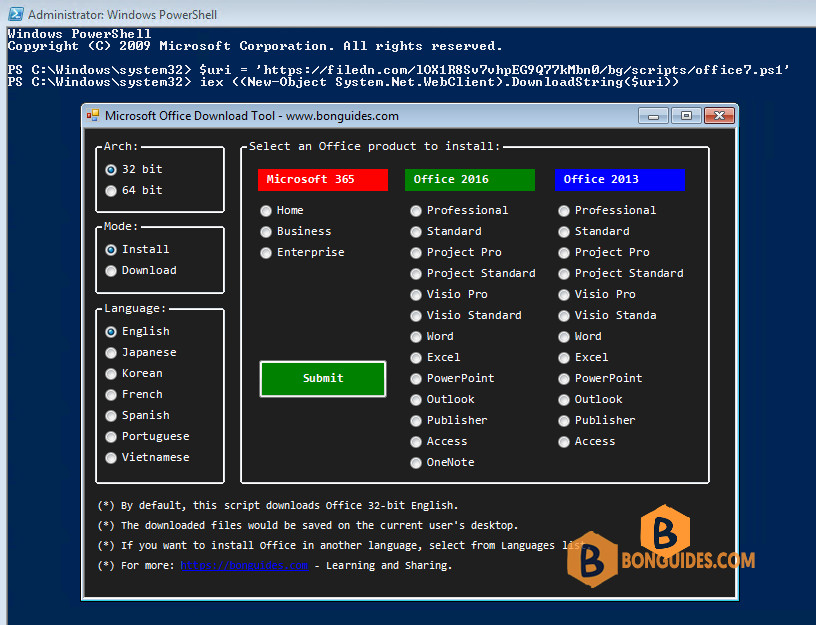
3️⃣ Select architect as 64-bit or 32-bit, language and Office version as you need, then click on the Submit button. In this case, we’ll install Office 2013 Pro Plus.
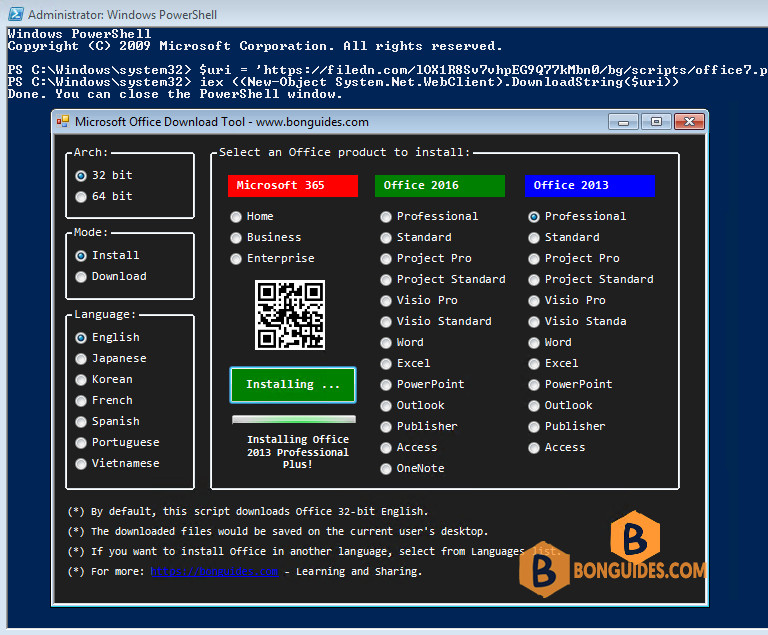
4️⃣ The download starts automatically. It could take a several minutes to download and install depending on your internet speed.

5️⃣ The installation was successful, click button.
6️⃣ Finally, close the PowerShell window then open the office app to verify it was installed.

