Table of Contents
Security Default in Microsoft 365
Security Defaults are a set of policies that are enabled by default for Microsoft 365 accounts to provide increased account and organizational security. These settings include using Multi-Factor Authentication (MFA) for logins, disabling legacy mail protocols (IMAP, POP3, and SMTP), etc. In some cases, the Microsoft 365 administrator needs to turn off the Security Defaults settings in Microsoft 365 tenants:
- You want to enable MFA for a specific accounts instead of all users in your organization.
- You want to allow to sending email using SMTP AUTH from apps or printers without modern authentication support.
If your tenant was created on or after October 22, 2019, security defaults may be enabled in your tenant. To protect all of our users, security defaults are being rolled out to all new tenants at creation.
But Security Defaults does not support app password, so you should disable it then using Per-user MFA instead.
Enable or disable Security Defaults
You can enable or disable Security Defaults in your Azure tenant settings:
1️⃣ Open the Microsoft Entra admin center and log in with an Azure or Microsoft 365 tenant Global Administrator account.
2️⃣ Expand Identity | Select Overview the select Properties.
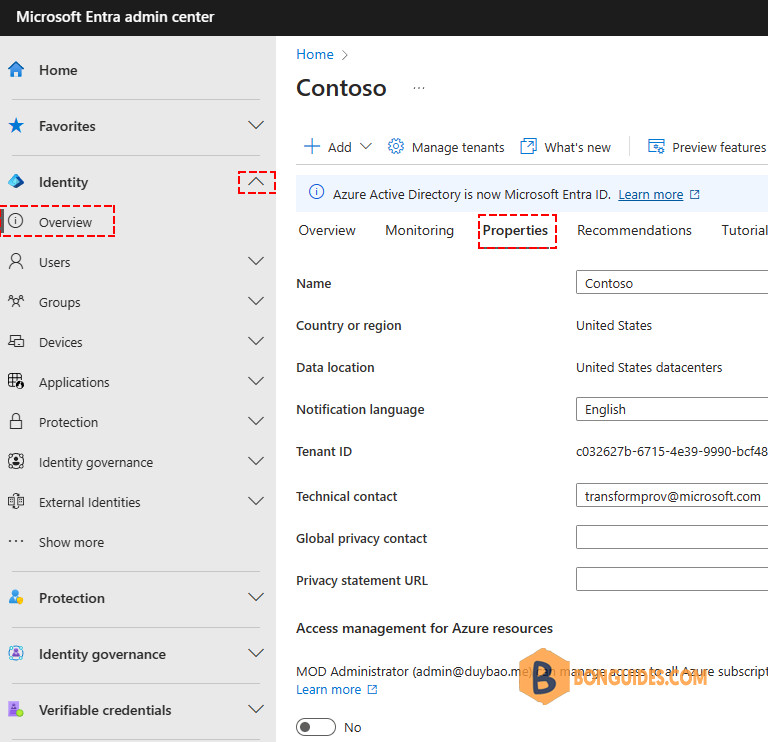
3️⃣ At the very bottom of the tenant settings page, click on the Manage Security Defaults link.
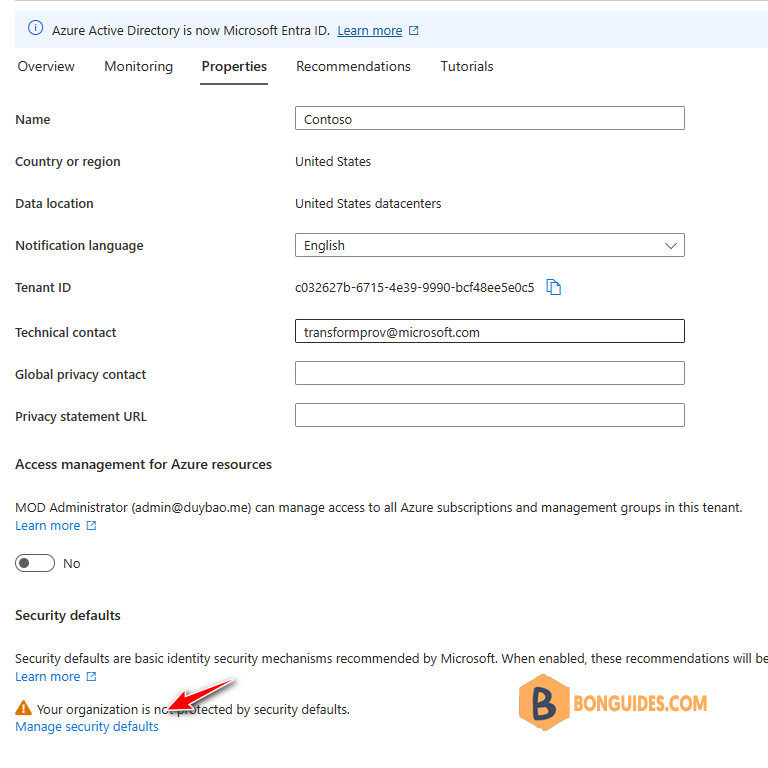
4️⃣ You will see a window in which only one Enable Security defaults (Yes/No) switch is available.
Security Defaults are enabled by default for all new Azure (Microsoft 365) tenants. If you want to disable Security Defaults, select No, and walk through a small Microsoft survey then Save the changes.
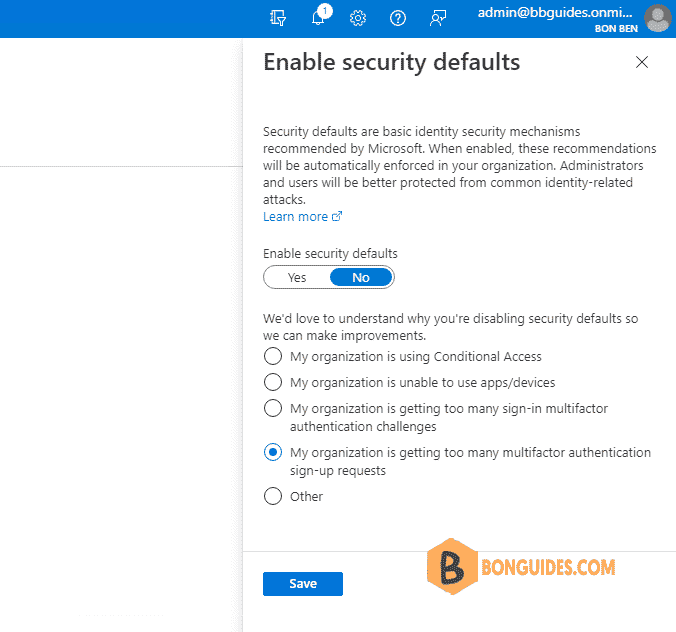
Now users will no longer be prompted to configure the MFA when sign-in.
Enable MFA for users using Per-user MFA
You can enable each account for per-user Entra ID Multi-Factor Authentication. When users are enabled individually, they perform multi-factor authentication each time they sign in (with some exceptions, such as when they sign in from trusted IP addresses or when the remember MFA on trusted devices feature is turned on).
1️⃣ To view and manage user states, complete the following steps to access the Azure portal or Microsoft admin center.
Sign in to the Azure portal as a Global administrator | Search for and select Azure Active Directory | then select Users > All users | Select Per-user MFA.
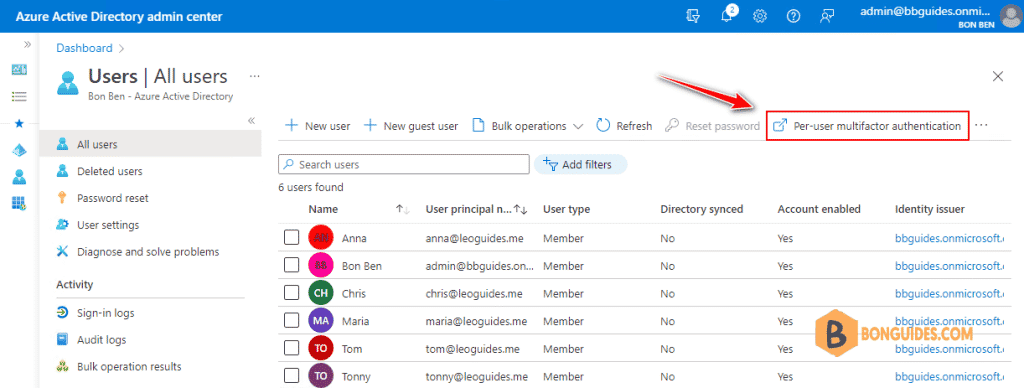
In the Microsoft 365 admin center, in the left nav choose Users > Active users. On the Active users page, choose Multi-factor authentication.
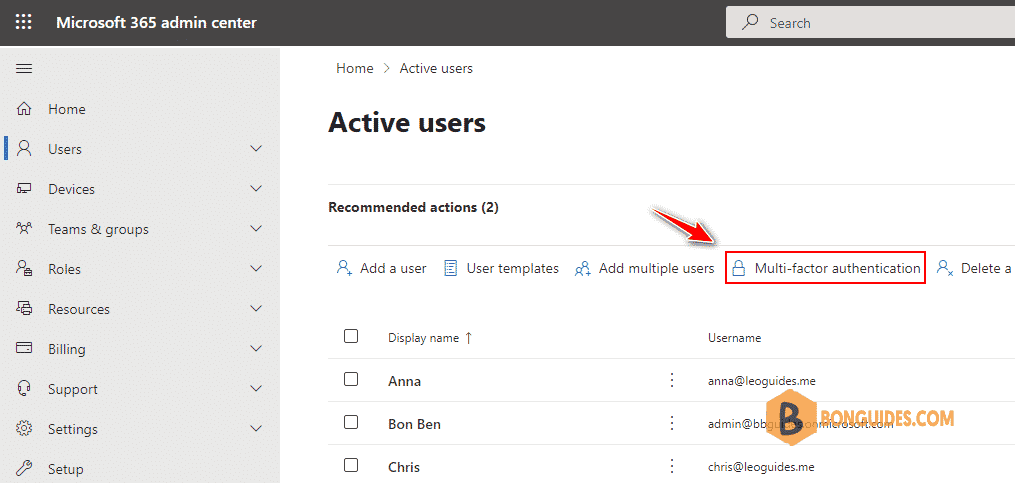
Alternatively, you can visit https://aka.ms/mfaportal to go to the legacy multi-factor authentication portal directly.
2️⃣ A new page opens that displays the user state, as shown in the following example.
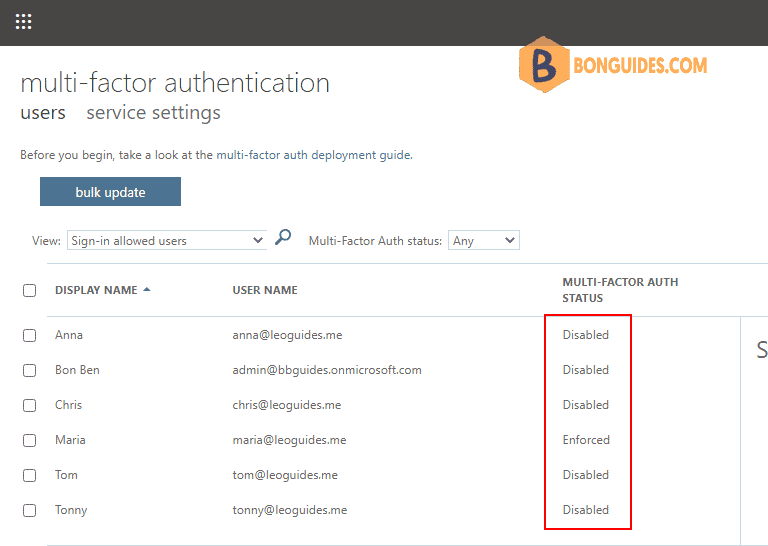
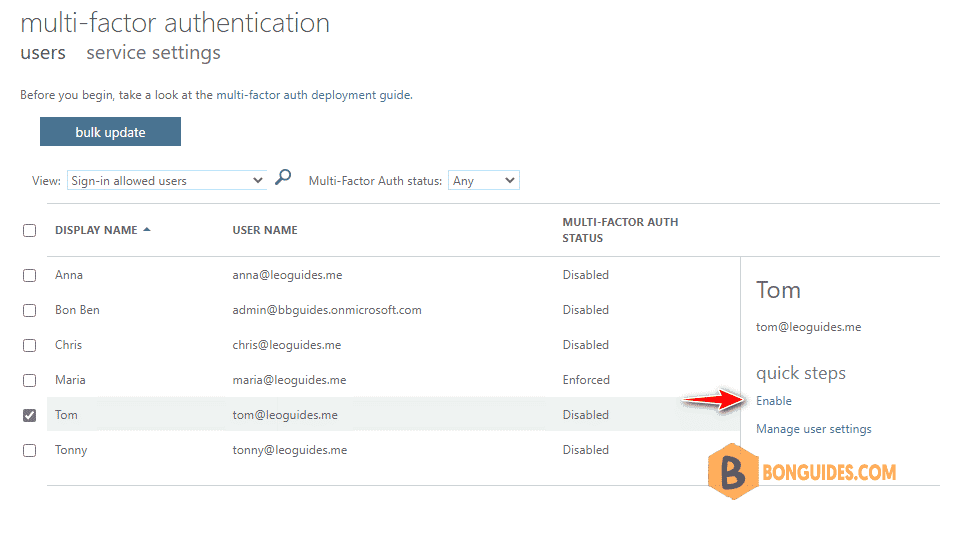
3️⃣ Find then select the user you want to enable for per-user Entra ID Multi-Factor Authentication. You might need to change the view at the top to users.
On the right-hand side, under quick steps, choose Enable or Disable. In the following example, the user Tom has a check next to their name and is being enabled for use:
4️⃣ After you enable users, notify them via email. Tell the users that a prompt is displayed to ask them to register the next time they sign in. Also, if your organization uses non-browser apps that don’t support modern authentication, they need to create app passwords.
Not a reader? Watch this related video tutorial:


