Table of Contents
Windows Hello for Business
If you join your device to Entra ID by using the Access work or school settings, the device by default will be automatically registered with Windows Hello for Business support aka Windows Hello for Business provisioning.
Then you will be prompted during the first login with your Entra ID (Microsoft 365) account to set up Windows Hello for Business as follows.
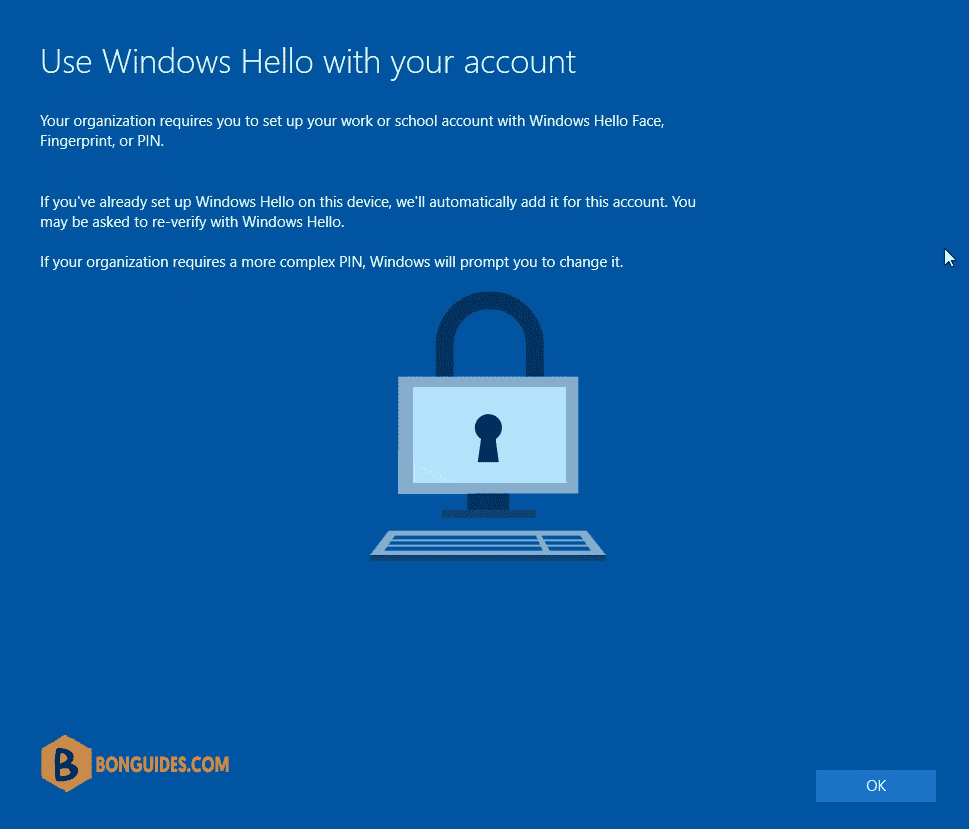
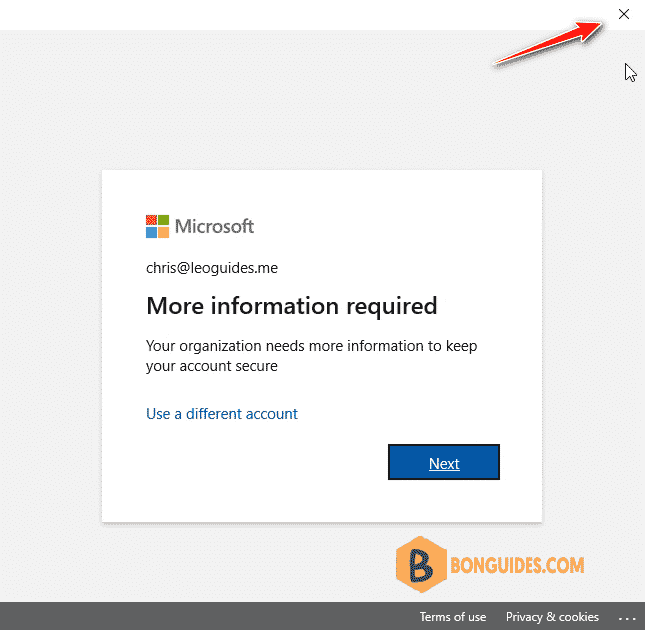
If you do not want to use Windows Hello for Business, you can click on the OK button above, after that you will be prompted with the dialog below to enter your username and password again. That dialog you have to close and click it away to be able to skip the set up of Windows Hello for Business as follows.
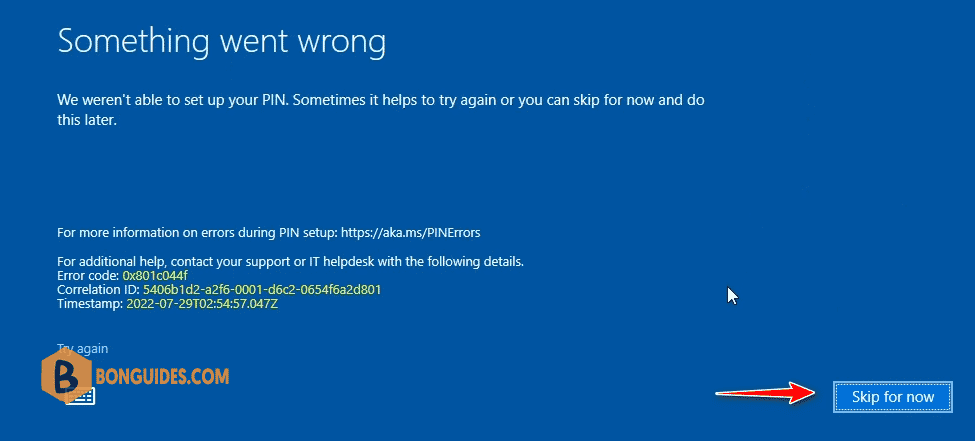
Now you can click on Skip for now and as it implies, unfortunately the next time you logon to your device it will appear again.
Disable Windows Hello for Business by using PowerShell
1️⃣ Right click on Windows Start icon then select Windows PowerShell Admin. In Windows 11, select Windows Terminal Admin instead.
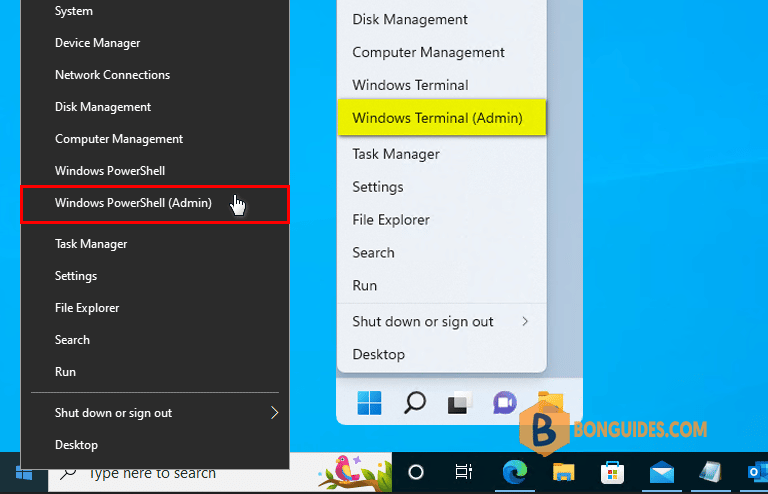
2️⃣ Copy then paste all the below commands into the PowerShell window at once then hit Enter. Once done, restart your computer to verify it works.
#Disable pin requirement
$path = "HKLM:\SOFTWARE\Policies\Microsoft"
$key = "PassportForWork"
$name = "Enabled"
$value = "0"

New-Item -Path $path -Name $key –Force
New-ItemProperty -Path $path\$key -Name $name -Value $value -PropertyType DWORD -Force

#Delete existing pins
$passportFolder = "C:\Windows\ServiceProfiles\LocalService\AppData\Local\Microsoft\Ngc"

if(Test-Path -Path $passportFolder)
{
Takeown /f $passportFolder /r /d "Y"
ICACLS $passportFolder /reset /T /C /L /Q

Remove-Item –path $passportFolder –recurse -force
}
Disable Windows Hello for Business by using a Group Policy
Another way to disable Windows Hello for Business is by using a Group Policy.
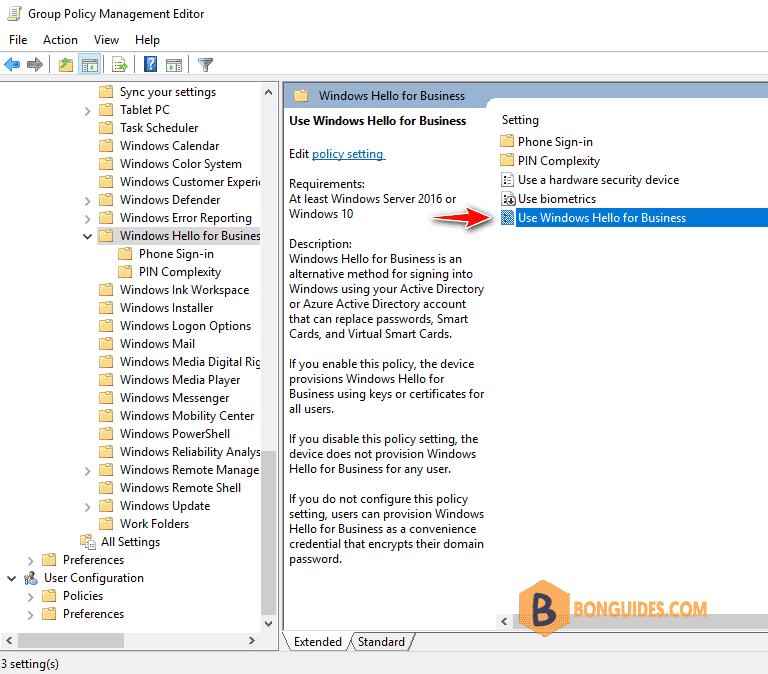
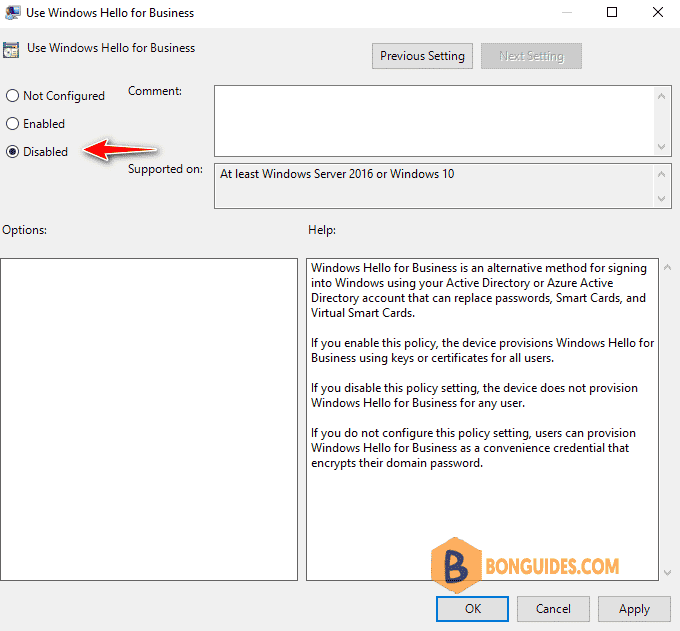
Use Windows Hello for Business select Disabled.
Disable Windows Hello for Business by using Microsoft Intune
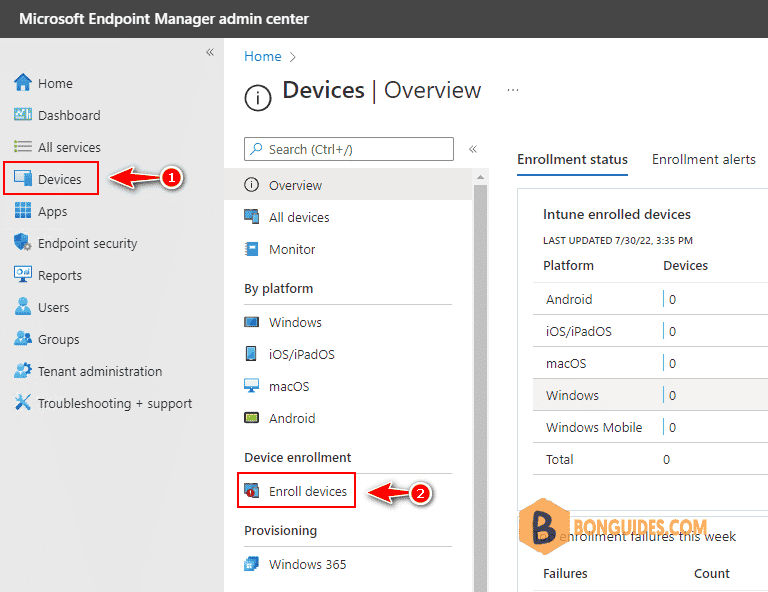
1️⃣ To disable Windows Hello for Business we can also use Microsoft Intune which we will find in the Microsoft Endpoint Manager admin center portal.
2️⃣ Select Device tab then select Enroll devices under Device enrollment section.
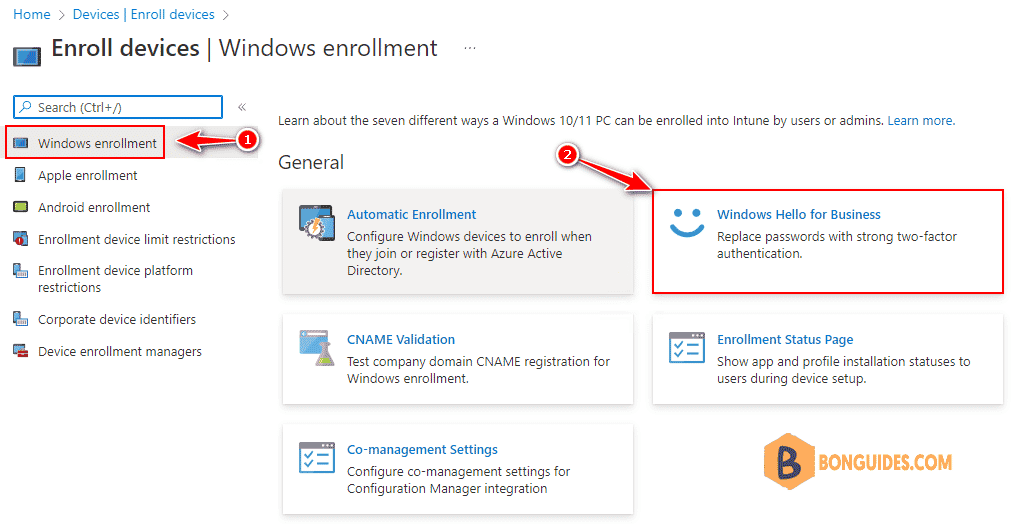
3️⃣ Select Windows enrollment then select Windows Hello for Business.
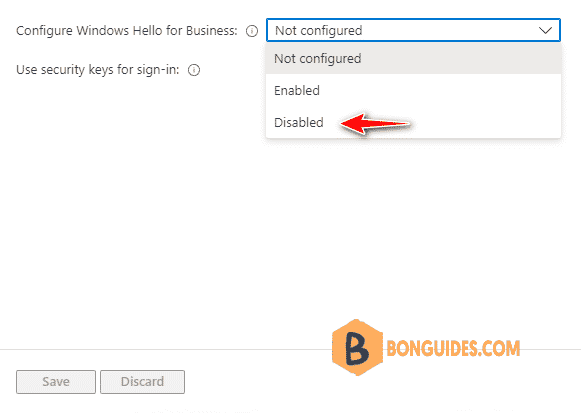
4️⃣ Here we can switch under Configure Windows Hello for Business from Not configured to Disabled.
- Enabled: Select this setting if you want to configure Windows Hello for Business settings. When you select Enabled, additional settings for Windows Hello are visible and can be configured for devices.
Disabled: If you don’t want to enable Windows Hello for Business during device enrollment, select this option. When disabled, users can’t provision Windows Hello for Business. When set to Disabled, you can still configure the subsequent settings for Windows Hello for Business even though this policy won’t enable Windows Hello for Business.
- Not configured: Select this setting if you don’t want to use Intune to control Windows Hello for Business settings. Any existing Windows Hello for Business settings on Windows 10 devices isn’t changed. All other settings on the pane are unavailable.
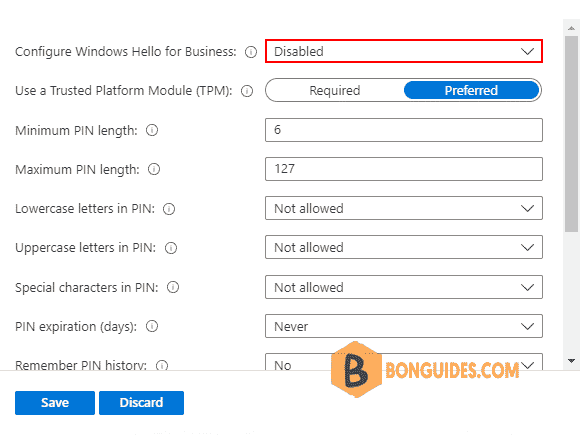
5️⃣ After changing from Not configured to Disabled, a bunch of detailed settings for Windows Hello appeared you can still configure for Windows Hello for Business even though this policy won’t enable Windows Hello for Business.
Not a reader? Watch this related video tutorial:


Hi,
great powershell command, it worked like a charm. Do you also have a command for re-enabling Windows Hello?