Table of Contents
If you’re looking for a way to check your website’s PHP configuration, also known as phpinfo. For example, you might want to check whether your PHP configurations meet the requirements of any software you want to run on your server.
<?php
phpinfo();
?>
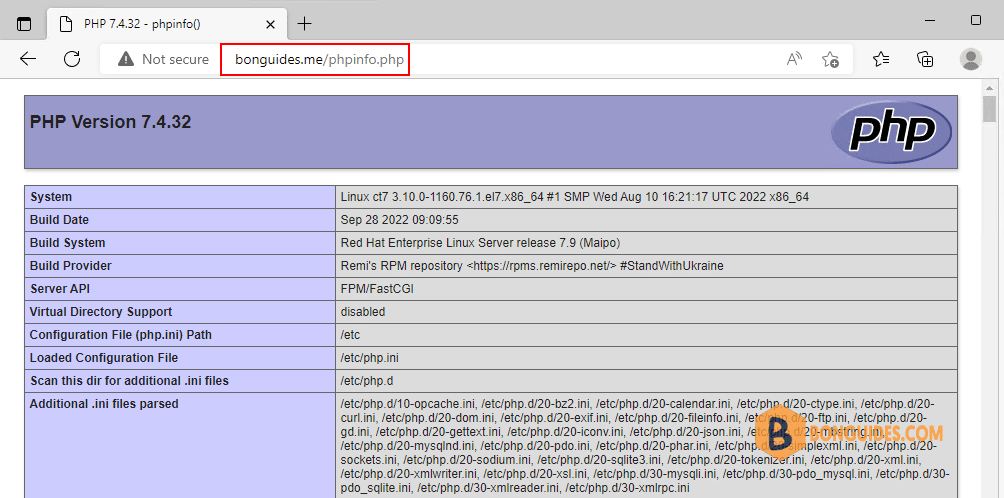
phpinfo() is a PHP function or a snippet of code that takes in one or more parameters and returns a value. Running phpinfo() will display information regarding your site’s PHP configuration, including:
- The current version of PHP your site is running.
- Your server information and environment.
- The PHP environment.
- Your Operating System (OS) version information.
- Paths, including the location of php.ini.
- Master and local values for PHP configuration options.
- HTTP headers.
- The PHP License.
- Modules and extensions currently in use.
In this post, we’ll show you how to create a phpinfo.php file and also how to check its detailed information.
Creating the phpinfo.php file through terminal
1. Connect to your VPS using SSH protocol.
2. Create a fine named phpinfo.php in the root directory of your website.
echo "<?php phpinfo(); ?>" > /var/www/bonguides.me/phpinfo.php# echo "<?php phpinfo(); ?>" > /var/www/bonguides.me/phpinfo.php
# ls -l /var/www/bonguides.me/
total 216
-rw-r--r--. 1 nginx nginx 405 Feb 6 2020 index.php
-rw-r--r--. 1 root root 20 Oct 28 20:52 phpinfo.php
-rw-r--r--. 1 nginx nginx 19915 Dec 31 2021 license.txt
-rw-r--r--. 1 nginx nginx 7401 Mar 22 2022 readme.html
-rw-r--r--. 1 nginx nginx 7165 Jan 20 2021 wp-activate.php
-rw-r--r--. 1 nginx nginx 2993 Oct 28 20:29 wp-config.php
drwxr-xr-x. 4 nginx nginx 52 Oct 17 17:10 wp-content
...3. Once done, your phpinfo page will become publicly available. This means you and anyone else can view it in a browser by appending /phpinfo.php to the end of your site’s domain.

Delete or Rename Your phpinfo Page
As we mentioned, because your phpinfo.php file was placed in your web root folder, it’s now publicly available. The problem with this is that some of the information the phpinfo() function returns is sensitive and could help a malicious hacker gain access to your server.
If you don’t want your phpinfo page to be displayed all the time, you can easily disable the file by giving it a different name. phpinfo.php_disabled, for instance.
Some people choose to rename their phpinfo page to help hide it from hackers. They use a random string of letters and numbers, for example, instead of phpinfo.php. However, this isn’t a guaranteed solution for preventing a security breach, so it’s best to simply create the page when needed and then delete it.
###Disable phpinfo function
mv /var/www/bonguides.me/phpinfo.php /var/www/bonguides.me/phpinfo.php_disabled

###Delete phpinfo file
rm -f /var/www/bonguides.me/phpinfo.php
# mv /var/www/bonguides.me/info.php /var/www/bonguides.me/info.php_disabled
# ll
total 216
-rw-r--r--. 1 nginx nginx 405 Feb 6 2020 index.php
-rw-r--r-- 1 root root 20 Oct 28 21:04 info.php_disabled
-rw-r--r--. 1 nginx nginx 19915 Dec 31 2021 license.txt
-rw-r--r--. 1 nginx nginx 7401 Mar 22 2022 readme.html
...Checking PHP Information using cPanel
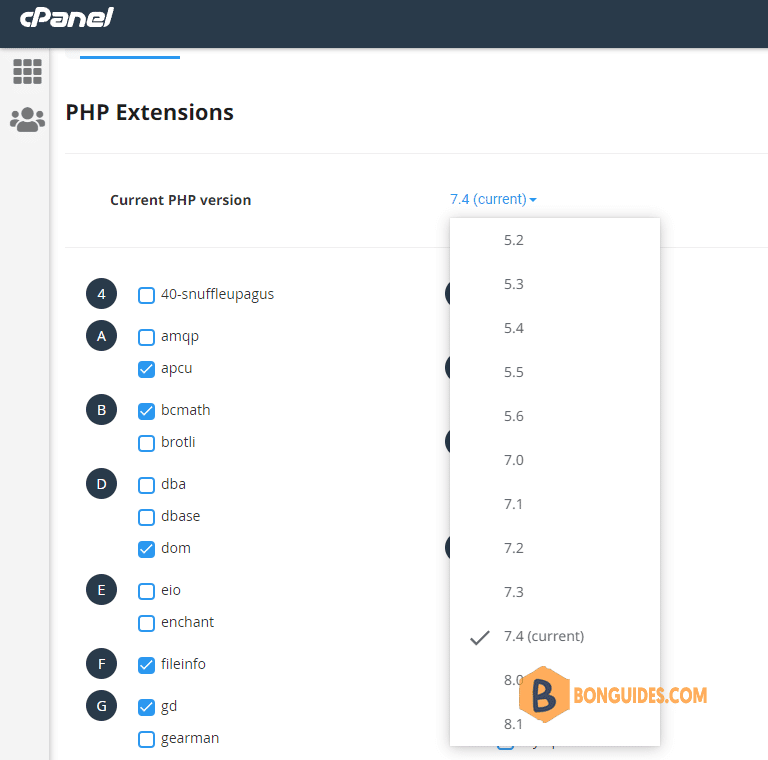
If you’re using a web hosting service, you’re already have a native tool to check PHP configuration. The below image shows the PHP configurations in cPanel.

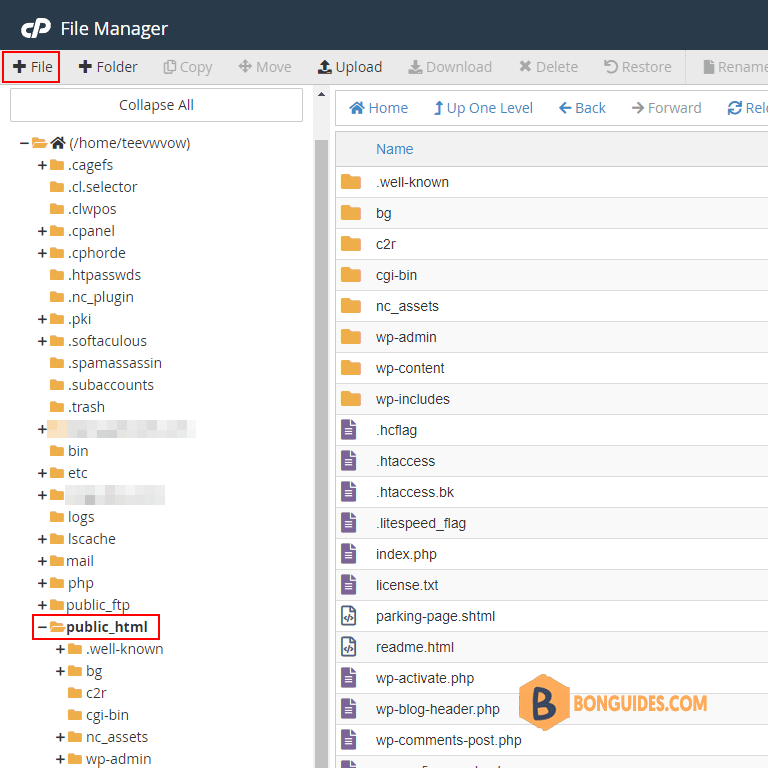
If you still need the phpinfo.php file, you can reach the same goal by creating a phpinfo.php file in your public_html directory using File Manager in cPanel.

Select the public_html folder then clicks create a new file.

Enter the php function, save the file then access your phpinfo.php page via your browser.

Create a phpinfo.php File and Upload It to Your Server
If you have a basic understanding of File Transfer Protocol (FTP) and how to use an FTP client, creating a phpinfo page is really quite simple. In the following sections, we’ve broken it down into three short steps.
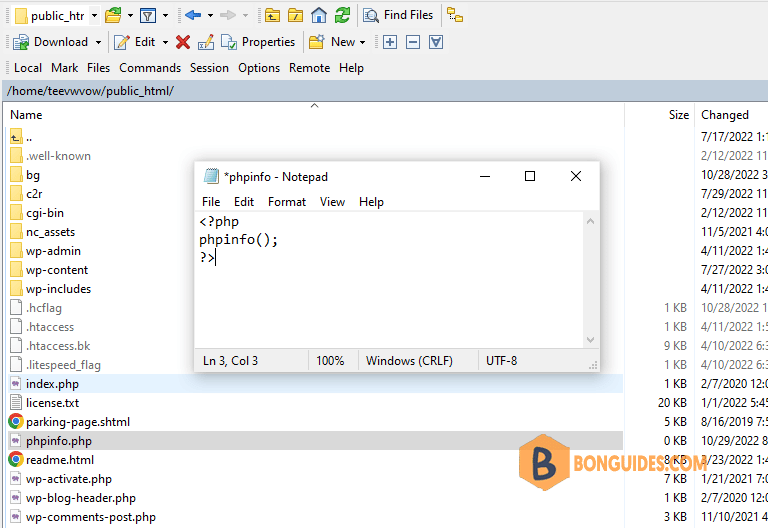
1. To start creating this page, open up your preferred text editor. In a new document, add the following line of code:
<?php
phpinfo();
?>
2. Next, open up WinSCP or another FTP client, and connect to your site’s server using your FTP credentials. Then, upload your new phpinfo.php file to the public_html folder:

You’ve now successfully added the phpinfo.php page to your site. In order to view the page, let’s appending /phpinfo.php to the end of your site’s domain.
Conclusion
By finishing this post, you’ve learned how to create a phpinfo.php file and how to check PHP information via your hosting control panel or your default browser.


