Learning and Sharing
  • Home
  • Blog
  • Linux
  • macOS
  • Virtualization
    • VMware
    • VirtualBox
  • Windows
    • Windows 11
    • Windows 10
    • Windows Server
  • Series
    • Symantec
    • Intune
    • Microsoft Azure
    • Powershell
    • VirtualBox
    • VMware
    • PowerShell Learning
    • Microsoft Graph
  • More
    • Auto Installation
    • AEC Installation
  • Contact
No Result
View All Result
No Result
View All Result

How to Create an Ubuntu Bootable USB Stick on Windows 10/11

November 2, 2022
in Blog, Linux
0
ADVERTISEMENT

Table of Contents

With a bootable Ubuntu USB stick, you can:

  • Install or upgrade Ubuntu.
  • Test out the Ubuntu desktop experience without touching your PC configuration.
  • Boot into Ubuntu on a borrowed machine or from an internet cafe.
  • Use tools installed by default on the USB stick to repair or fix a broken configuration.

This tutorial will show you how to create a bootable USB stick on Microsoft Windows using Rufus and balenaEtcher.

Requirements

  • A 4GB or larger USB stick/flash drive.
  • Microsoft Windows XP or later.
  • Rufus or baleanEtcher, they are free and open-source USB stick writing tool.
  • An Ubuntu ISO file. See Get Ubuntu for download links.

Create a bootable Ubuntu USB stick using Rufus

You just need download the portable version of Rufus instead of installed Rufus on your computer.

Bg2314

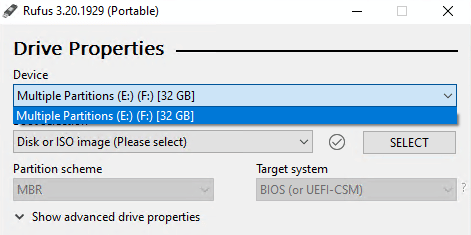
1. Launch Rufus, insert your USB stick. Rufus will update to set the device within the Device field then select the correct one from the device field’s drop-down menu.
Bg2315

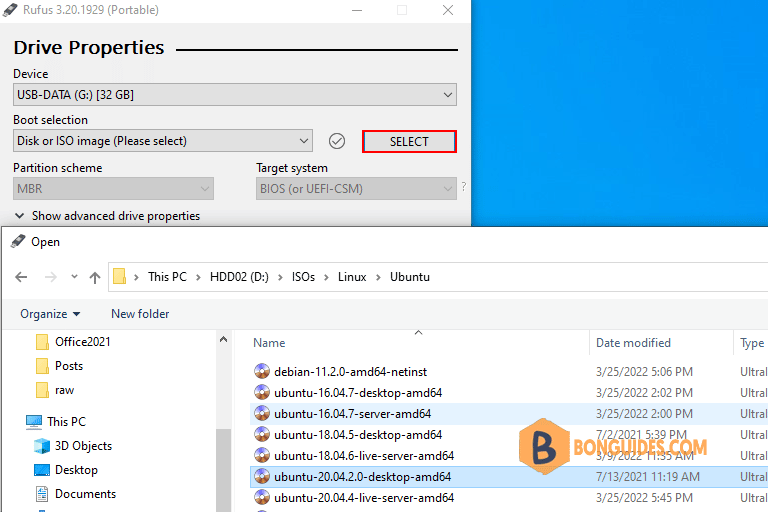
2. Select the Ubuntu ISO file you downloaded previously, click the to the right of Boot selection. then select the appropriate ISO file and click on Open.
Bg2316
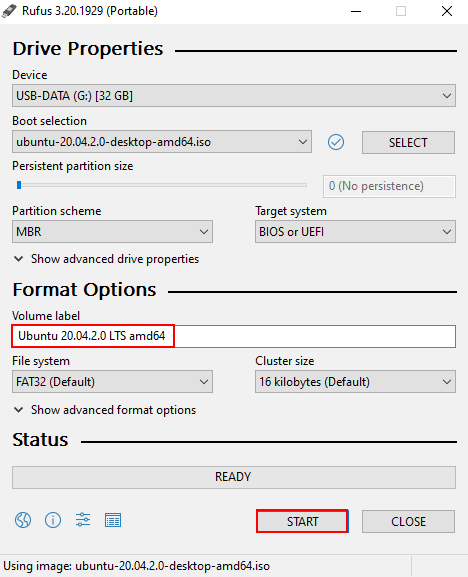
3. The Volume label will be updated to reflect the ISO selected. Leave all other parameters with their default values and click to initiate the write process.
Bg2317

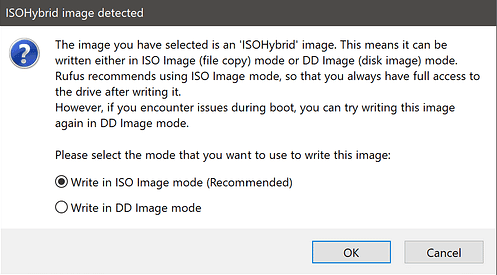
4. You will then be alerted that Rufus has detected that the Ubuntu ISO is an ISOHybrid image. This means the same image file can be used as the source for both a DVD and a USB stick without requiring conversion. Keep Write in ISO Image mode selected and click on OK to continue.
Bg2319

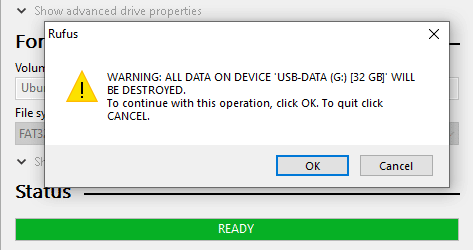
5. Rufus will also warn you that all data on your selected USB device is about to be destroyed. This is a good moment to double check you’ve selected the correct device before clicking OK when you’re confident you have.
Bg2320

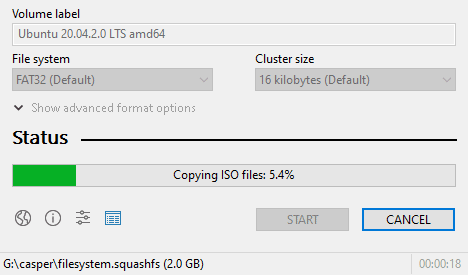
6. The ISO will now be written to your USB stick, and the progress bar in Rufus will give you some indication of where you are in the process. With a reasonably modern machine, this should take around 10 minutes. Total elapsed time is shown in the lower right corner of the Rufus window.
Bg2321

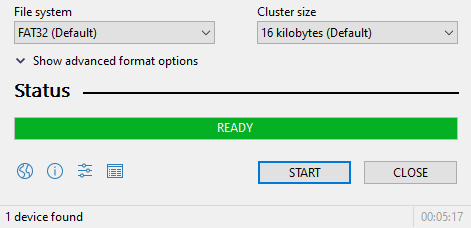
7. When Rufus has finished writing the USB device, the Status bar will be filled green and the word READY will appear in the center. Select CLOSE to complete the write process.
Bg2323

Congratulations! You now have Ubuntu on a USB stick, bootable and ready to go.

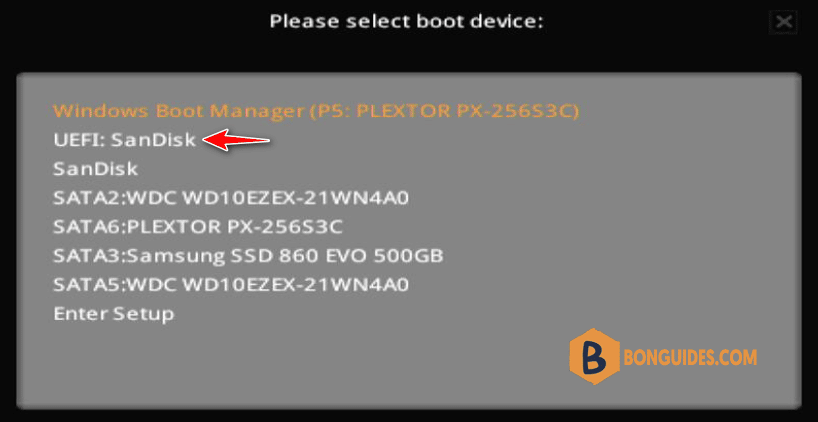
To use it you need to insert the stick into your target PC or laptop and reboot the device. It should recognize the installation media automatically during startup, but you may need to hold down a specific key (usually F12) to bring up the boot menu and choose to boot from USB.
Bg2330
ADVERTISEMENT

Create a bootable Ubuntu USB stick using balenaEtcher

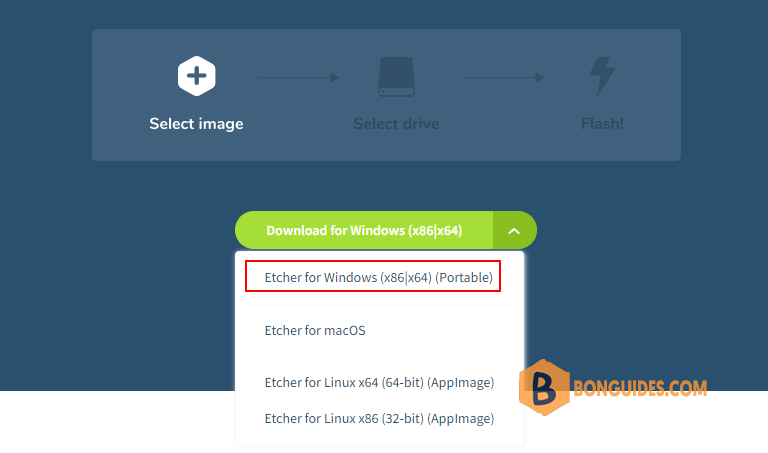
1. Visit balenaEtcher site then download the portable version of the tool.
Bg2322

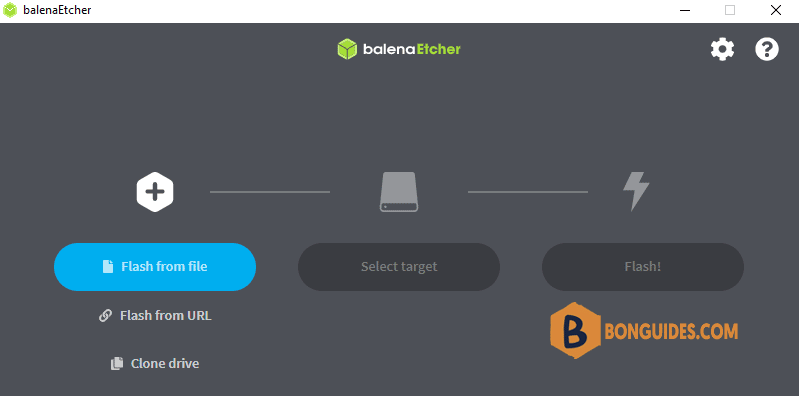
2. Open downloaded file to run balenaEtcher. First, click on the Flash from file button then select your iso of Ubuntu image.
Bg2324

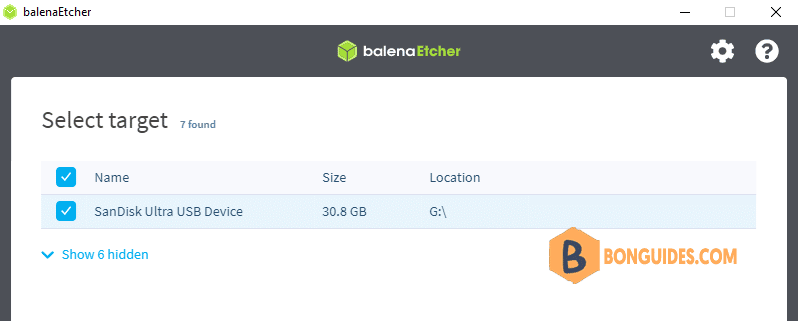
3. Next, select your USB stick to create a bootable drive.
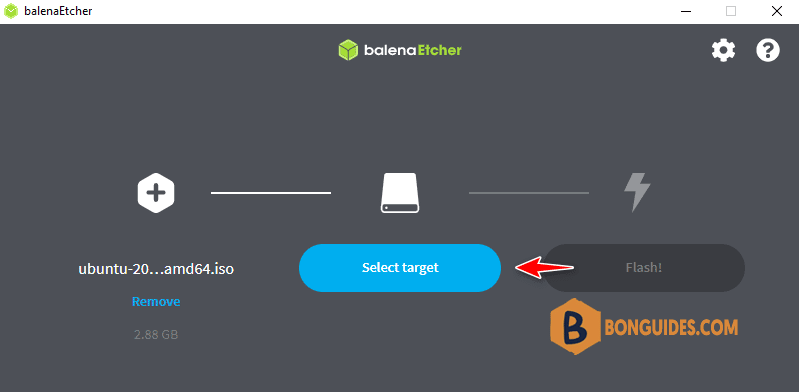
Bg2325
Bg2326
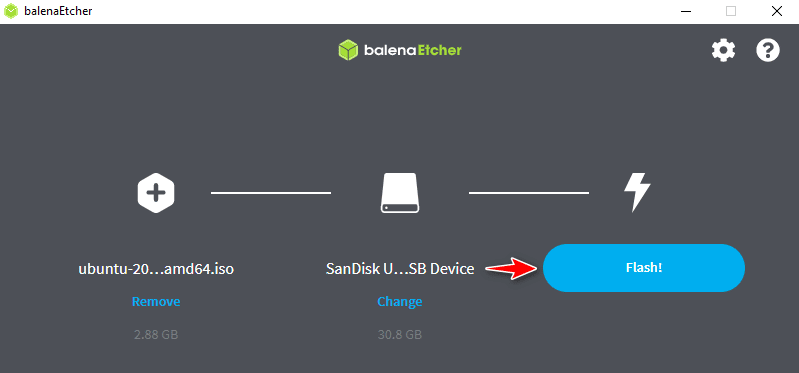
4. Finally, click on the button.
Bg2327

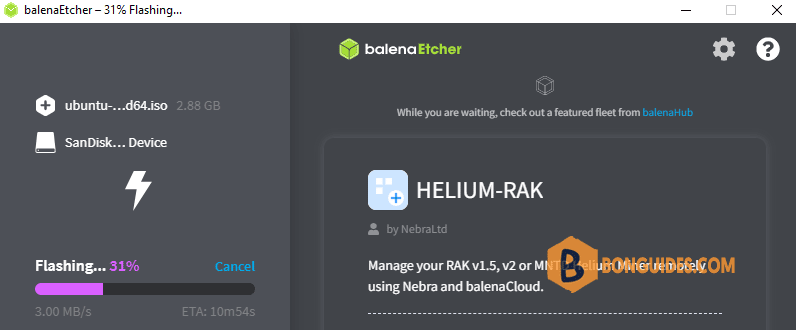
5. Creating an Ubuntu bootable USB stick, it could take several minutes to complete.
Bg2328

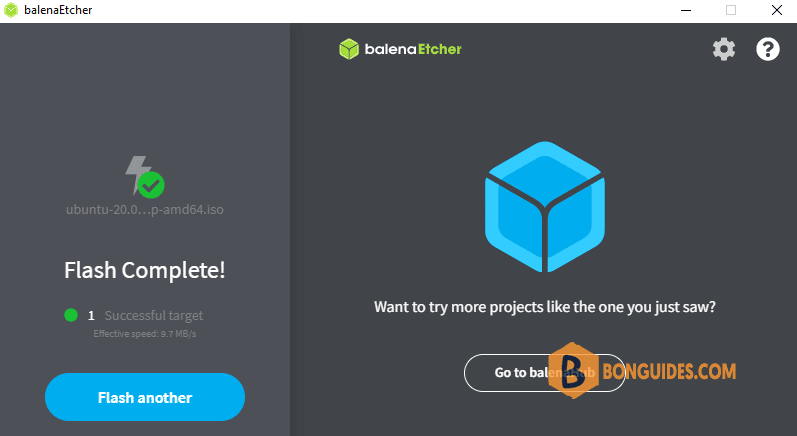
Congratulations! You now have Ubuntu on a USB stick, bootable and ready to go.
Bg2329
ADVERTISEMENT
5/5 - (1 vote)
Previous Post

How to Compare Files in Two Folders in Windows 10/11

Next Post

How to Create a macOS Bootable USB Stick on Windows 10/11

Related Posts

Running Hyper-V and VMware Workstation on The Same Machine

August 15, 2024

How to Uninstall All Autodesk Products At Once Silently

July 29, 2024
Ftr5

How to Uninstall the Autodesk Genuine Service on Windows

July 29, 2024
Ftr19

How to Fix Windows Cannot Read the ProductKey From the Unattend Answer File in VirtualBox

July 26, 2024
Ftr25

How to Update Windows Terminal in Windows 10/11

July 26, 2024

How to Disable The Beep Sound in WSL Terminal on Windows

July 26, 2024

Leave a Reply Cancel reply

Your email address will not be published. Required fields are marked *

Recent Posts

  • How To Turn On uBlock Origin Extension in Chrome (2025)
  • Images Hidden Due To Mature Content Settings In CivitAI
  • Azure OpenAI vs Azure AI Hub, How to Choose the Right One for Your Needs

Categories

Stay in Touch

Discord Server

Join the Discord server with the site members for all questions and discussions.

Telegram Community

Jump in Telegram server. Ask questions and discuss everything with the site members.

Youtube Channel

Watch more videos, learning and sharing with Leo ❤❤❤. Sharing to be better.

Newsletter

Join the movement and receive our weekly Tech related newsletter. It’s Free.

General

Microsoft Windows

Microsoft Office

VMware

VirtualBox

Technology

PowerShell

Microsoft 365

Microsoft Teams

Email Servers

Copyright 2025 © All rights Reserved. Design by Leo with ❤

No Result
View All Result
  • Home
  • Linux
  • Intune
  • macOS
  • VMware
  • VirtualBox
  • Powershell
  • Windows 10
  • Windows 11
  • Microsoft 365
  • Microsoft Azure
  • Microsoft Office
  • Active Directory

No Result
View All Result
  • Home
  • Linux
  • Intune
  • macOS
  • VMware
  • VirtualBox
  • Powershell
  • Windows 10
  • Windows 11
  • Microsoft 365
  • Microsoft Azure
  • Microsoft Office
  • Active Directory