Table of Contents
A virtual USB drive can be attached to virtual machines, virtual USB drives bear great resemblance to physical external hard drives in terms of functionality and their dependency on your computer’s memory.
How to make a virtual USB drive in Windows 11
1. Right click on the Windows Start icon then select Disk Management.
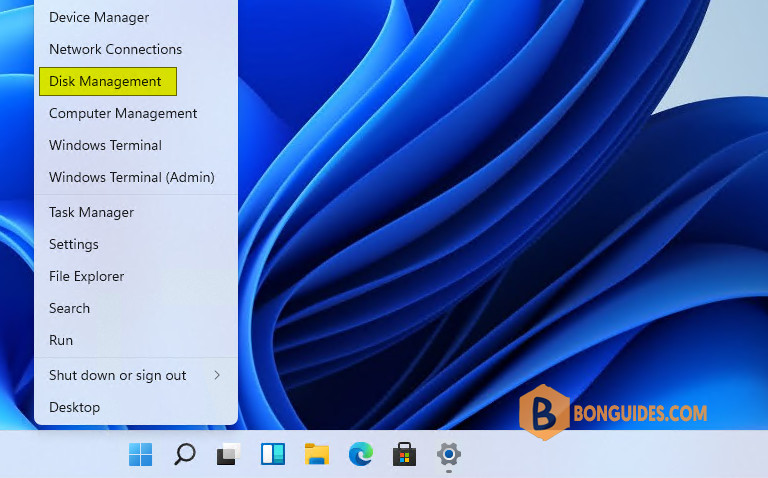

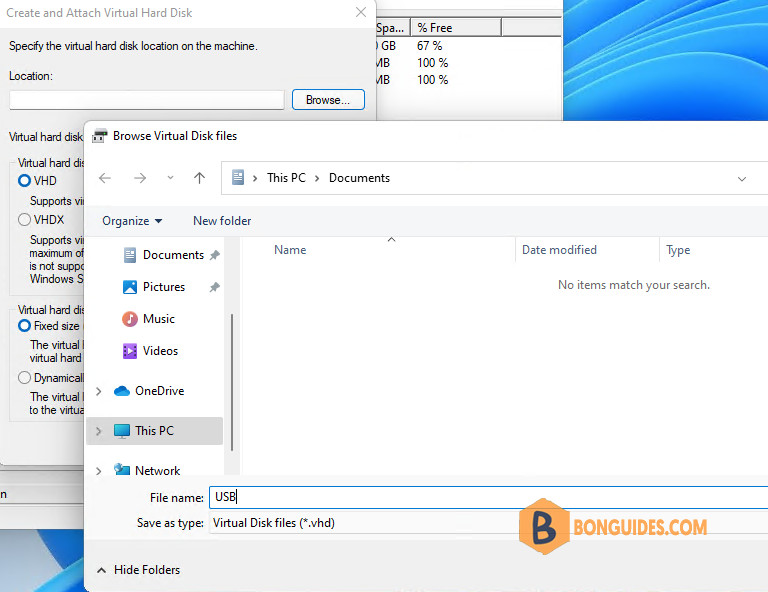
3. Now, click to locate the folder in which you would like to store your virtual USB drive in Windows 11. And type the name for the virtual drive.
4. Next step is to determine the size of your virtual USB drive. From under Virtual hard disk size, specify the size in any of the following formats Megabytes (MB), Gigabytes (GB), Terabytes (TB).
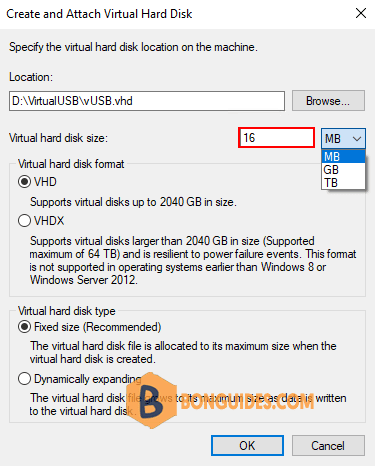
5. Now, under Virtual hard disk format. Select the radio button to save your virtual USB drive as *.vhdx or *.vhd format.
6. Now, you will need to select the type of your virtual USB drive under Virtual hard disk type:
- Dynamic expanding option if you have chosen VHDX in the step 5.
- Fixed size option if you have chosen VHD in the step 5.
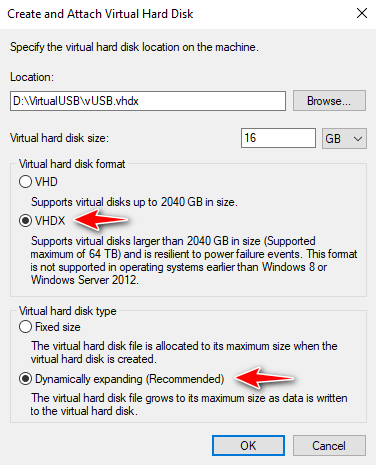
Finally click OK. Now, you have created a virtual USB drive on your Windows 11.
Configure the virtual USB device
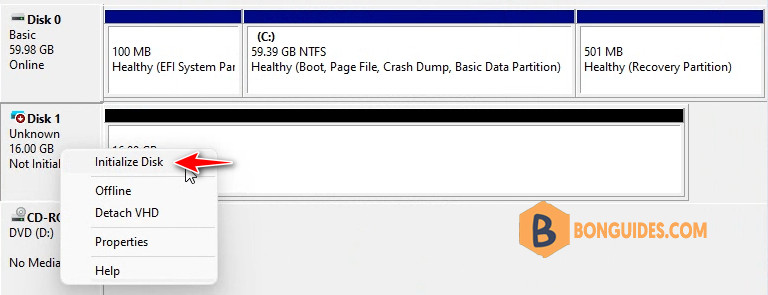
1. After the virtual device is created, you will see it in the disk list. Let’s right click on the disk then select Initialize Disk option.
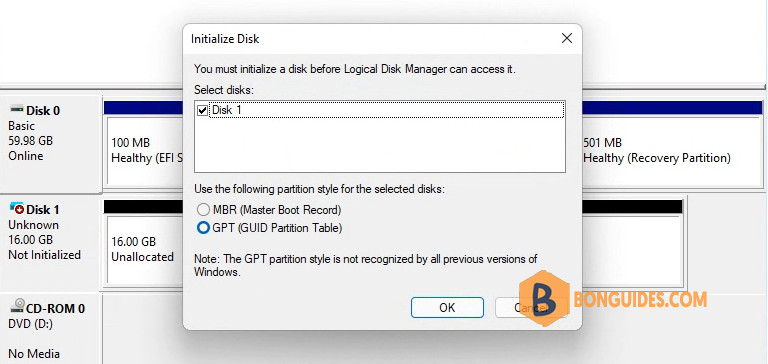
2. Select the partition style for the selected disk.
3. Once done, right click on the Unallocated area then create a New Simple Volume.
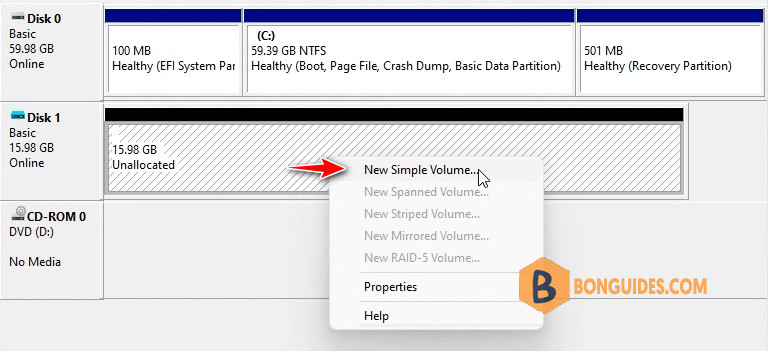
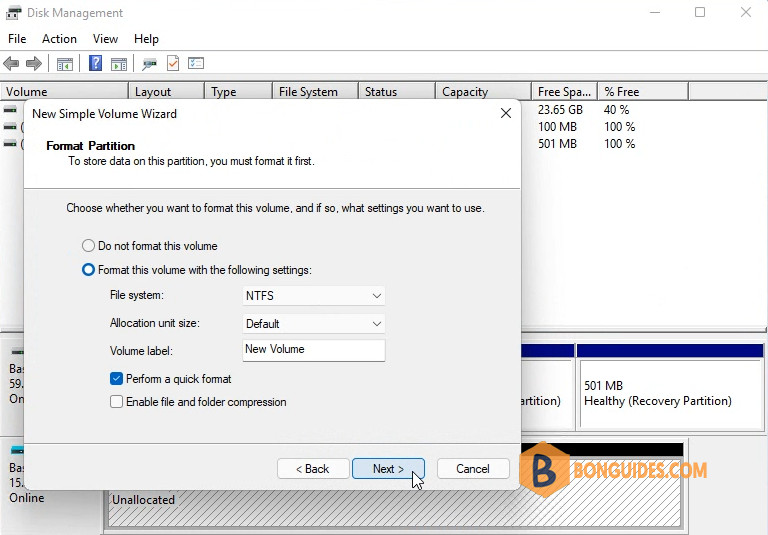
4. Create the partition following the wizard and enter the name for the volume.
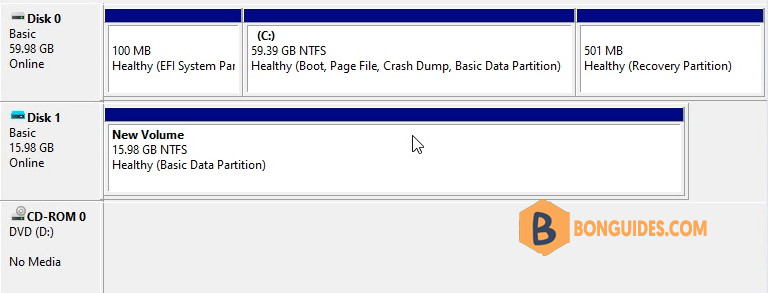
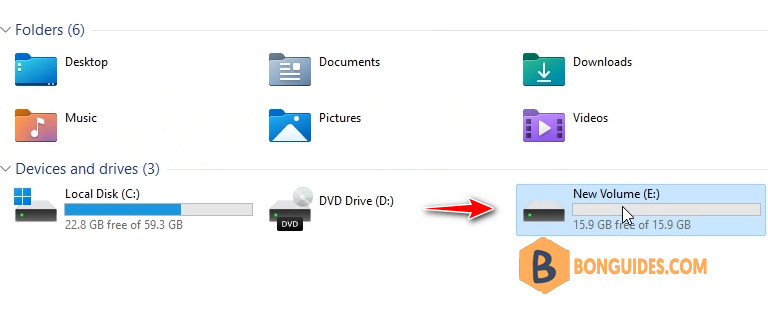
Now, your virtual USB drive is ready, you can see it in the My Computer in Windows Explorer.
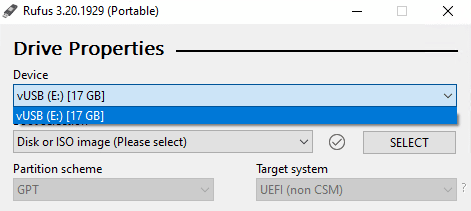
When I open the Rufus app, the virtual USB drive is listed in the device list.
