If you’re synchronizing directories or backing up data, it’s a good idea to double-check that the copy you’ve made is actually identical to the original. It is possible for issues to occur where data doesn’t copy across perfectly, or some data doesn’t copy across at all.
If this sort of copy failure happens to an important document, and you don’t notice, you could end up with data loss.
WinMerge is a tool that allows you to compare the contents of two directories. You can see if there are any missing files or if any of the backed-up files are different from the originals. This guide will walk you through installing and using WinMerge to compare the files in two folders.
1. By default, all extensions are enabled and there’s no real reason to turn them off – leave these options as they are. If you want to install an extra language pack, you can select one or more of the many options in the language list at the bottom.
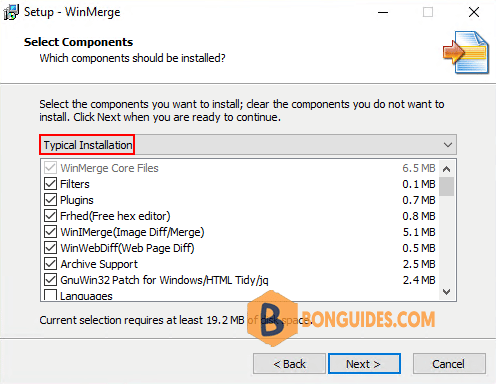
2. Next, there are checkboxes to enable File Explorer context menu integration, which allows you to launch WinMerge from the right-click menu File Explorer.
Other options include creating a desktop shortcut and adding WinMerge to your system path, which you can leave disabled.

3. Once the installation has completed, close the installer and launch WinMerge.

4. Once WinMerge is open, press the Control+O hotkey combo to open a new comparison.
5. To select a folder, click on the far right just under the 1st File or Folder bar. Use the browse feature to select a folder that you want to compare.
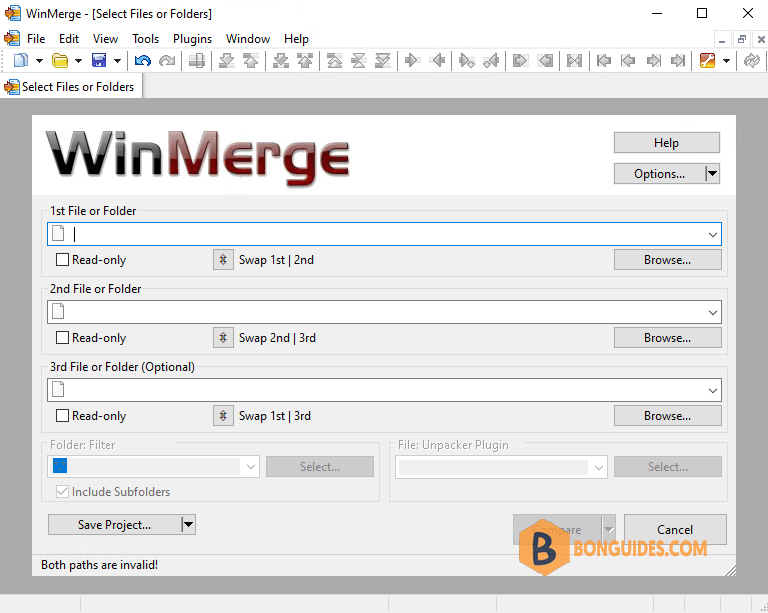
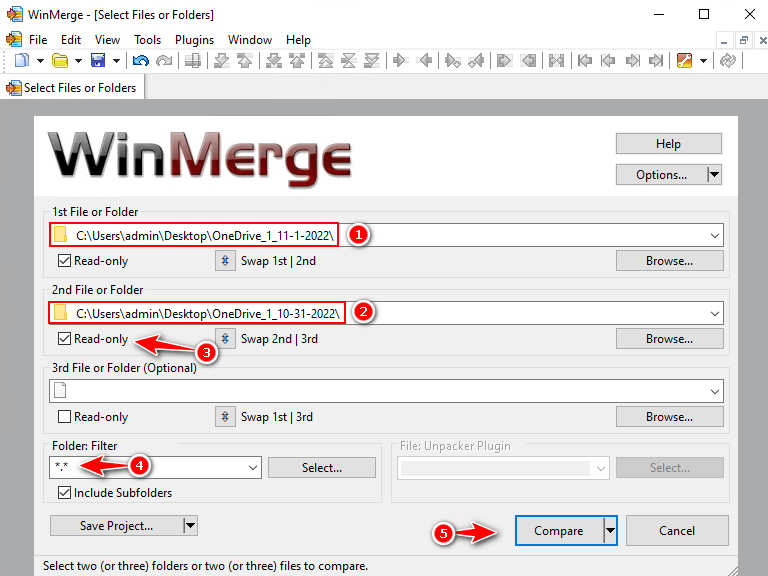
6. When you’ve selected the first folder, repeat the process for the second folder below it. Once you’ve selected both folders that you want to compare, ensure that both Read-only checkboxes are ticked.
You also need to make sure that the Folder Filter is set to the default *.*, to compare all files. Once you’ve completed setting up the comparison, click Compare.
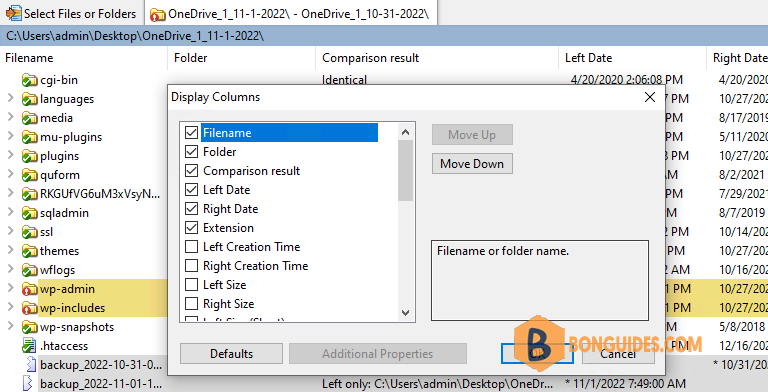
7. With large folders containing a lot of files and subdirectories, the comparison process may take a while to complete. Once it has completed, you’ll see a list of all the files in the folders. By default, the results table lists: the filename, the path of a subdirectory, the result of the comparison, the edit dates of the file in both folders and the file extension for each file in the compared folders.
The possible comparison results show if files or folders are identical or different.
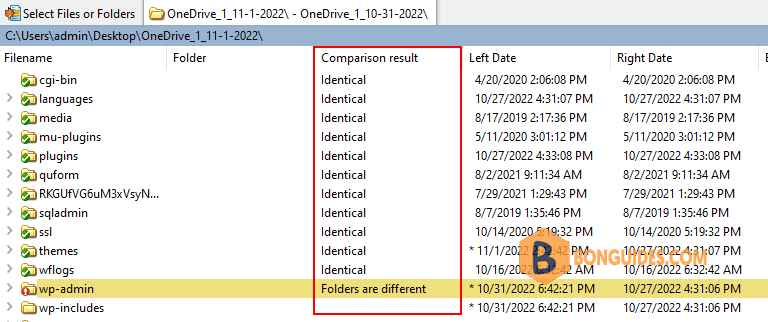
8. If the comparison says a file is Right only it means the file or folder was only in the second folder being compared and not the first. Conversely, Left only means the file or folder was only in the first folder being compared.

Different results are colour-coded to make spotting them easier.
- A white background means the files are identical.
- A yellow background means the files are different.
- And a grey background means the files are only in one of the two folders being compared.
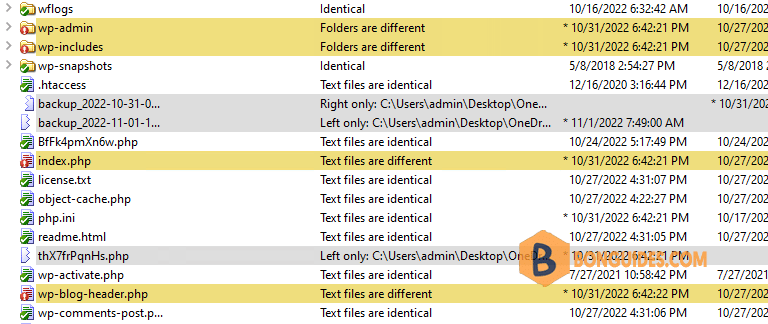
9. If you double-click on a folder, it will expand to reveal its contents.

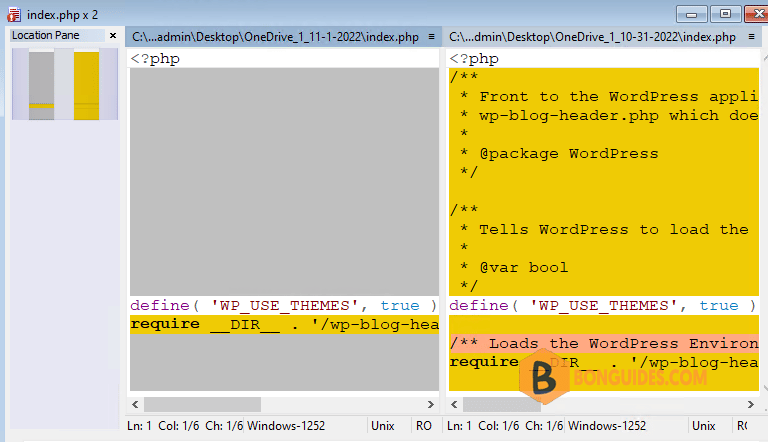
10. If you double-click on a file, it will open a side-by-side comparison and will highlight the differences, if any, between the two files.
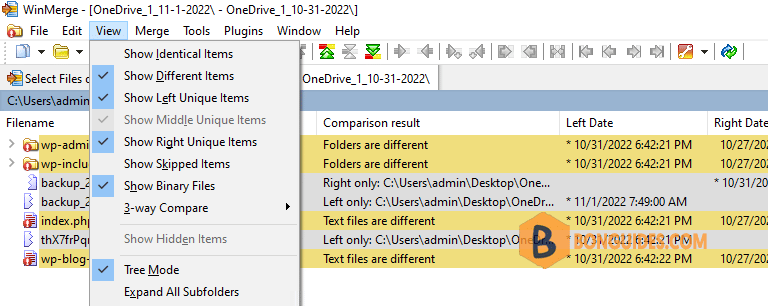
11. If you have a large number of files, it may be convenient to hide all of the files that are identical, to make it easier to identify differences. To do so, click View in the top bar, and then untick Show identical items by clicking on it.

If you only want to update the existing comparison, you can click the refresh icon on the far right or press the F5 key.


