Table of Contents
Change Hostname of the Ubuntu Instance in WSL
If you are running Ubuntu on Windows WSL (Windows Subsystem for Linux) and wondering how to change hostname permanently then follow all steps mentioned below.
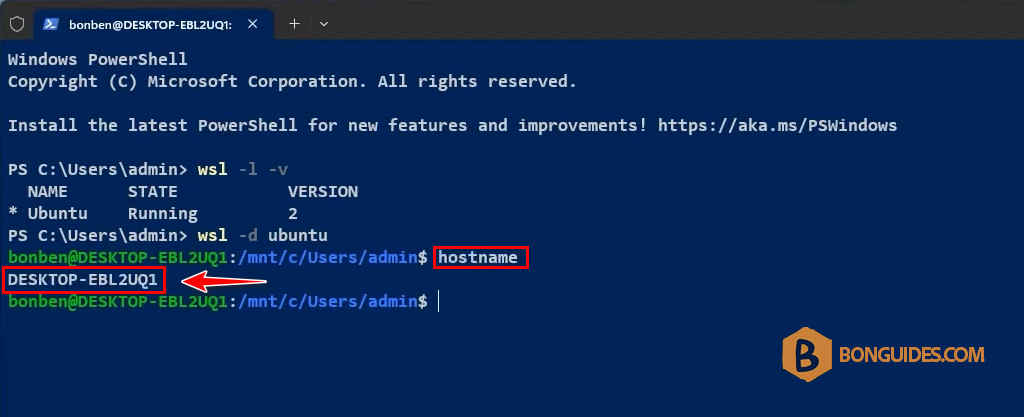
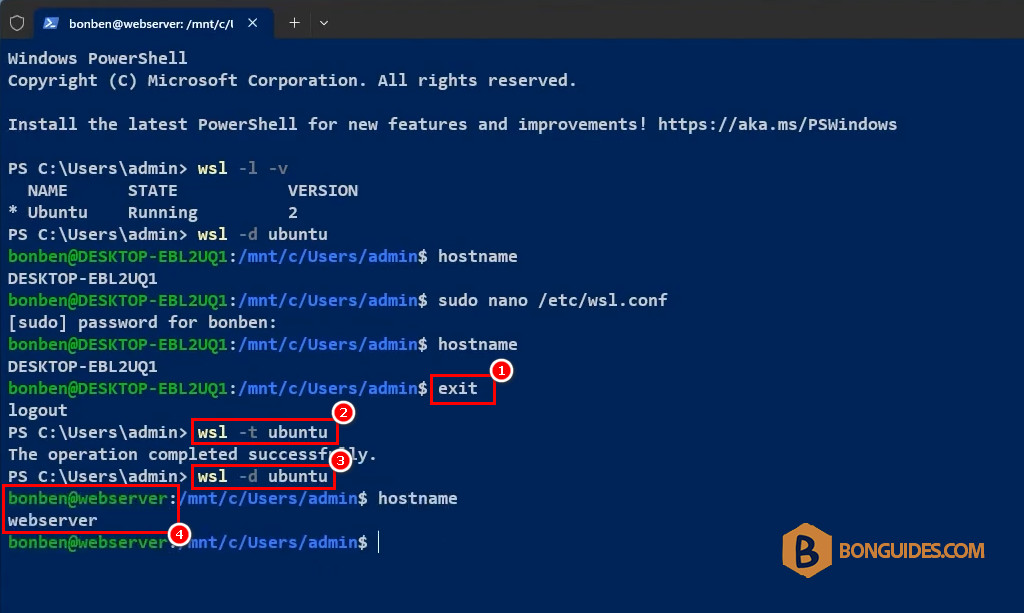
1. Check the instance hostname. Here, DESKTOP-EBL2UQ1 is hostname of Ubuntu running in my Windows 11.
2. Open /etc/wsl.conf or create the same if it does not exist using the nano text editor.
sudo nano /etc/wsl.conf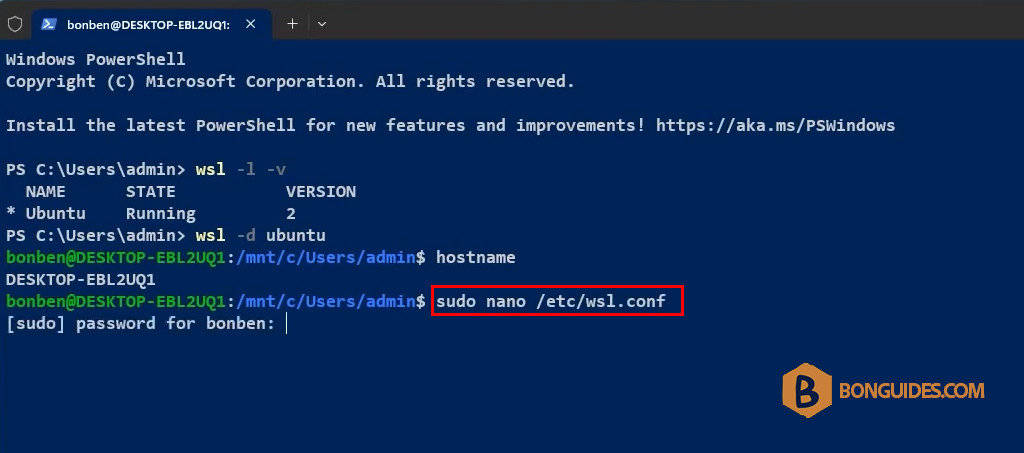
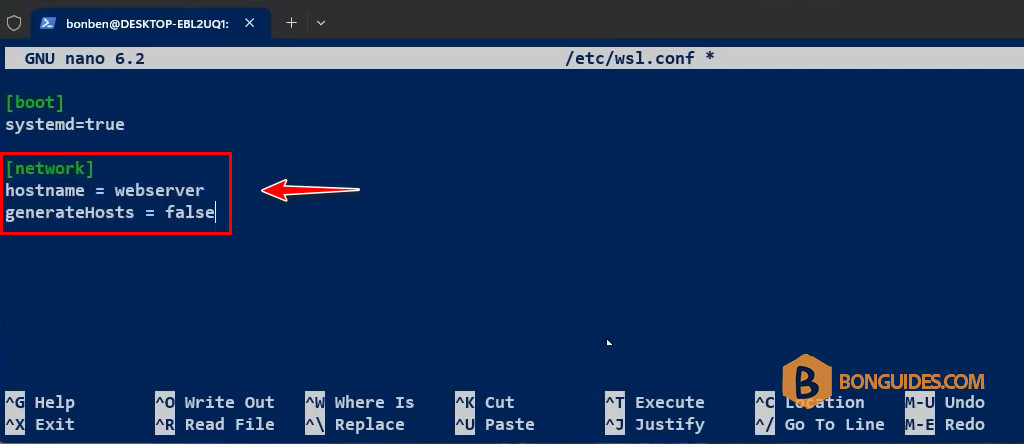
3. Add following lines in /etc/wsl.conf:
[network]
hostname = SrcCodes
generateHosts = false- hostname = webserver will update the hostname in /etc/hostname.
- generateHosts = false will prevent WSL from automatic generation of /etc/hosts file.
4. Save and exit from the nano editor.
Note
Tip: To save and close the file in nano editor, press > followed by > and then
5. Shut down the WSL 2 distribution using wsl -t ubuntu and relaunch it then checks hostname.
Unable to resolve host: Name or service not known
The /etc/hosts file change will be overwritten during re-launch of Ubuntu and we’ll get “unable to resolve host <hostname>: Name or service not known” when trying to refresh the update repositories.
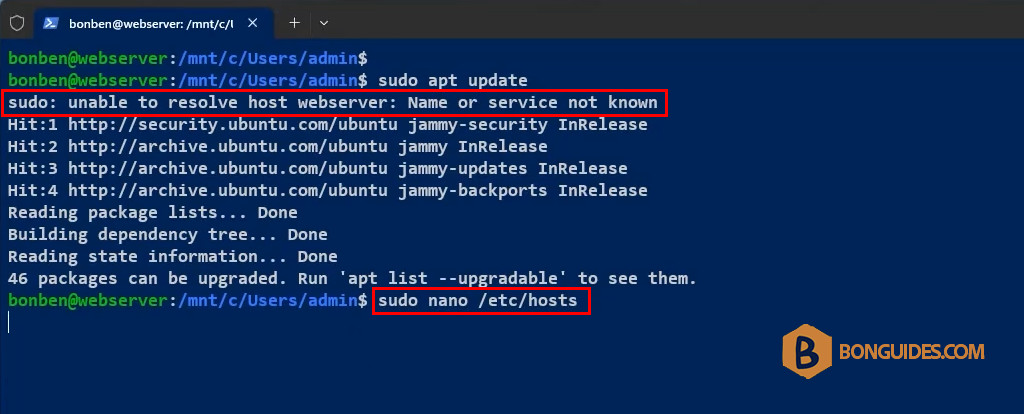
To fix it, let’s edit the /etc/hosts file using the nano editor.
sudo nano /etc/hostsYou will see some entries similar to below:
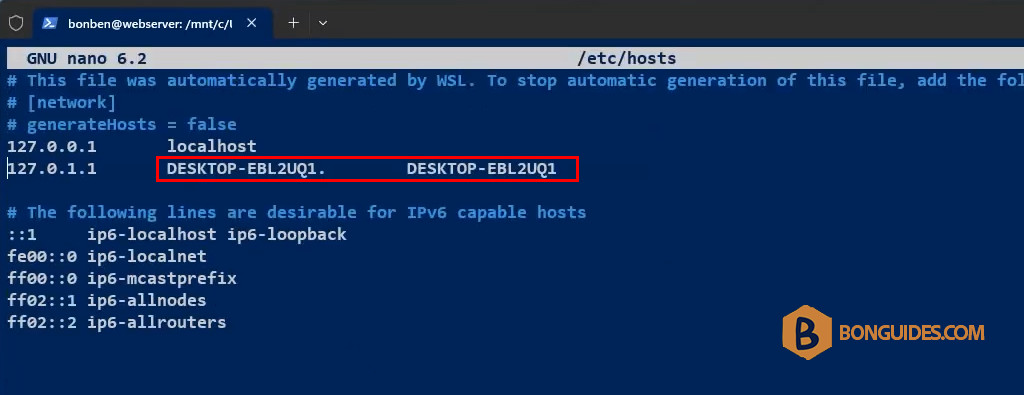
Find all occurrences of hostname (e.g. “DESKTOP-EBL2UQ1”) and replace with new one (e.g. “webserver”).
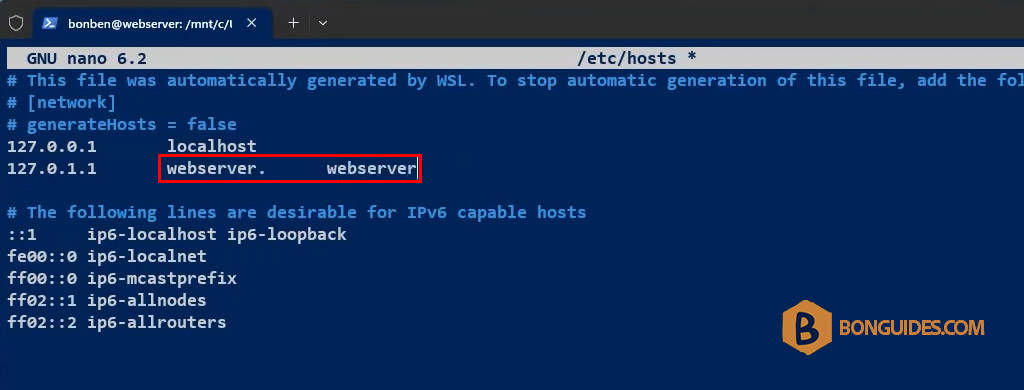
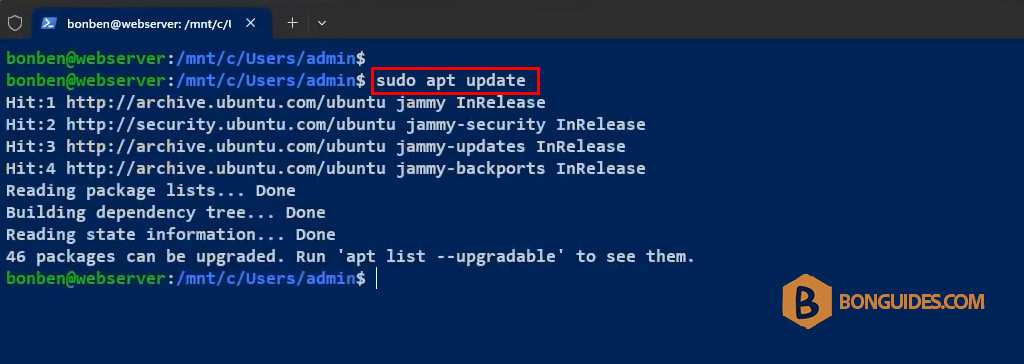
Save and exit from the nano editor. Then fresh the update repositories to verify it works.