Learning and Sharing
  • Home
  • Blog
  • Linux
  • macOS
  • Virtualization
    • VMware
    • VirtualBox
  • Windows
    • Windows 11
    • Windows 10
    • Windows Server
  • Series
    • Symantec
    • Intune
    • Microsoft Azure
    • Powershell
    • VirtualBox
    • VMware
    • PowerShell Learning
    • Microsoft Graph
  • More
    • Auto Installation
    • AEC Installation
  • Contact
No Result
View All Result
No Result
View All Result

How to Add a Domain into Cloudflare and Set Up DNS Records

May 31, 2022
in Blog, Wordpress
0
ADVERTISEMENT

Table of Contents

Add a domain into Cloudfrale account

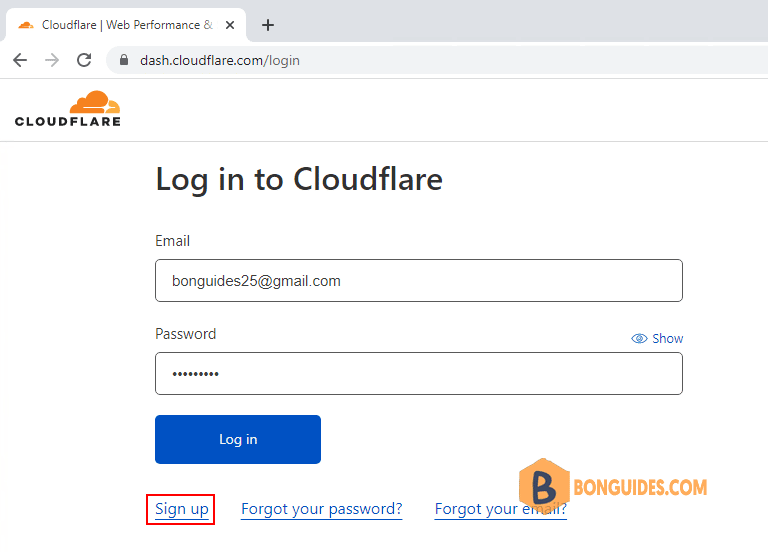
1. Login into Cloudflare or you can create a new one at https://dash.cloudflare.com/login.

Bg474
2. At the Home page, click button.
Bg475

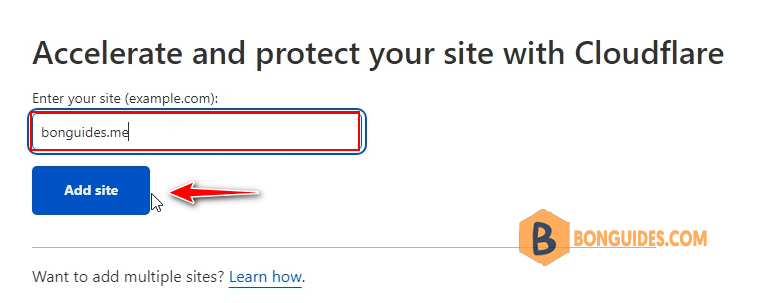
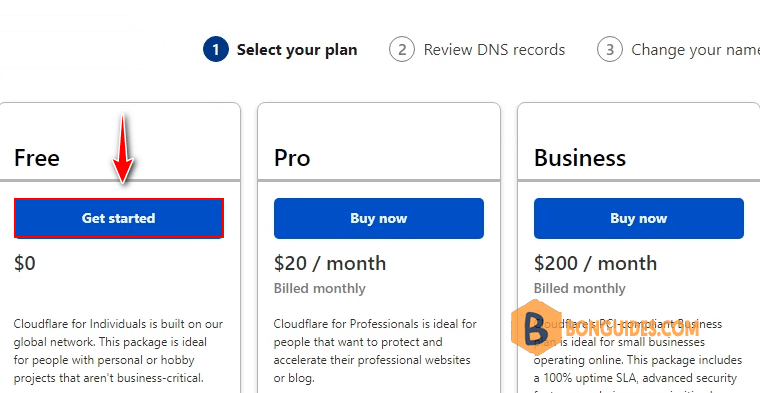
3. Enter your domain name you would like to enable Cloudflare for and click on

Bg476
4. On the next page you will need to choose a prefereable CDN plan. You can choose the Free plan. Click on button.
Bg477

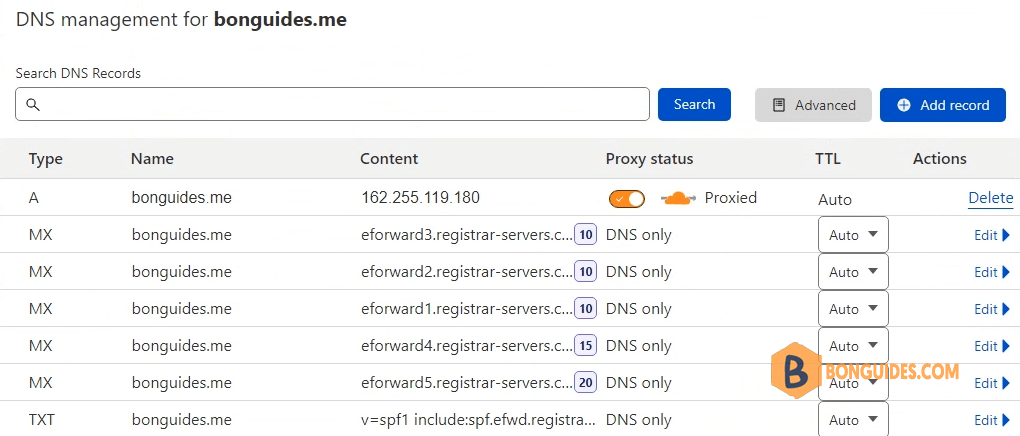
5. On the next screen, you will see the list of your existing host records. Be sure to double-check if the specified DNS records match the ones in your cPanel.

Note It is not recommended to modify DNS records at this stage as you will be able to do this after the setup is complete.
Bg478

6. On the next page, you will be offered to change nameservers to the Cloudflare ones. You need to log into your account in your domain registrar and change the nameservers for the domain.

Bg479

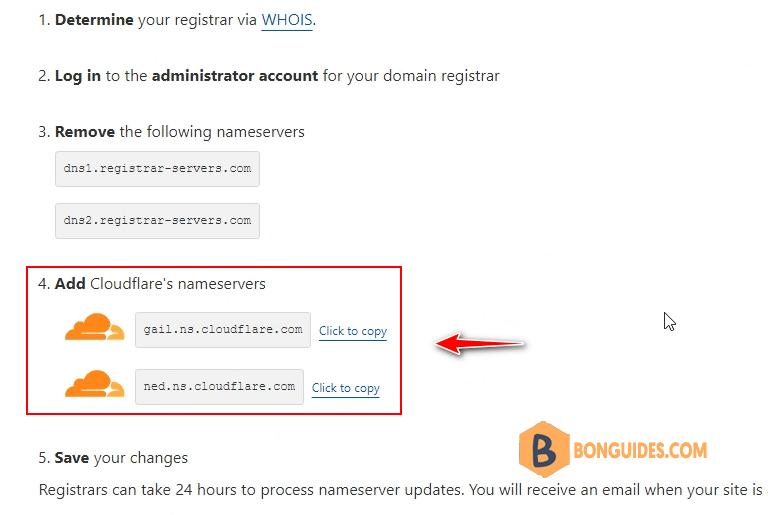
Change nameservers for the domain

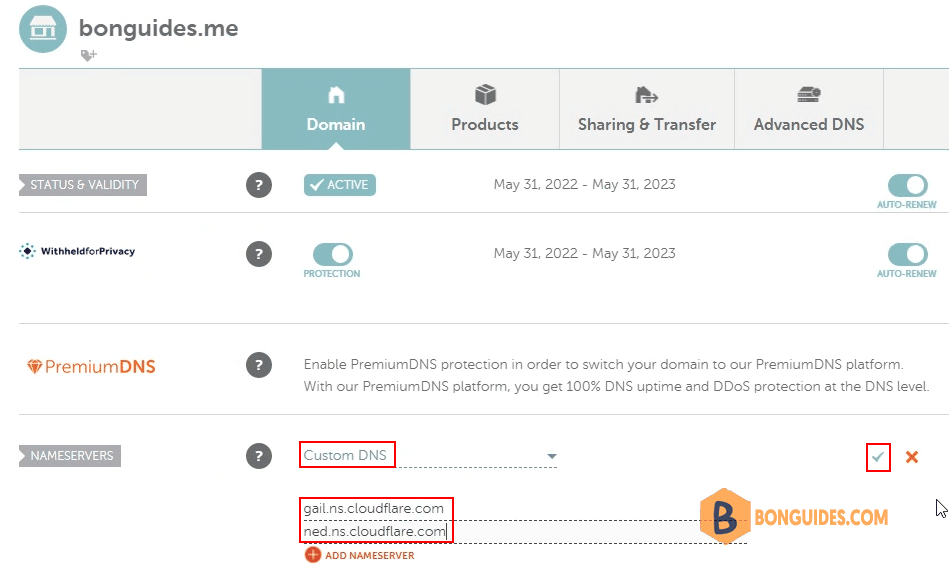
7. In this case, my domain is registered with Namecheap.

Note Once the nameservers have been set up, it may take up to 24-48 hours (in rare cases more) for local ISPs to update their DNS caches so that everyone can see your website. Since the caching time varies between ISPs, it takes time for DNS changes to be totally in effect
Bg480

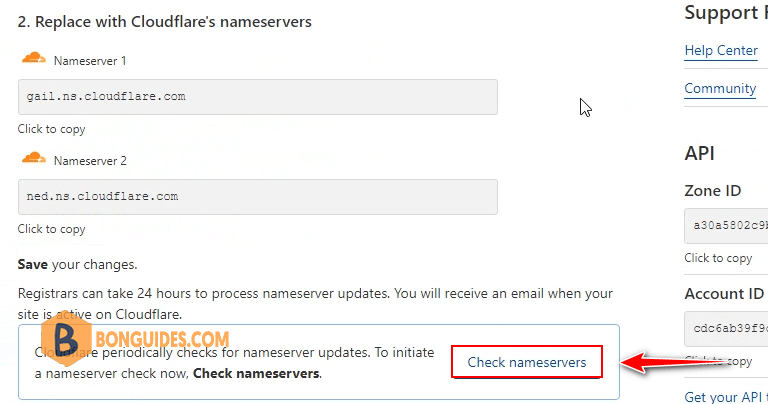
8. Once the nameservers are set up, return to the Cloudflare tab and click Check nameservers:

Bg481

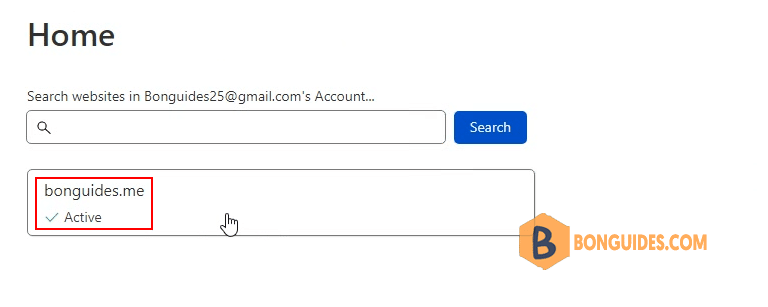
9. If the nameservers have been successfully updated, you will see the Active status:

Bg482

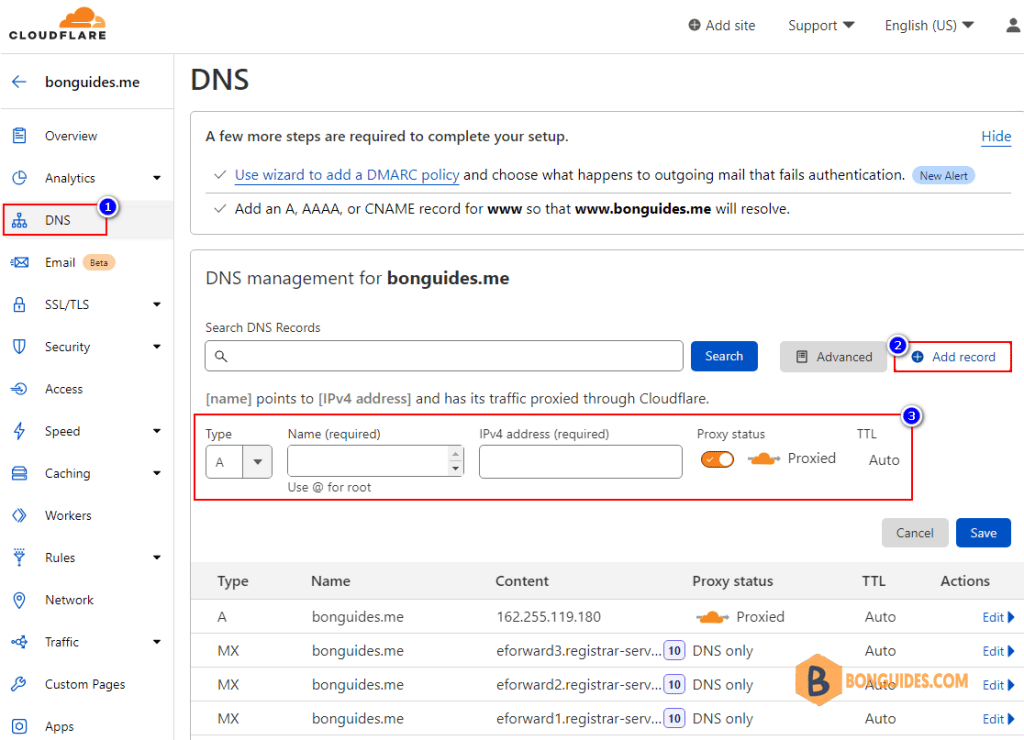
10. Now you may proceed with setting up DNS records in the DNS menu. On the DNS Records page, you may add or delete the DNS records for your domain.


In order to add any record, click +Add Record and choose the record type you need, the hostname (subdomains or domain itself) and value of the record. TTL will be set up automatically. When the record is ready, click on Save.

Bg483
Note After the nameservers change all the DNS records for your domain in the old nameservers will be no longer active. That is why make sure they have been set up in your Cloudflare account. The new DNS records should be created in the Cloudflare account as well. For instance, if you wish to switch to another mail service or update the IP address for your domain, the MX and A records should be updated correspondingly.
5/5 - (1 vote)
Previous Post

How to Enable or Disable MFA for a Single User in Microsoft 365 and AzureAD

Next Post

How to Fix Something Went Wrong and Outlook Couldn’t Set up Your Account When Connecting to Exchange Online Office 365

Related Posts

Running Hyper-V and VMware Workstation on The Same Machine

August 15, 2024

How to Uninstall All Autodesk Products At Once Silently

July 29, 2024
Ftr5

How to Uninstall the Autodesk Genuine Service on Windows

July 29, 2024
Ftr19

How to Fix Windows Cannot Read the ProductKey From the Unattend Answer File in VirtualBox

July 26, 2024
Ftr25

How to Update Windows Terminal in Windows 10/11

July 26, 2024

How to Disable The Beep Sound in WSL Terminal on Windows

July 26, 2024

Leave a Reply Cancel reply

Your email address will not be published. Required fields are marked *

Recent Posts

  • How To Turn On uBlock Origin Extension in Chrome (2025)
  • Images Hidden Due To Mature Content Settings In CivitAI
  • Azure OpenAI vs Azure AI Hub, How to Choose the Right One for Your Needs

Categories

Stay in Touch

Discord Server

Join the Discord server with the site members for all questions and discussions.

Telegram Community

Jump in Telegram server. Ask questions and discuss everything with the site members.

Youtube Channel

Watch more videos, learning and sharing with Leo ❤❤❤. Sharing to be better.

Newsletter

Join the movement and receive our weekly Tech related newsletter. It’s Free.

General

Microsoft Windows

Microsoft Office

VMware

VirtualBox

Technology

PowerShell

Microsoft 365

Microsoft Teams

Email Servers

Copyright 2025 © All rights Reserved. Design by Leo with ❤

No Result
View All Result
  • Home
  • Linux
  • Intune
  • macOS
  • VMware
  • VirtualBox
  • Powershell
  • Windows 10
  • Windows 11
  • Microsoft 365
  • Microsoft Azure
  • Microsoft Office
  • Active Directory

No Result
View All Result
  • Home
  • Linux
  • Intune
  • macOS
  • VMware
  • VirtualBox
  • Powershell
  • Windows 10
  • Windows 11
  • Microsoft 365
  • Microsoft Azure
  • Microsoft Office
  • Active Directory