Table of Contents
You can set up backup in SQL Server Management Studio just as usual. But some errors may occur during the process, like Operating system error 3 (The system cannot find the path specified) and Operating system error 5 (Access is denied).

You can use SSMS backup wizard or T-SQL to backup SQL database to network drive, but while specifying a remote location as destination, some operating system errors (like error 3 or error 5) might fail the backup. This is usually due to path issue or permission issue. Simply put, you should be aware that:
- When backing up to a mapped drive, enter its UNC name instead of mapped drive letter.
- Provide full permissions of the target share to the account you log on SQL Server as.
Backup with SSMS backup wizard:
1. Connect to your server. Right-click the database you want to backup, and choose Task > Back Up.
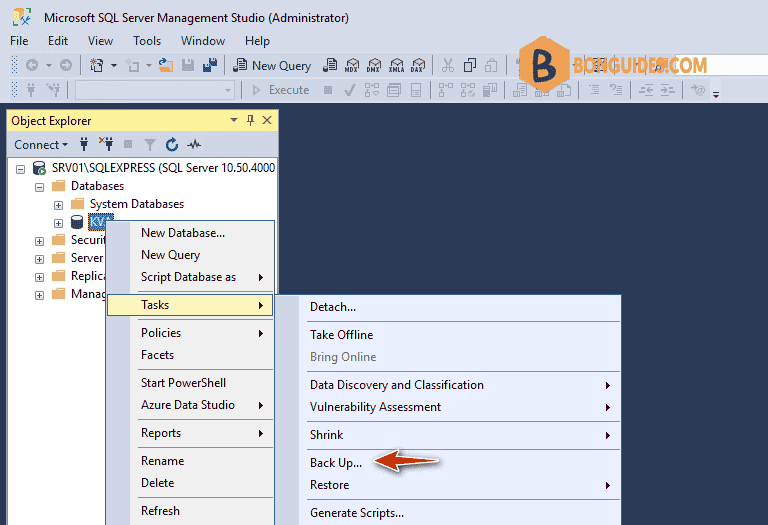
2. In the pop-up wizard, you could configure the database, backup type and destination. In the destination section, Remove the default path and Add a new one.
It’s not allowed to select a share or mapped drive directly, so you need to enter its UNC name of the remote location. For example, I want to backup database to a network share “\\10.0.0.5\backup” and name the backup file as “kav.bak”. Then I need to enter “\\10.0.0.5\backup\kav.bak” .
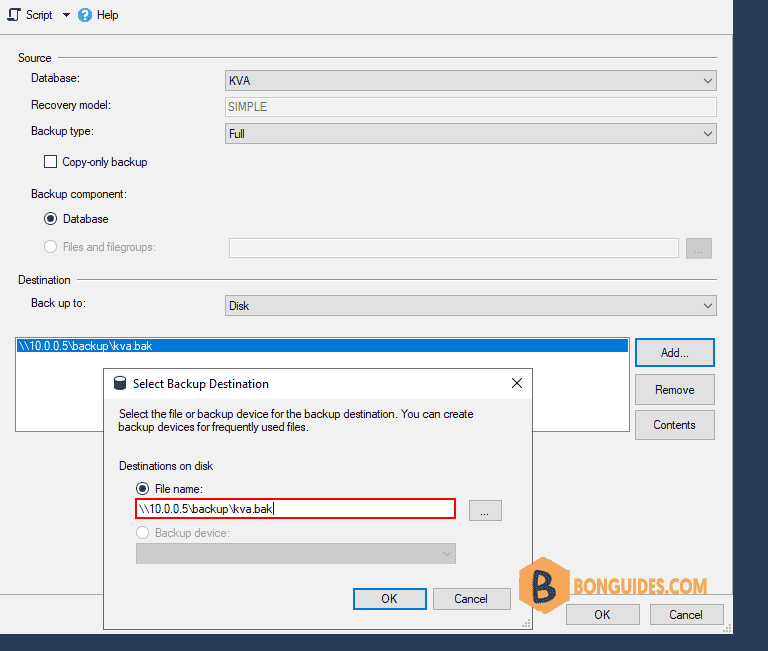
3. Click OK to perform the operation.

Backup failed with Operating system error 5 (Access is denied)?
When you specify a network share in your local drive or a remote machine, the backup may also fail due to error 5:

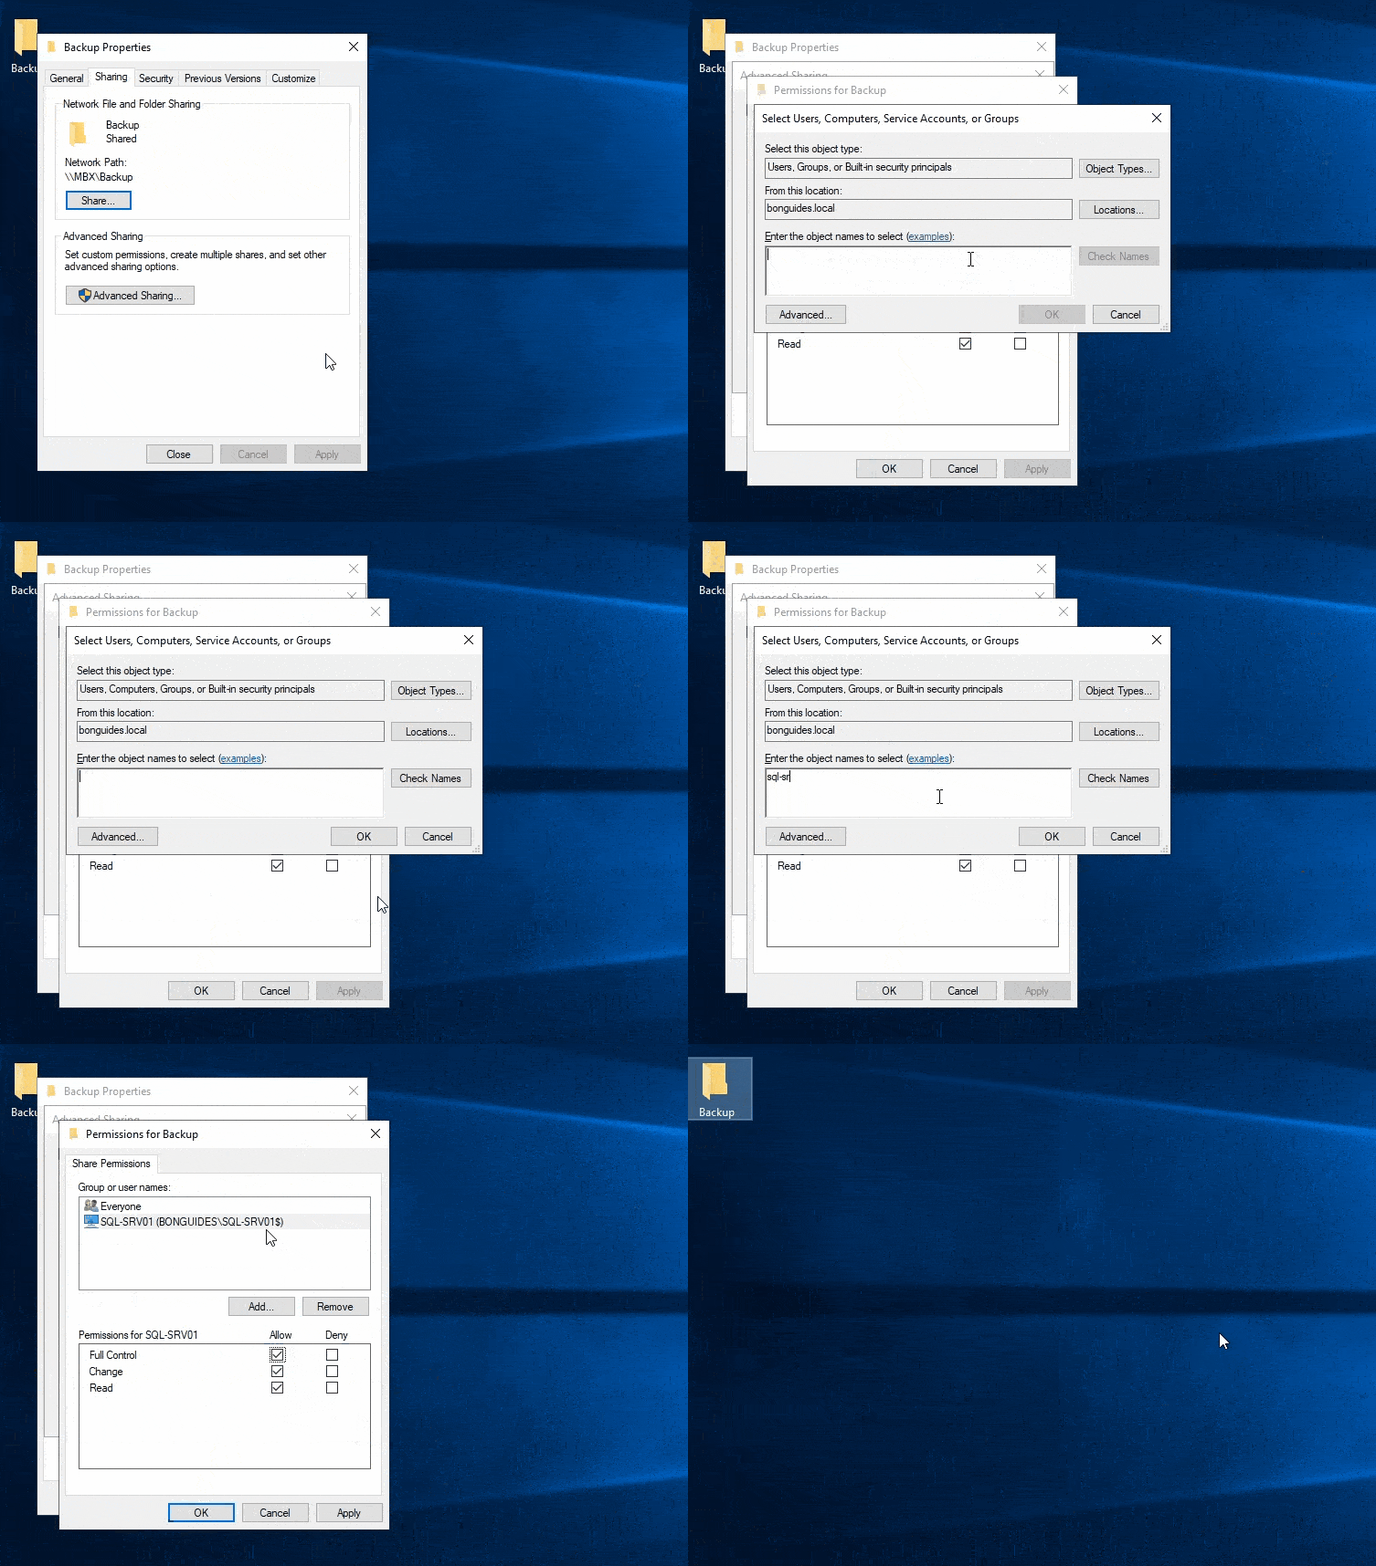
This is usually because the account you log on the SQL Server as doesn’t have the permission to read & write data to the share. To fix it, you need to find the account, then provide full privilege to it. Here’s the approach:
In the domain environment
1. In the domain environment, you can grant read and write permission for the SQL server computer account.

2. Grant NTFS permission for SQL server computer account on shared folder.
In a WORKGROUP environment
In a workgroup environment, you cannot specify computer account because it not exist in the file share server.
1. Let create an user in the SQL server and file share server with the same username and password.
In the SQL Server:
net user /add sqlbackup Pass@wordnet localgroup administrators /add sqlbackupIn the file share server:
net user /add sqlbackup Pass@word2. In the file share server, add share permission and NTFS permission for the newly created user on the shared folder.
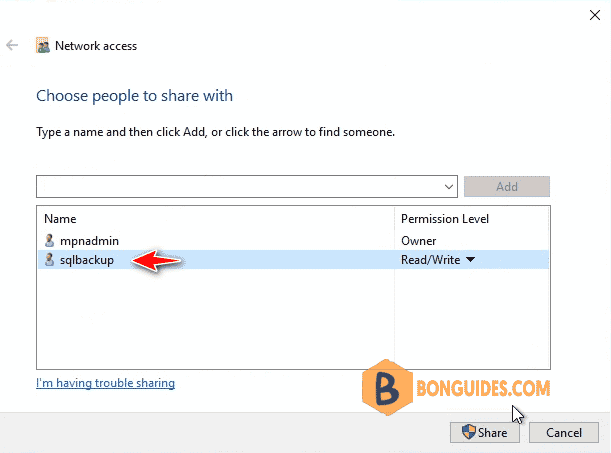
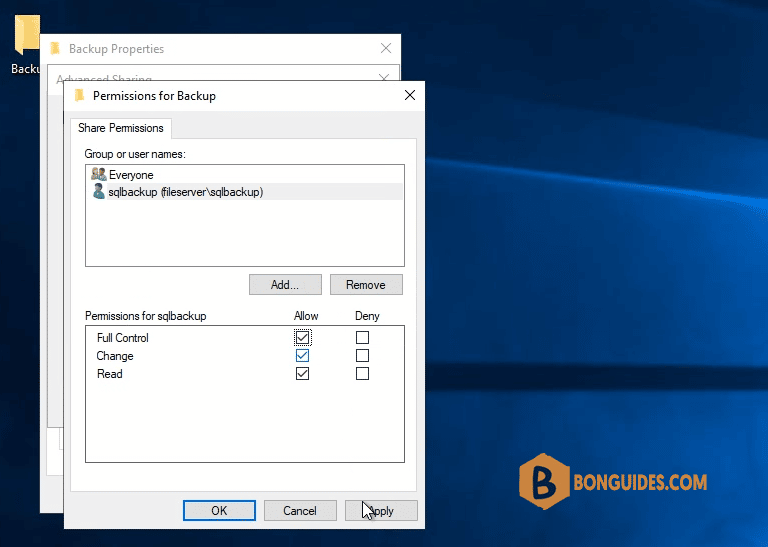
3. In the SQL server, change the service account to the newly created user then restart SQL service.

Not a reader? Watch this related video tutorial:


