Table of Contents
Set Root as Default User for WSL Instances
The default UNIX user is the user account that appears signed in when you open the appropriate Linux console. By default, it opens with the username that you’ve specified during the initial setup of the feature.
PS C:\> wsl --install -d ubuntu
Ubuntu is already installed.
Launching Ubuntu...
Installing, this may take a few minutes...
Please create a default UNIX user account.
For more information visit: https://aka.ms/wslusers
Enter new UNIX username: bonben
New password:
Retype new password:
passwd: password updated successfully
The operation completed successfully.
Every time when you ran a commend need the administrative right, you need to enter the password of the current logged on user.

To bypass this, you can set the root user as the default user for the WSL instances.
1. Get the list of installed WSL instances. In PowerShell run wsl -l -v command:
PS C:\> wsl -l -v
  NAME      STATE           VERSION
* Ubuntu    Stopped         2
  Debian    Stopped         2
2. To set the default root user for Ubuntu in WSL, run the command. Substitute the ubuntu portion with the name of your WSL instance. In my case, it is ubuntu.
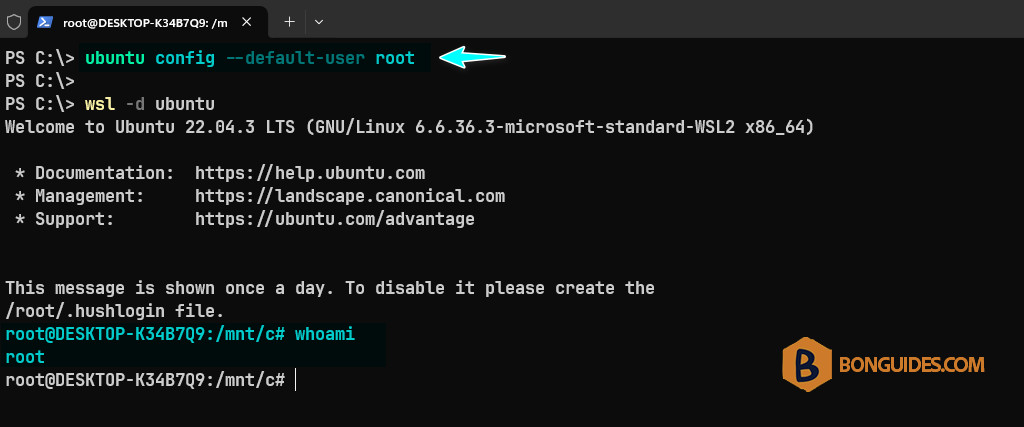
ubuntu config --default-user rootAs you can see, from now, when you launch the Ubuntu instance, the root account would be used by default. The Linux console will open with this user.
If you are using Debian, run the following command:
debian config --default-user root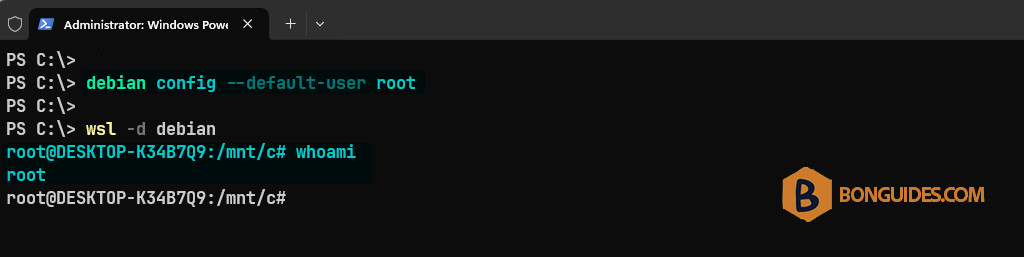
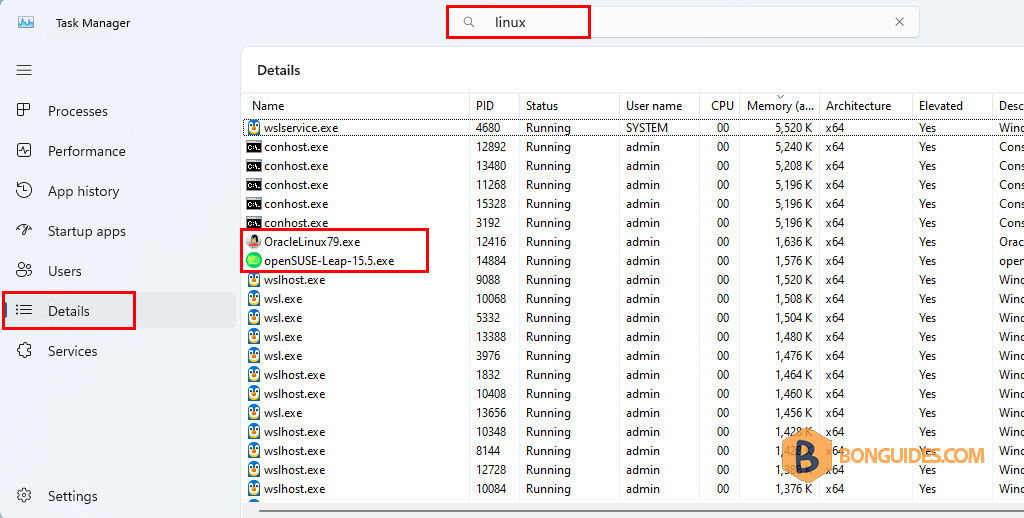
Tip: The binary file name of other distros can be found with Task Manager. Open the Windows Task Manager → Select the Details tab → Then Search for Linux. See the following screenshot.