Table of Contents
Netcat is a versatile network security tool that can be used by administrators for various network operations, including checking open ports, transferring data over a network connection, and performing security assessments.
In this tutorial, we will demonstrate how to download and install Netcat on Windows 11, 10, or Server.
Method 1: Install Netcat for Windows with Nmap
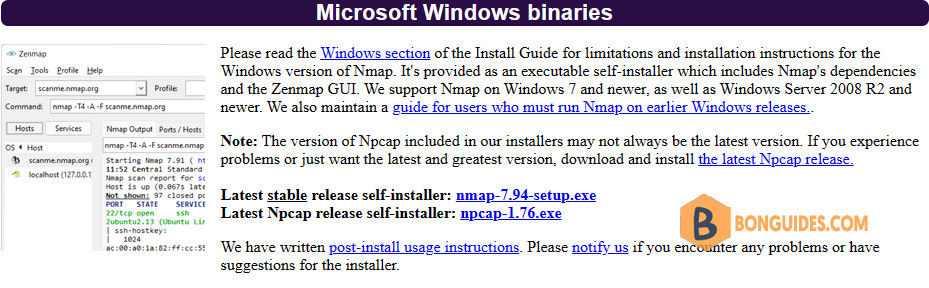
1️⃣ For Windows, you should install the Netcat (Ncat) package that comes with Nmap, which you can download from https://nmap.org/download.html#windows
2️⃣ After the download is finished, right-click the setup and select Run as administrator then follow the installation wizard with default options.
3️⃣ Once done, open your Windows Terminal or CMD or PowerShell and run the ncat –version command to check the installed Netcat version:
PS C:\> ncat --version
Ncat: Version 7.80 ( https://nmap.org/ncat )
Method 2: Install Netcat using Package Manager
In Windows 10 1709+ and Windows 11, you can simply install it using either Windows Package Manager (winget) or Chocolatey Package Manager. Open PowerShell then run the below command to install it:
#Install using Windows Package Manager
winget install Insecure.Nmap

#Install using Chocolatey Package Manage
choco install nmap -yMore information of the Nmap can be found using the below command.
PS C:\> winget show Insecure.Nmap

Found Nmap [Insecure.Nmap]
Version: 7.80
Publisher: Nmap Project
Publisher Url: https://nmap.org
Author: Nmap Project
Moniker: nmap
Homepage: https://nmap.org
License: Modified GNU GPLv2
License Url: https://nmap.org/book/man-legal.html
Privacy Url: https://insecure.org/privacy.html
Tags:
  network
  scan
  security
Installer:
  Installer Type: nullsoft
  Installer Url: https://nmap.org/dist/nmap-7.80-setup.exe
  Installer SHA256: 3b4d726bd366e7439367fa78a186dfa9b641d3b2ad354fd915581b6567480f94
For example, below is output when installing Nmap with Windows Package Manager:
PS C:\> winget install Insecure.Nmap

Found Nmap [Insecure.Nmap] Version 7.80
This application is licensed to you by its owner.
Microsoft is not responsible for, nor does it grant any licenses to, third-party packages.
Downloading https://nmap.org/dist/nmap-7.80-setup.exe
  ██████████████████████████████  25.6 MB / 25.6 MB
Successfully verified installer hash
Starting package install...
Successfully installed
How To Use Netcat Command
If you want to check the Netcat is really working or not. You can check if a port is opening on a remote or local machine. For example, we check the port 80 and 443 on a web server.
PS C:\> ncat -v -n 10.10.5.88 80
Ncat: Version 7.80 ( https://nmap.org/ncat )
Ncat: Connected to 10.10.5.88:80.

PS C:\> ncat -v -n 10.10.5.88 443
Ncat: Version 7.80 ( https://nmap.org/ncat )
Ncat: No connection could be made because the target machine actively refused it. .
Another example of Netcat. We’ll check if an UDP port is opened on a remote host. By default, Netcat checks the TCP only, show we need to -u to use UDP instead of TCP.
PS C:\> ncat -v -n -u 103.1xx0.2xx.2xx 5060

Ncat: Version 7.80 ( https://nmap.org/ncat )
Ncat: Connected to 103.1xx0.2xx.2xx:5060.Netcat is a supper powerful tool for network admins. You can get more useful Netcat commands can be found in the help page using the command below:
PS C:\> ncat --help

Ncat 7.80 ( https://nmap.org/ncat )
Usage: ncat [options] [hostname] [port]

Options taking a time assume seconds. Append 'ms' for milliseconds,
's' for seconds, 'm' for minutes, or 'h' for hours (e.g. 500ms).
  -4                         Use IPv4 only
  -6                         Use IPv6 only
  -C, --crlf                 Use CRLF for EOL sequence
  -c, --sh-exec <command>    Executes the given command via /bin/sh
  -e, --exec <command>       Executes the given command
      --lua-exec <filename>  Executes the given Lua script
  -g hop1[,hop2,...]         Loose source routing hop points (8 max)
  -G <n>                     Loose source routing hop pointer (4, 8, 12, ...)
  -m, --max-conns <n>        Maximum <n> simultaneous connections
  -h, --help                 Display this help screen
  -d, --delay <time>         Wait between read/writes
  -o, --output <filename>    Dump session data to a file
  -x, --hex-dump <filename>  Dump session data as hex to a file
  -i, --idle-timeout <time>  Idle read/write timeout
  -p, --source-port port     Specify source port to use
  -s, --source addr          Specify source address to use (doesn't affect -l)
  -l, --listen               Bind and listen for incoming connections
  -k, --keep-open            Accept multiple connections in listen mode
  -n, --nodns                Do not resolve hostnames via DNS
  -t, --telnet               Answer Telnet negotiations
  -u, --udp                  Use UDP instead of default TCP
      --sctp                 Use SCTP instead of default TCP
  -v, --verbose              Set verbosity level (can be used several times)
  -w, --wait <time>          Connect timeout
  -z                         Zero-I/O mode, report connection status only
      --append-output        Append rather than clobber specified output files
      --send-only            Only send data, ignoring received; quit on EOF
      --recv-only            Only receive data, never send anything
      --no-shutdown          Continue half-duplex when receiving EOF on stdin
      --allow                Allow only given hosts to connect to Ncat
      --allowfile            A file of hosts allowed to connect to Ncat
      --deny                 Deny given hosts from connecting to Ncat
      --denyfile             A file of hosts denied from connecting to Ncat
      --broker               Enable Ncat's connection brokering mode
      --chat                 Start a simple Ncat chat server
      --proxy <addr[:port]>  Specify address of host to proxy through
      --proxy-type <type>    Specify proxy type ("http", "socks4", "socks5")
      --proxy-auth <auth>    Authenticate with HTTP or SOCKS proxy server
      --proxy-dns <type>     Specify where to resolve proxy destination
      --ssl                  Connect or listen with SSL
      --ssl-cert             Specify SSL certificate file (PEM) for listening
      --ssl-key              Specify SSL private key (PEM) for listening
      --ssl-verify           Verify trust and domain name of certificates
      --ssl-trustfile        PEM file containing trusted SSL certificates
      --ssl-ciphers          Cipherlist containing SSL ciphers to use
      --ssl-alpn             ALPN protocol list to use.
      --version              Display Ncat's version information and exit

See the ncat(1) manpage for full options, descriptions and usage examplesNot a reader? Watch this related video tutorial:


