Table of Contents
Can’t Select Windows 11 Edition During Clean Installation
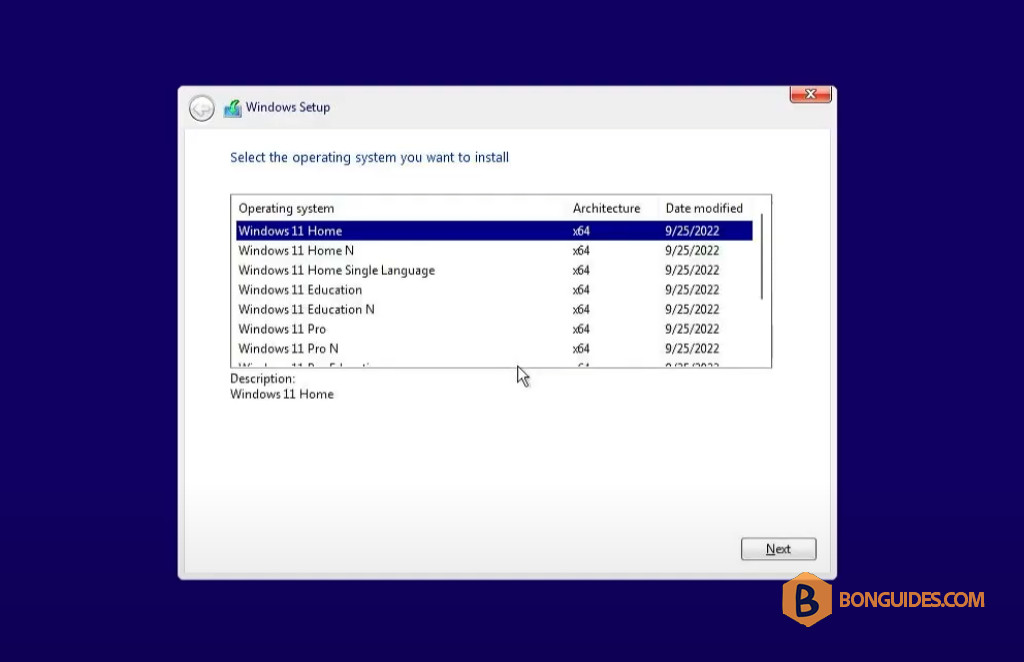
In some cases, when instating a new Windows 11. You cannot select Windows 11 edition, the installation wizard auto bypass that screen then install Windows 11 Home or Windows 11 Home Single Language edition.
This is because the Windows Setup can try to look for the (Original Equipment Manufacturer) OEM license tied to the motherboard of your PC to determine the Windows edition that needs to install. That is, if you install Home, the installer automatically installs a new Home edition on the machine. After the installation, the edition is activated automatically.
This is a useful feature since you won’t activate the PC but you cannot choose a Windows edition during clean installation. This is a bit troublesome especially when you need to install another specific edition of the system.
How to Fix Can’t Select Windows Edition During Installation
If you are unable to select Windows 11 Pro edition during clean installation or unable to select Windows 10 edition during clean installation, take it easy and you can configure a file called ei.cfg to the bootable media folder. This helps to force Windows Setup to show the screen where you can choose an edition to install.
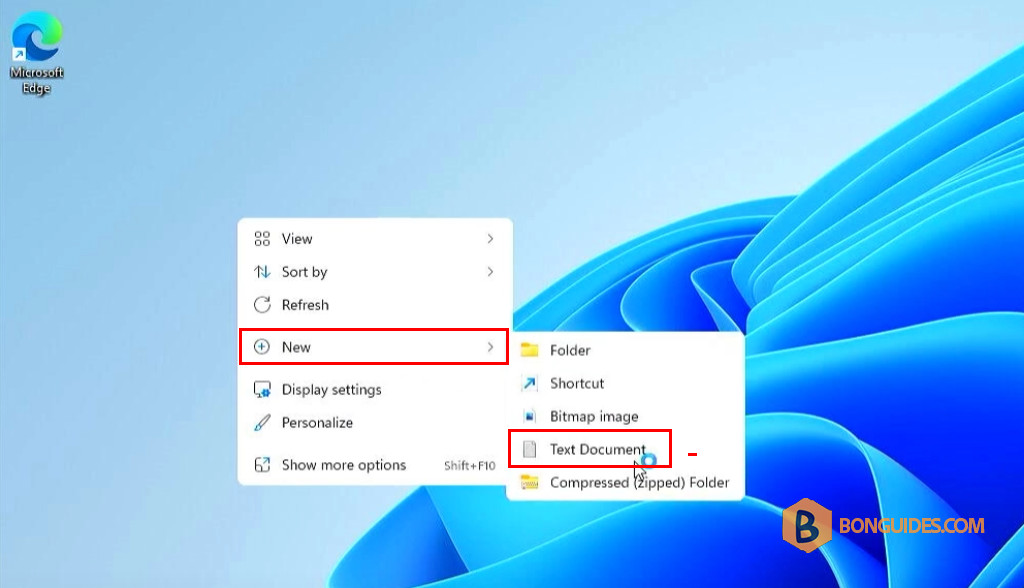
1. Right-click on the empty place on the desktop then create a New Text Document.
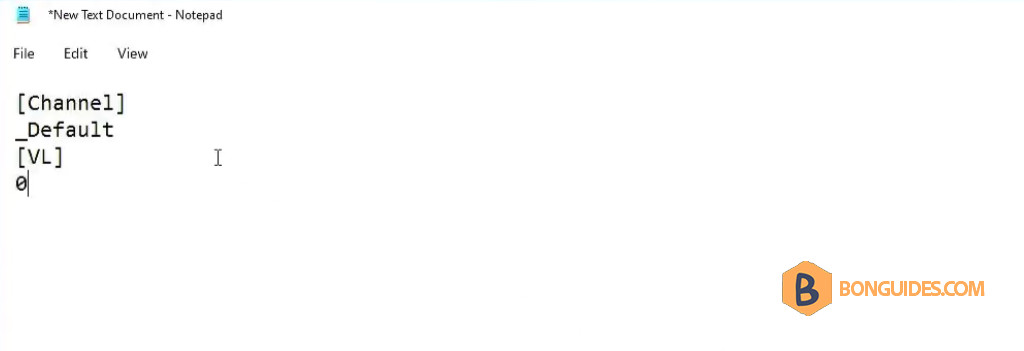
2. Open the newly created text file then copy and paste the following lines to the file.
[Channel]
_Default
[VL]
0
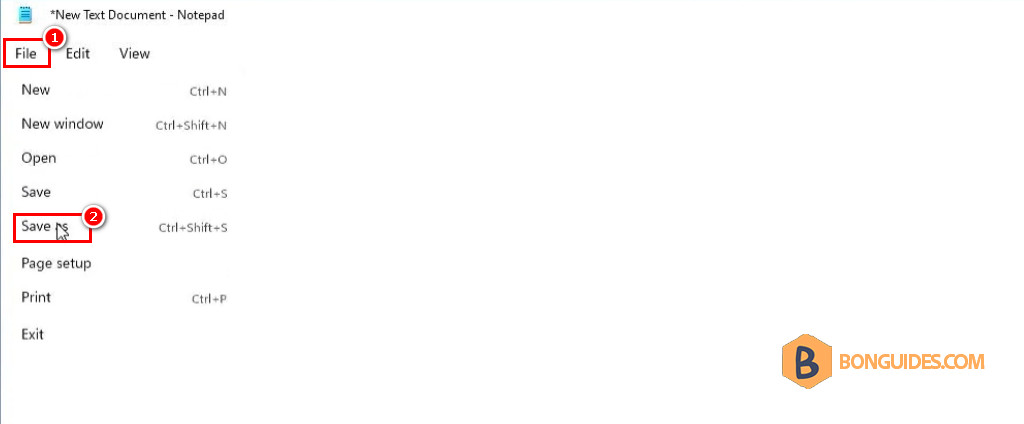
3. Now, navigate to the File → Save as.
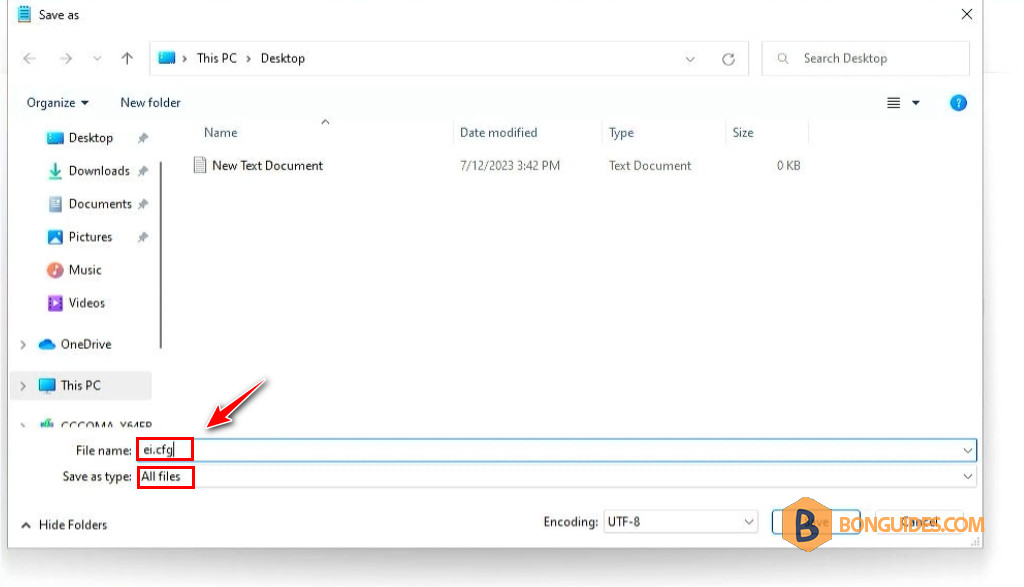
4. Type ei.cfg to the field of File name → choose All Files under Save as type and click Save to save the file in .cfg file extension instead of the text file extension (.txt)
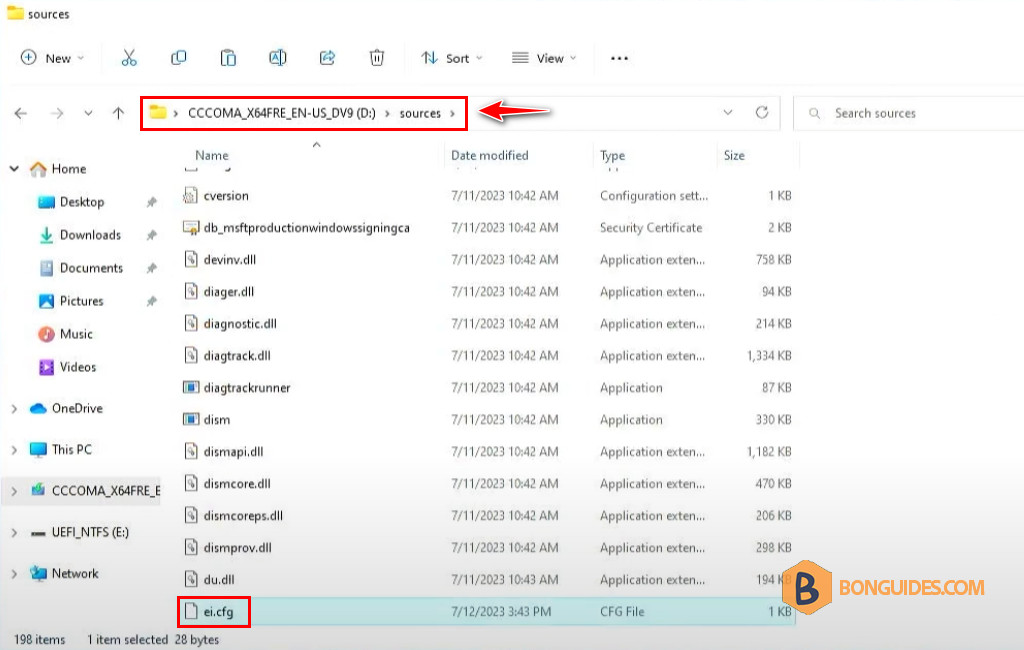
5. Open the bootable USB drive in File Explorer then navigate to the sources folder and copy the ei.cfg file to this folder.
6. After that, boot the PC from your USB drive or disc, and then you can choose an edition of Windows 11/10 during clean installation.
Auto select Windows edition when installing
If you want to force install a particular Windows edition like Pro, you can configure the ei.cfg file with the following text lines to automate the edition selection process.
[EditionID]
Professional
[Channel]
_Default
[VL]
0
Additionally, the ei.cfg file should be placed in the sources folder. During a clean installation, Windows Setup will automatically choose the Windows 11/10 Pro edition.
Configuration for a Windows ISO image
In case you don’t have a USB boot drive. You can do it for a Windows ISO image for later use.
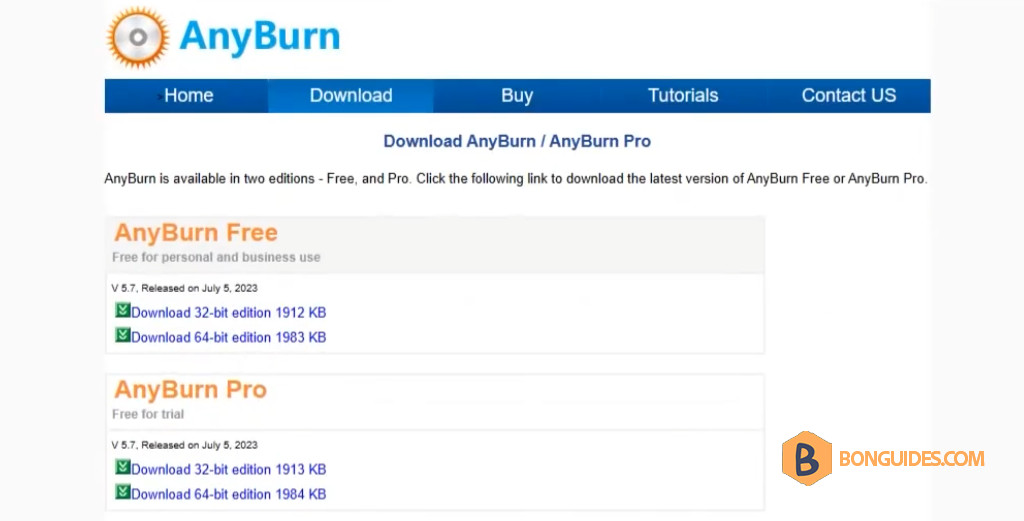
1. To add the ei.cfg file into an ISO image, we need a free and small tool named AnyBurn. The free version is enough to edit the ISO image. You don’t need to buy the Pro version.
Download AnyBurn: https://anyburn.com/download.php
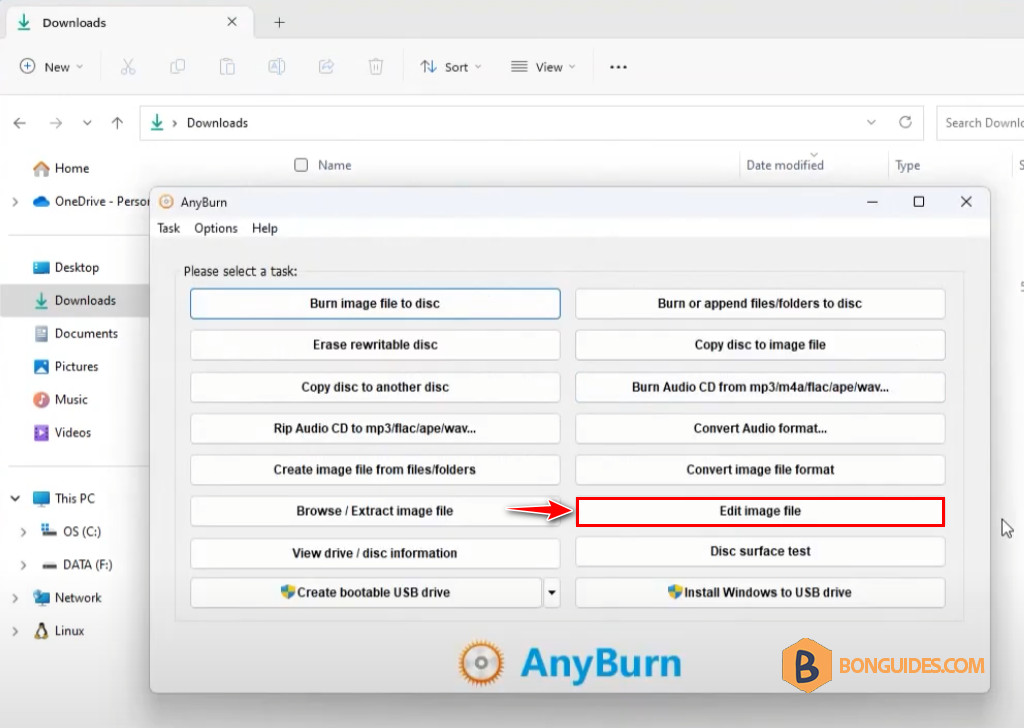
2. Once the AnyBurn is installed, let’s open it then select Edit Image File.
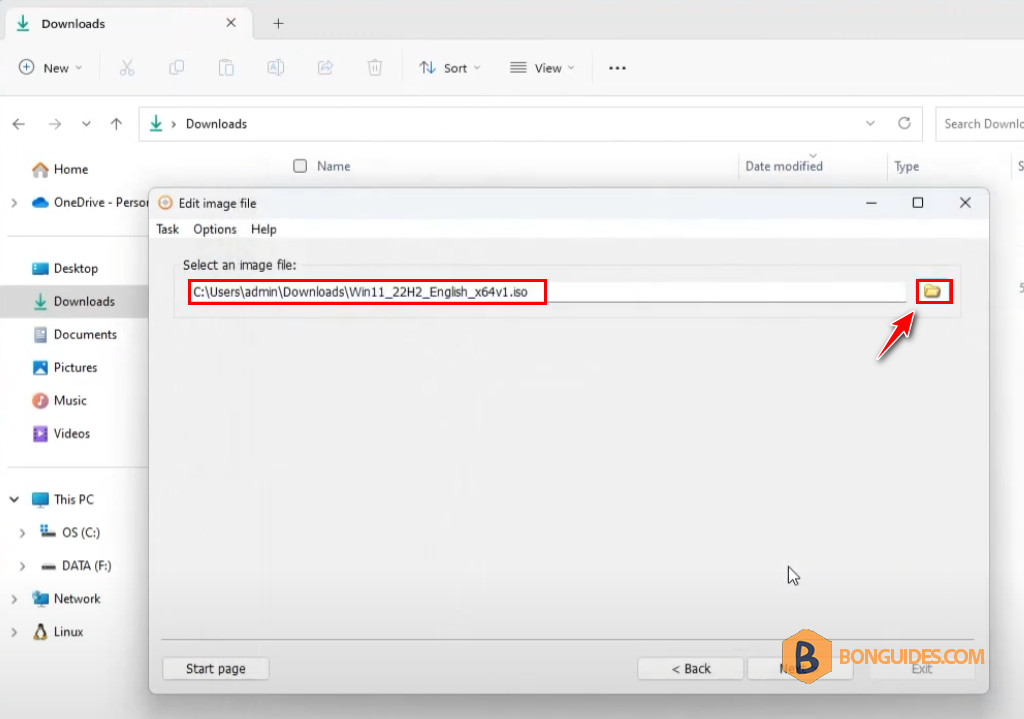
3. Browse then select the ISO image that you want to add the ei.cfg file.
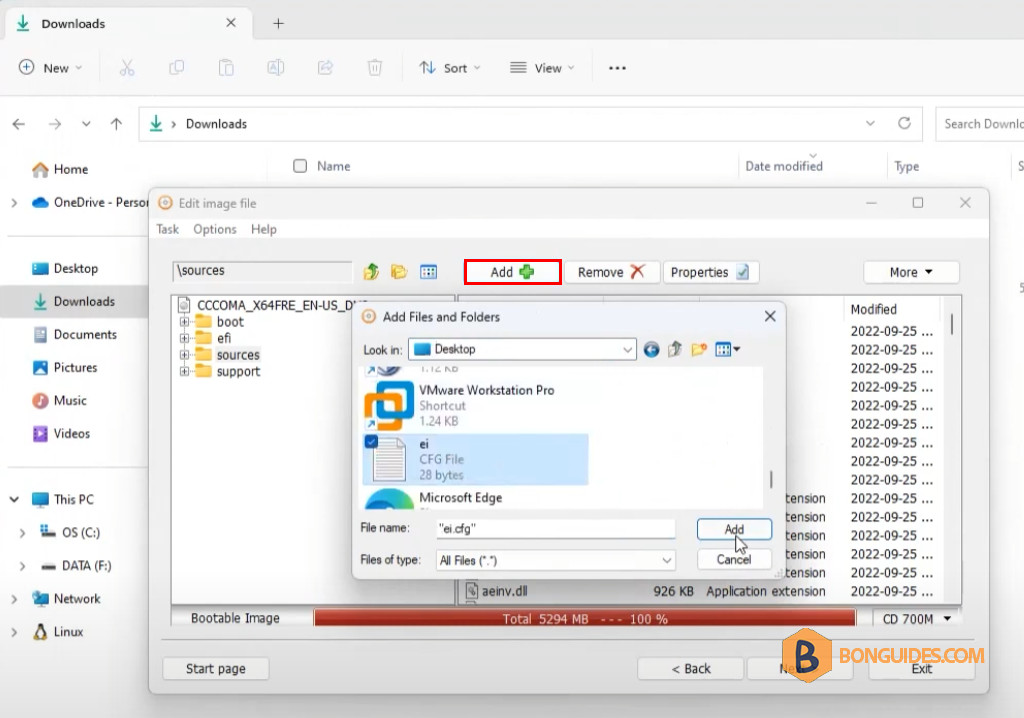
4. In AnyBurn, open the sources folder then add the ei,cfg file into it by click on Add +.
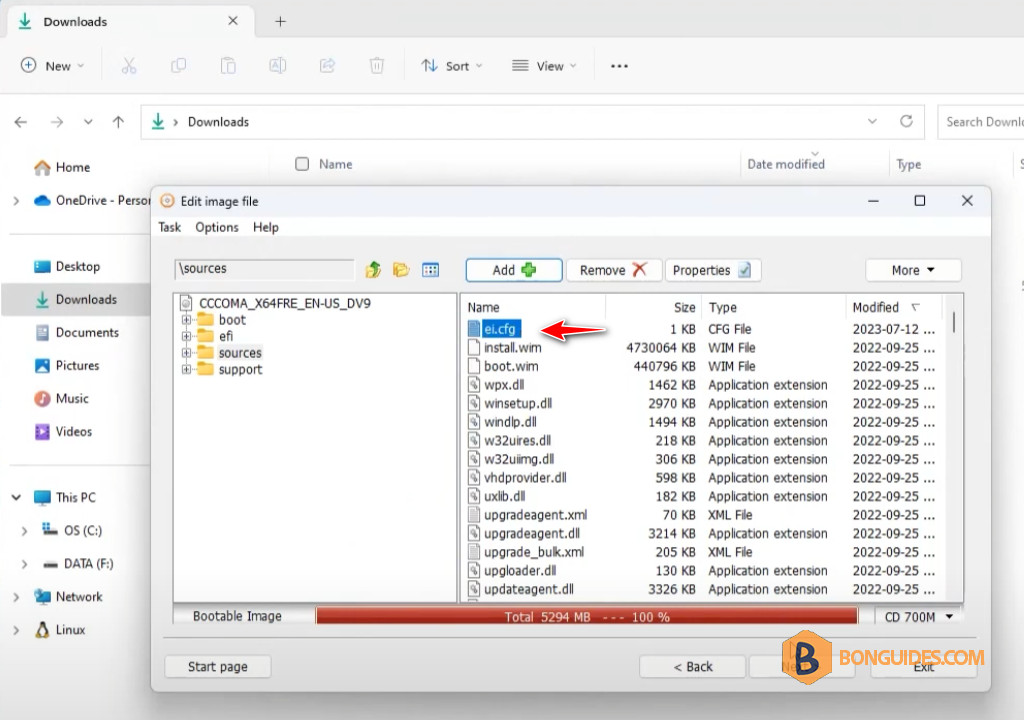
5. Once the file is added to the sources folder. Click Next to continue.
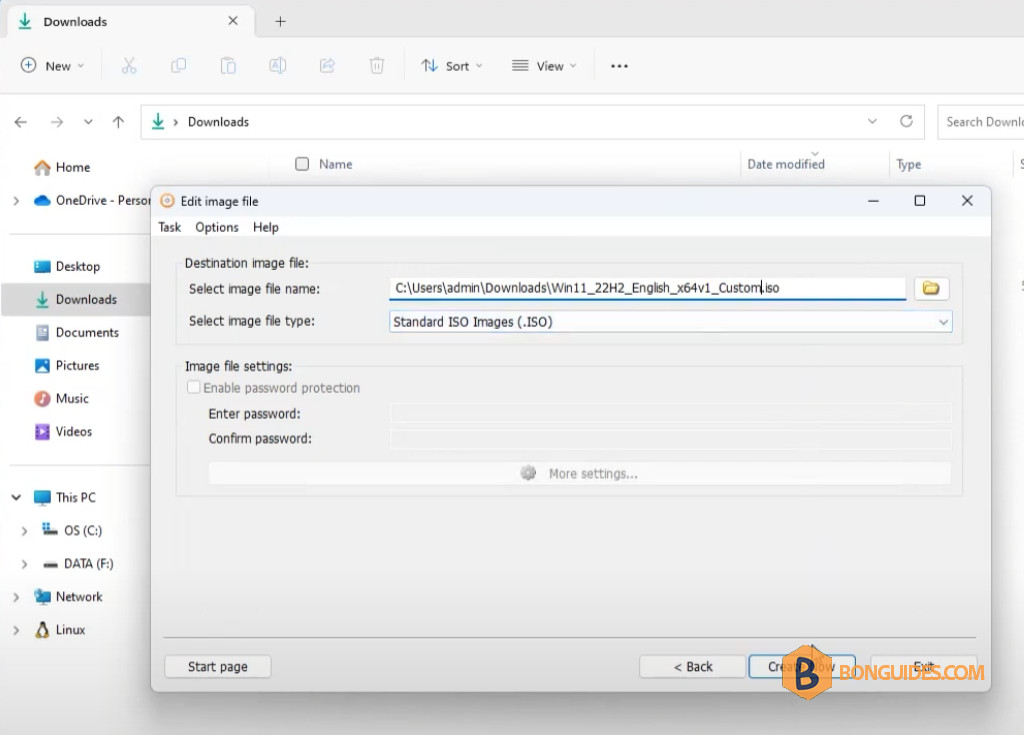
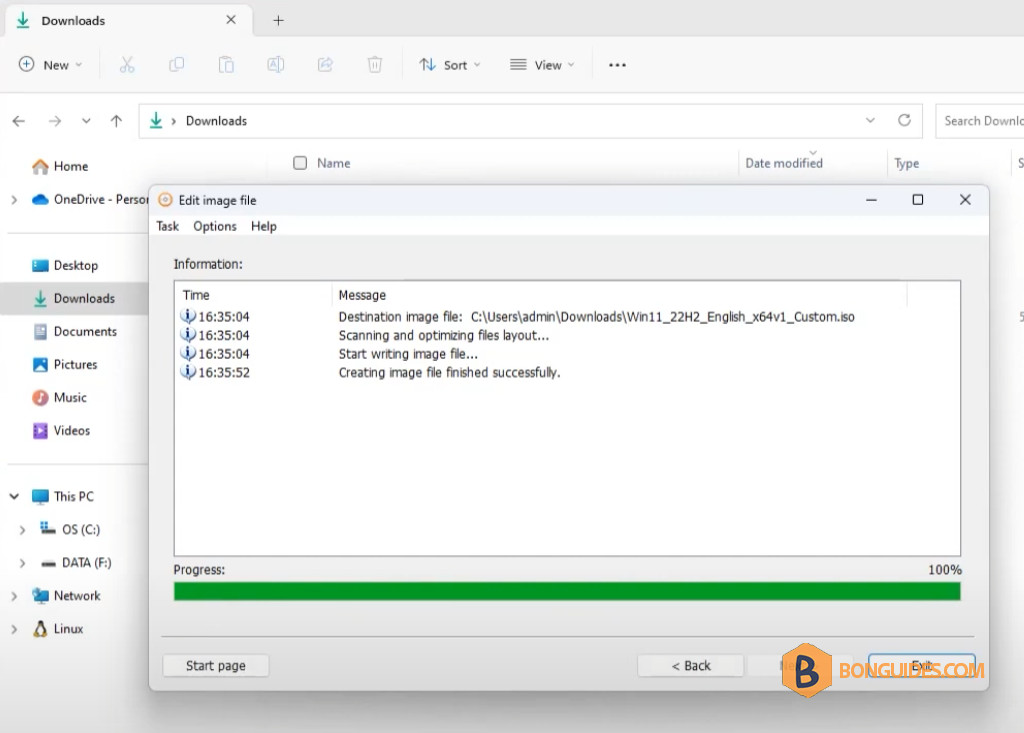
6. Enter a desire name for your ISO file then click on Create now to create a custom ISO image.
7. Creating the custom ISO image, it could take several minutes to complete.
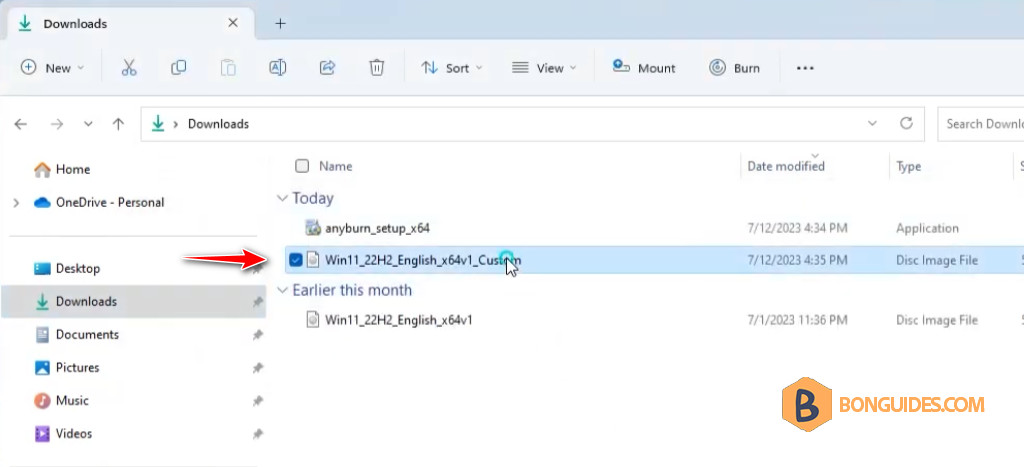
8. The custom ISO image has been created. You can now create a USB boot drive to install Windows with edition selection window using Rufus or any media creation tool.
Not a reader? Watch this related video tutorial:

