Table of Contents
The Azure PowerShell module is used to create and manage Azure resources from the PowerShell command line or in scripts. This quickstart shows you how to use the Azure PowerShell module to deploy a virtual machine (VM) in Azure.
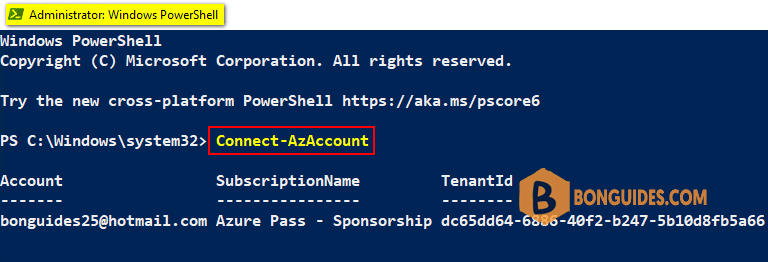
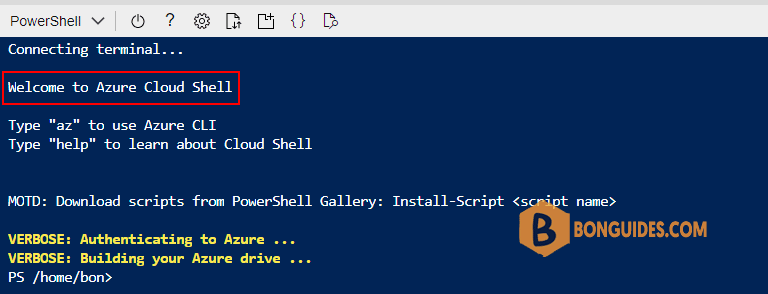
Connect to Microsoft Azure PowerShell
First, you need connect to Microsoft Azure PowerShell, there’re two ways to run PowerShell commands in Microsoft Azure:
Method 1: From Azure PowerShell modules installed in a computer.

Method 2: From Azure Cloud Shell using browsers.

Create a new Windows VM in Azure using PowerShell
1. Gets all locations.
Get-AzLocation | select DisplayName, Location, Type, GeographyGroupDisplayName Location Type GeographyGroup
----------- -------- ---- --------------
East US eastus Region US
East US 2 eastus2 Region US
South Central US southcentralus Region US
West US 2 westus2 Region US
West US 3 westus3 Region US
Australia East australiaeast Region Asia Pacific
Southeast Asia southeastasia Region Asia Pacific
North Europe northeurope Region Europe
Sweden Central swedencentral Region Europe
UK South uksouth Region Europe
West Europe westeurope Region Europe
....2. The Azure marketplace includes many images that can be used to create a new VM. Run The below command to return a list of image publishers in a location.
Get-AzVMImagePublisher -Location "EastUS" | where PublisherName -like *windows*PublisherName Location
------------- --------
Microsoft.WindowsAdminCenter.Test eastus
SentinelOne.WindowsExtension.Test eastus
Chef.Bootstrap.WindowsAzure eastus
Microsoft.Windows.Azure.Extensions eastus
MicrosoftWindowsDesktop eastus
Microsoft.VisualStudio.WindowsAzure.DevTest.Test eastus
Microsoft.VisualStudio.WindowsAzure.RemoteDebug eastus
MicrosoftWindowsServer eastus
MicrosoftWindowsServerHPCPack eastus
....3. Use the Get-AzVMImageOffer to return a list of image offers. With this command, the returned list is filtered on the specified publisher named MicrosoftWindowsServer:
Get-AzVMImageOffer -Location "EastUS" -PublisherName "MicrosoftWindowsServer"Offer PublisherName Location
----- ------------- --------
19h1gen2servertest MicrosoftWindowsServer eastus
microsoftserveroperatingsystems-previews MicrosoftWindowsServer eastus
servertesting MicrosoftWindowsServer eastus
windows-cvm MicrosoftWindowsServer eastus
WindowsServer MicrosoftWindowsServer eastus
windowsserver-gen2preview MicrosoftWindowsServer eastus
windowsserver-previewtest MicrosoftWindowsServer eastus
windowsserverdotnet MicrosoftWindowsServer eastus
windowsserverhotpatch-previews MicrosoftWindowsServer eastus
WindowsServerSemiAnnual MicrosoftWindowsServer eastus
windowsserverupgrade MicrosoftWindowsServer eastus
....4. The Get-AzVMImageSku command will then filter on the publisher and offer name to return a list of image names.
Get-AzVMImageSku `
   -Location "EastUS" `
   -PublisherName "MicrosoftWindowsServer" `
   -Offer "WindowsServer"
Skus Offer PublisherName Location
---- ----- ------------- --------
2008-R2-SP1 WindowsServer MicrosoftWindowsServer EastUS
2008-R2-SP1-smalldisk WindowsServer MicrosoftWindowsServer EastUS
2012-Datacenter WindowsServer MicrosoftWindowsServer EastUS
2012-Datacenter-smalldisk WindowsServer MicrosoftWindowsServer EastUS
2012-R2-Datacenter WindowsServer MicrosoftWindowsServer EastUS
2012-R2-Datacenter-smalldisk WindowsServer MicrosoftWindowsServer EastUS
2016-Datacenter WindowsServer MicrosoftWindowsServer EastUS
2016-Datacenter-Server-Core WindowsServer MicrosoftWindowsServer EastUS
2016-Datacenter-Server-Core-smalldisk WindowsServer MicrosoftWindowsServer EastUS
2016-Datacenter-smalldisk WindowsServer MicrosoftWindowsServer EastUS
2016-Datacenter-with-Containers WindowsServer MicrosoftWindowsServer EastUS
2016-Datacenter-with-Containers-smalldisk WindowsServer MicrosoftWindowsServer EastUS
2016-Datacenter-with-RDSH WindowsServer MicrosoftWindowsServer EastUS
2016-Nano-Server WindowsServer MicrosoftWindowsServer EastUS
....5. Next, find available VM sizes. To see a list of VM sizes available in a particular region, use the Get-AzVMSize command.
Get-AzVMSize -Location "EastUS" | where NumberOfCores -eq 4Name NumberOfCores MemoryInMB MaxDataDiskCount OSDiskSizeInMB ResourceDiskSizeInMB
---- ------------- ---------- ---------------- -------------- --------------------
Standard_D4a_v4 4 16384 8 1047552 102400
Standard_D4as_v4 4 16384 8 1047552 32768
Standard_E4a_v4 4 32768 8 1047552 102400
Standard_E4-2as_v4 4 32768 8 1047552 65536
Standard_E4as_v4 4 32768 8 1047552 65536
Standard_D4as_v5 4 16384 8 1047552 0
Standard_E4-2as_v5 4 32768 8 1047552 0
Standard_E4as_v5 4 32768 8 1047552 0
Standard_D4ads_v5 4 16384 8 1047552 153600
....The above information can be used to deploy a VM with a specific image. This example deploys a VM using the latest version of a Windows 10 Pro using PowerShell.
# Don't forget to change the variables to fit with yours.
$num            = $(Get-Random)
$rgname         = "RG-$num"
$loc            = "eastus"
$vmname         = "vm-$num"
$vnetname       = "vnet-$num"
$vnetAddress    = "10.0.0.0/16"
$subnetname     = "subnet-$num"
$subnetAddress  = "10.0.2.0/24"
$NICName        = $vmname + "-nic"
$NSGName        = $vmname + "-NSG"
$VMSize         = "Standard_DS2_v2"
$PublisherName  = "microsoftwindowsdesktop"
$Offer          = "Windows-10"
$SKU            = "win10-22h2-pro-g2"
$version        = "latest"
$password       = "Pass@ord123"
$adminUsername  = 'bonguides'
$securePassword = $password | ConvertTo-SecureString -AsPlainText -Force
$Credential     = New-Object System.Management.Automation.PSCredential ($adminUsername, $securePassword)

Write-Host "Creating a resource group..." -ForegroundColor Green
$null = New-AzResourceGroup -Name $rgName -Location $Loc

# Network setup
Write-Host "Setting up the network..." -ForegroundColor Green
$frontendSubnet = New-AzVirtualNetworkSubnetConfig -Name $subnetname -AddressPrefix $subnetAddress
$vnet           = New-AzVirtualNetwork -Name $vnetname -ResourceGroupName $rgname -Location $loc -AddressPrefix $vnetAddress -Subnet $frontendSubnet
$nsgRuleRDP     = New-AzNetworkSecurityRuleConfig -Name RDP  -Protocol Tcp  -Direction Inbound -Priority 1001 -SourceAddressPrefix * -SourcePortRange * -DestinationAddressPrefix * -DestinationPortRange 3389 -Access Allow
$nsg            = New-AzNetworkSecurityGroup -ResourceGroupName $RGName -Location $loc -Name $NSGName  -SecurityRules $nsgRuleRDP
$pip            = New-AzPublicIpAddress -ResourceGroupName $rgName -Location $loc -Name "mypublicdns$(Get-Random)" -AllocationMethod Static -IdleTimeoutInMinutes 4
$nic            = New-AzNetworkInterface -Name $NICName -ResourceGroupName $RGName -Location $loc -SubnetId $vnet.Subnets[0].Id -PublicIpAddressId $pip.Id -NetworkSecurityGroupId $nsg.Id -EnableAcceleratedNetworking
$vmConfig       = New-AzVMConfig -VMName $vmName -VMSize $VMSize
$null           = Set-AzVMOperatingSystem -VM $vmConfig -Windows -ComputerName $vmName -Credential $Credential
$null           = Set-AzVMSourceImage -VM $vmConfig -PublisherName $PublisherName -Offer $Offer -Skus $SKU -Version $version
$null           = Add-AzVMNetworkInterface -VM $vmConfig -Id $nic.Id

Write-Host "Creating the Azure VM..." -ForegroundColor Green
New-AzVM -ResourceGroupName $rgname -Location $loc -VM $vmConfig -WarningAction silentlyContinue

# Waiting for the VM starts
Write-Host "Waiting for the VM starts..." -ForegroundColor Green
Start-Sleep -Seconds 30

# Install required apps unattended.
$fileUri = @("https://raw.githubusercontent.com/bonguides25/PowerShell/main/Utilities/Files/new_az_vm_with_apps.ps1")
$protectedSettings = @{"commandToExecute" = "powershell.exe -ExecutionPolicy Unrestricted -File new_az_vm_with_apps.ps1"}
$settings = @{"fileUris" = $fileUri}

Write-Host "Install required apps unattended..." -ForegroundColor Green
$null = Set-AzVMExtension -ResourceGroupName $rgname -Location $loc -VMName $vmname -Name "MyCustomScriptExtension" -Publisher "Microsoft.Compute" -ExtensionType "CustomScriptExtension" -TypeHandlerVersion "1.10" -Settings $settings -ProtectedSettings $protectedSettings

# After the deployment has completed, create a remote desktop connection with the VM
Write-Host "Connecting using RDP..." -ForegroundColor Green
$rdpip = Get-AzPublicIpAddress -ResourceGroupName $rgname | Select-Object IpAddress
$null = cmdkey /generic:($rdpip).IPAddress /user:"$adminUsername" /pass:"$password"
$null = mstsc /v:($rdpip).IPAddress /w:1366 /h:768Not a reader? Watch this related video tutorial:


