
Table of Contents
When you delete files or free up space in your WSL distribution, the virtual disk doesn’t automatically shrink. To reclaim this unused space, you need to compact the virtual disk (VHDX) file.
Before you begin
Before you begin, make sure that your WSL instance is not running. You can check the status of your WSL distributions by executing the following command in PowerShell:
wsl.exe --list --verboseIf any distributions are running, shut them down using:
wsl --shutdownMethod 1: Using DiskPart (Admin Privileges Required)
1. The first step is locate the VHD file, the VHD file for your WSL distribution is typically located in:
C:\Users\<YourUsername>\AppData\Local\Packages\<DistroPackageName>\LocalState\Replace <YourUsername> with your actual Windows username and <DistroPackageName> with the name of your Linux distribution package (e.g., CanonicalGroupLimited.UbuntuonWindows_79rhkp1fndgsc for Ubuntu).
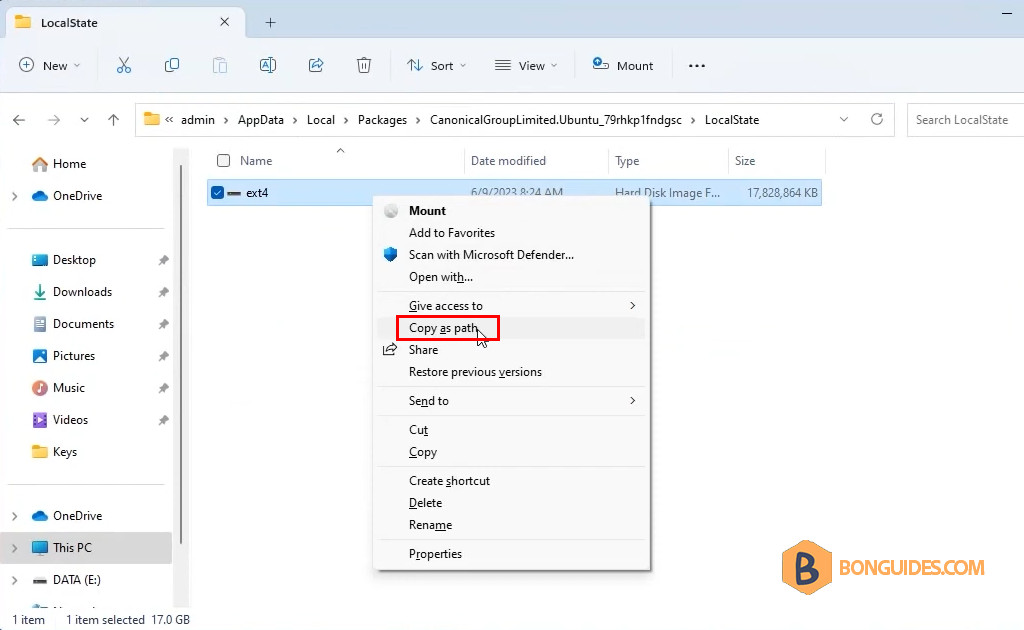
3. Open PowerShell (Terminal) as administrator then type diskpart and press 4. Use the following command, replacing the path with the actual location of your VHDX file to select the VHDX file.
select vdisk file="<path_to_ext4.vhdx>"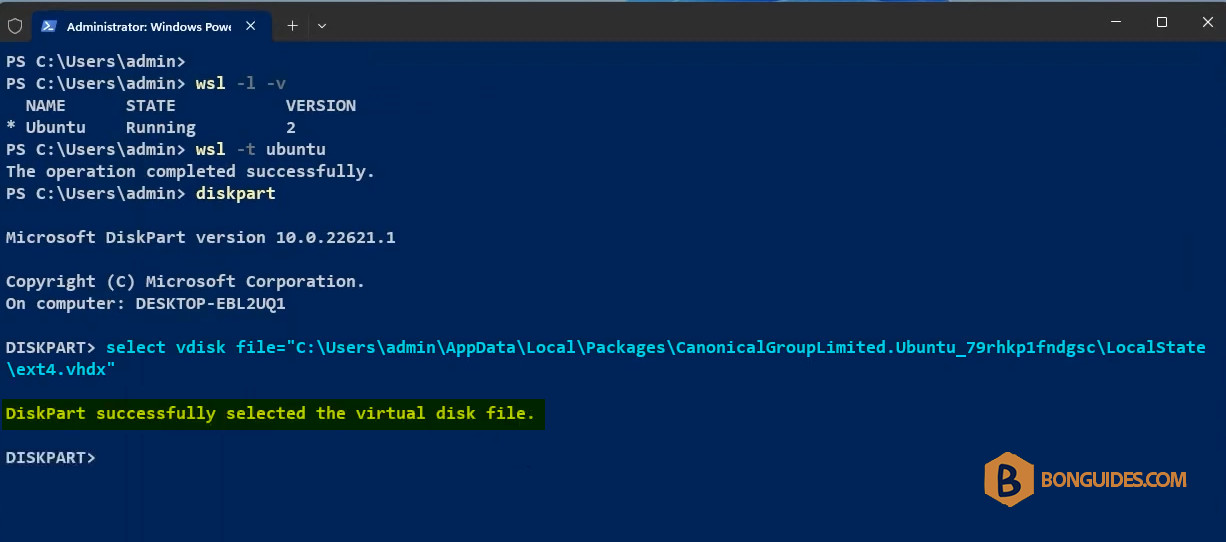
5. Once the disk is selected, run the below command within the DiskPart prompt to shirk the disk. This will reclaim the unused space in your VHD file. You should see a message indicating that the disk has been successfully compacted
compact vdisk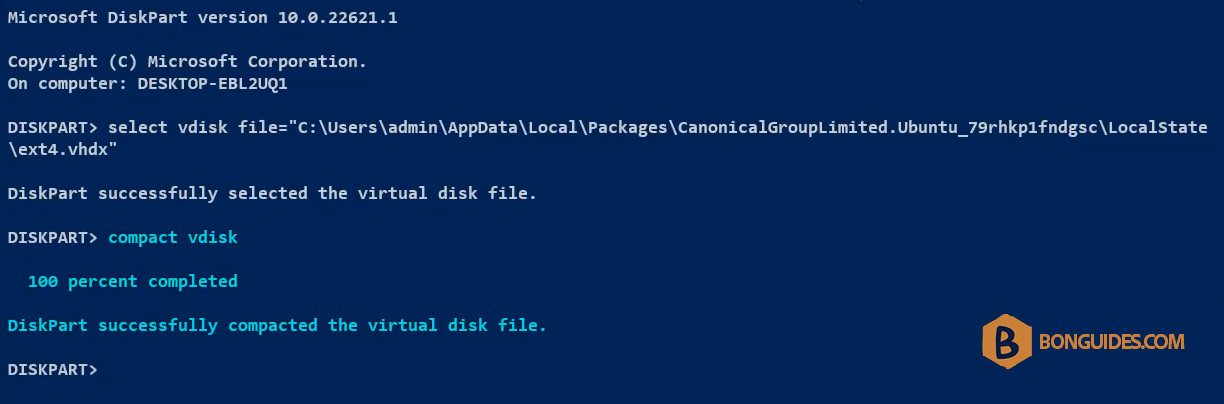
After the process is complete, you can check the size of the VHD file to confirm that it has been reduced.
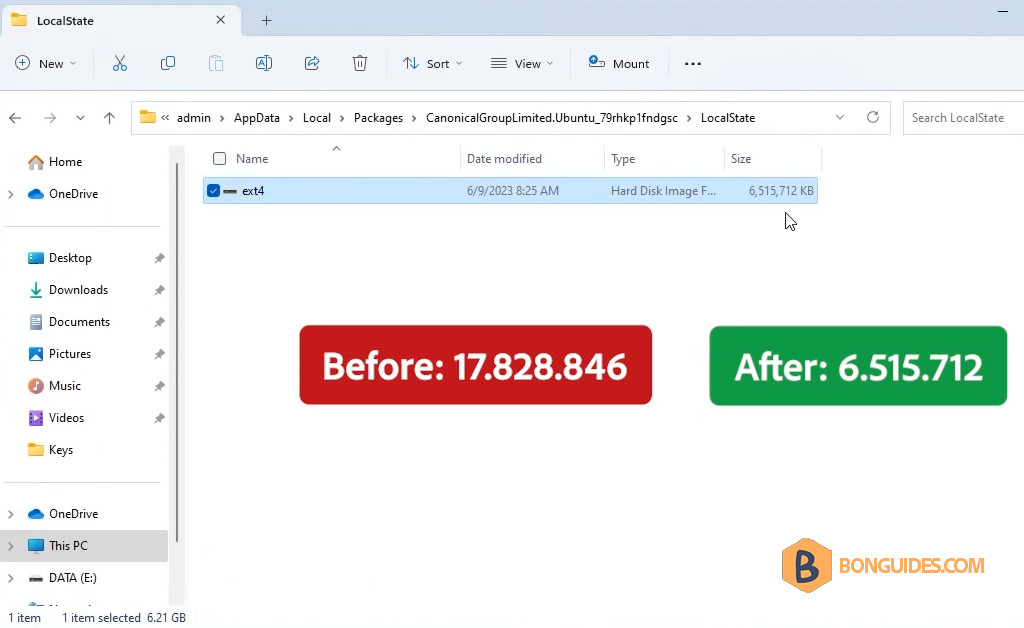
Method 2: Using Hyper-V
In case you’ve Hyper-V installed on your computer. You can use its cmdlet to compact the virtual disk of the WSL instance.
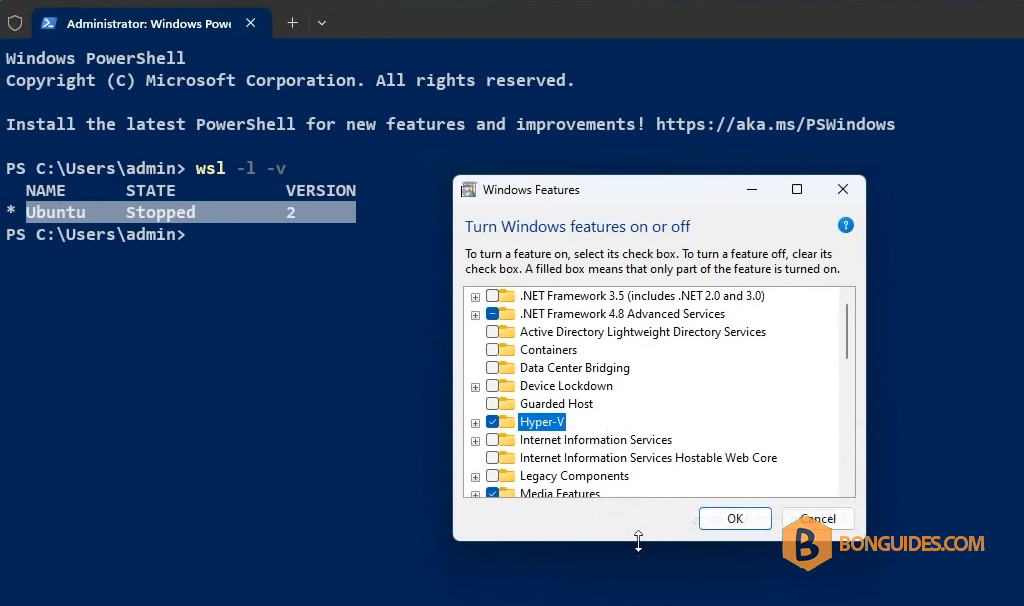
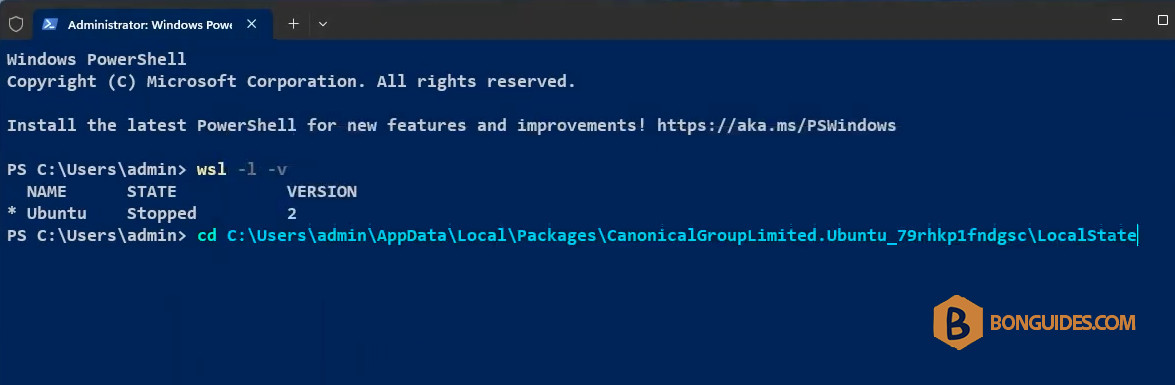
Open PowerShell as administrator, then navigate to the location of the VHD file. The below screenshot is an example of the Ubuntu distribution.
Run the following command to compact the VHD file:
optimize-vhd -Path .\ext4.vhdx -Mode full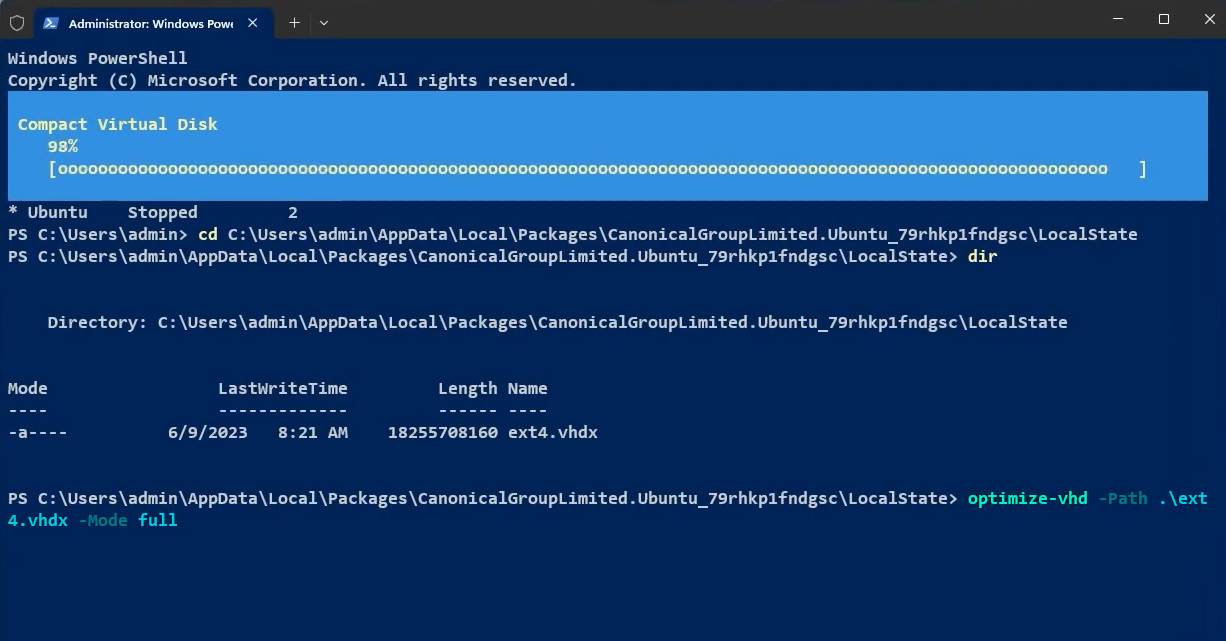
You can monitor the processing status on the screen. After completion, verify the virtual disk size to confirm functionality.
Method 3: Using the WSLCOMPACT
And the last way, you can you a third-party tool to compact the disk.
- WSLCOMPACT: https://github.com/okibcn/wslcompact
1. Install it using the below PowerShell commands:
Set-ExecutionPolicy RemoteSigned -Scope CurrentUser
iwr -useb https://raw.githubusercontent.com/okibcn/wslcompact/main/setup | iex
2. Run the wslcompact command to see the current size and estimated size of all WSL instances.
3. Run the below command to compact the disk and apply the change to the VHD file.
wslcompact -c ubuntu
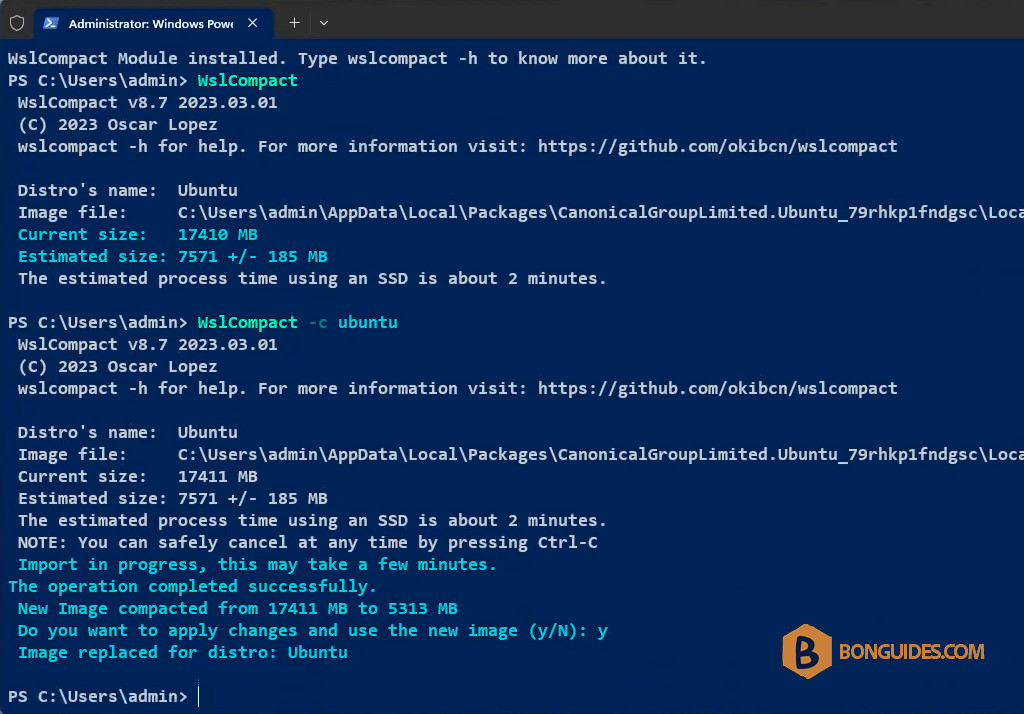
If the tool is no longer needed, to remove the utility, close all your PowerShell instances, open a fresh one, and type:
Remove-Item "$($env:PSModulePath.split(';')[0])/WslCompact" -Recurse -ForceConclusion
By following methods, you should be able to effectively shrink the virtual disk of your Linux distribution in WSL, reclaiming valuable disk space on your Windows system.


