Table of Contents
Microsoft Win32 Content Prep Tool / Intune WinAppUtil
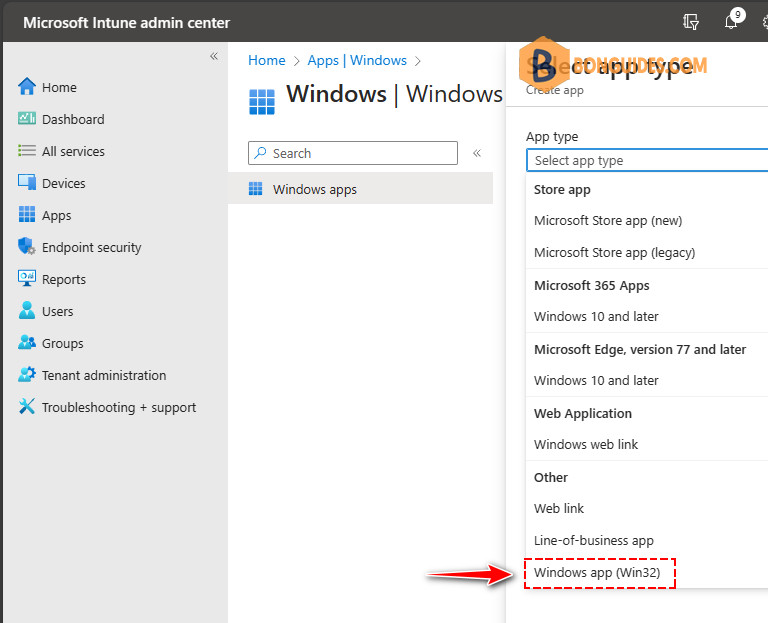
Microsoft Intune Win32 apps provide us with greater control over the deployment of applications. We can deploy 32-bit and 64-bit applications through Microsoft Intune Win32 apps. Before you can add a Win32 app to Microsoft Intune, you must prepare the app by using the Microsoft Win32 Content Prep Tool.

Use the Microsoft Win32 Content Prep Tool to preprocess Windows classic (Win32) apps. The tool converts application installation files into the .intunewin format. The tool also detects some of the attributes that Intune requires to determine the application installation state. After you use this tool on the app installer folder, you’ll be able to create a Win32 app in the Microsoft Intune admin center.
Before you begin, the following criteria should be met for Intune Win32 deployment:
- OS version : Windows 10 version 1607 or later (Enterprise, Pro or Education editions).
- The application size must not be greater than 30 GB per app.
- Devices must be enrolled in Intune and either:
- Azure AD registered
- Azure AD joined
- Hybrid Azure AD joined
Convert the Win32 app content
Below are steps to use the Intune Prep Tool to create Intunewin package for Win32 app deployment:
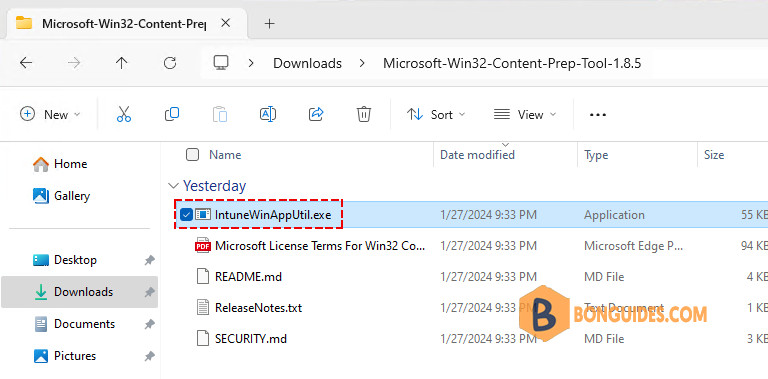
1. Download the Microsoft Win32 Content Prep Tool from GitHub as a .zip file. Extract the zipped file we’ve the prep tool (IntuneWinAppUtil.exe), the license, a readme, and the release notes.

2. Create the folders for package creation. For example, we’ve created:
- D:\Intune\Input: This folder is for all setup files (.exe, .msi, folders …). All files and folders in this folder will be compressed into an .intunewin file.
- D:\Intune\Output: Output folder for the generated .intunewin file.
- IntuneWinAppUtil.exe: Copy the extracted file to D:\Intune fodder. The Intune Win32 prep tool compresses all files and folders when it creates .intunewin file. Hence, it’s important to not keep the tool in application installation source folder.

3. Open the PowerShell (Terminal) and change the directory to root of the folder you created.
cd D:\Intune\PS C:\> cd D:\Intune\
PS D:\Intune> ls
Directory: D:\Intune
Mode LastWriteTime Length Name
---- ------------- ------ ----
d----- 1/26/2024 8:39 AM Input
d----- 1/26/2024 8:39 AM Output
-a---- 1/26/2024 8:42 AM 55184 IntuneWinAppUtil.exe4. Run IntuneWinAppUtil.exe and provide the required information.
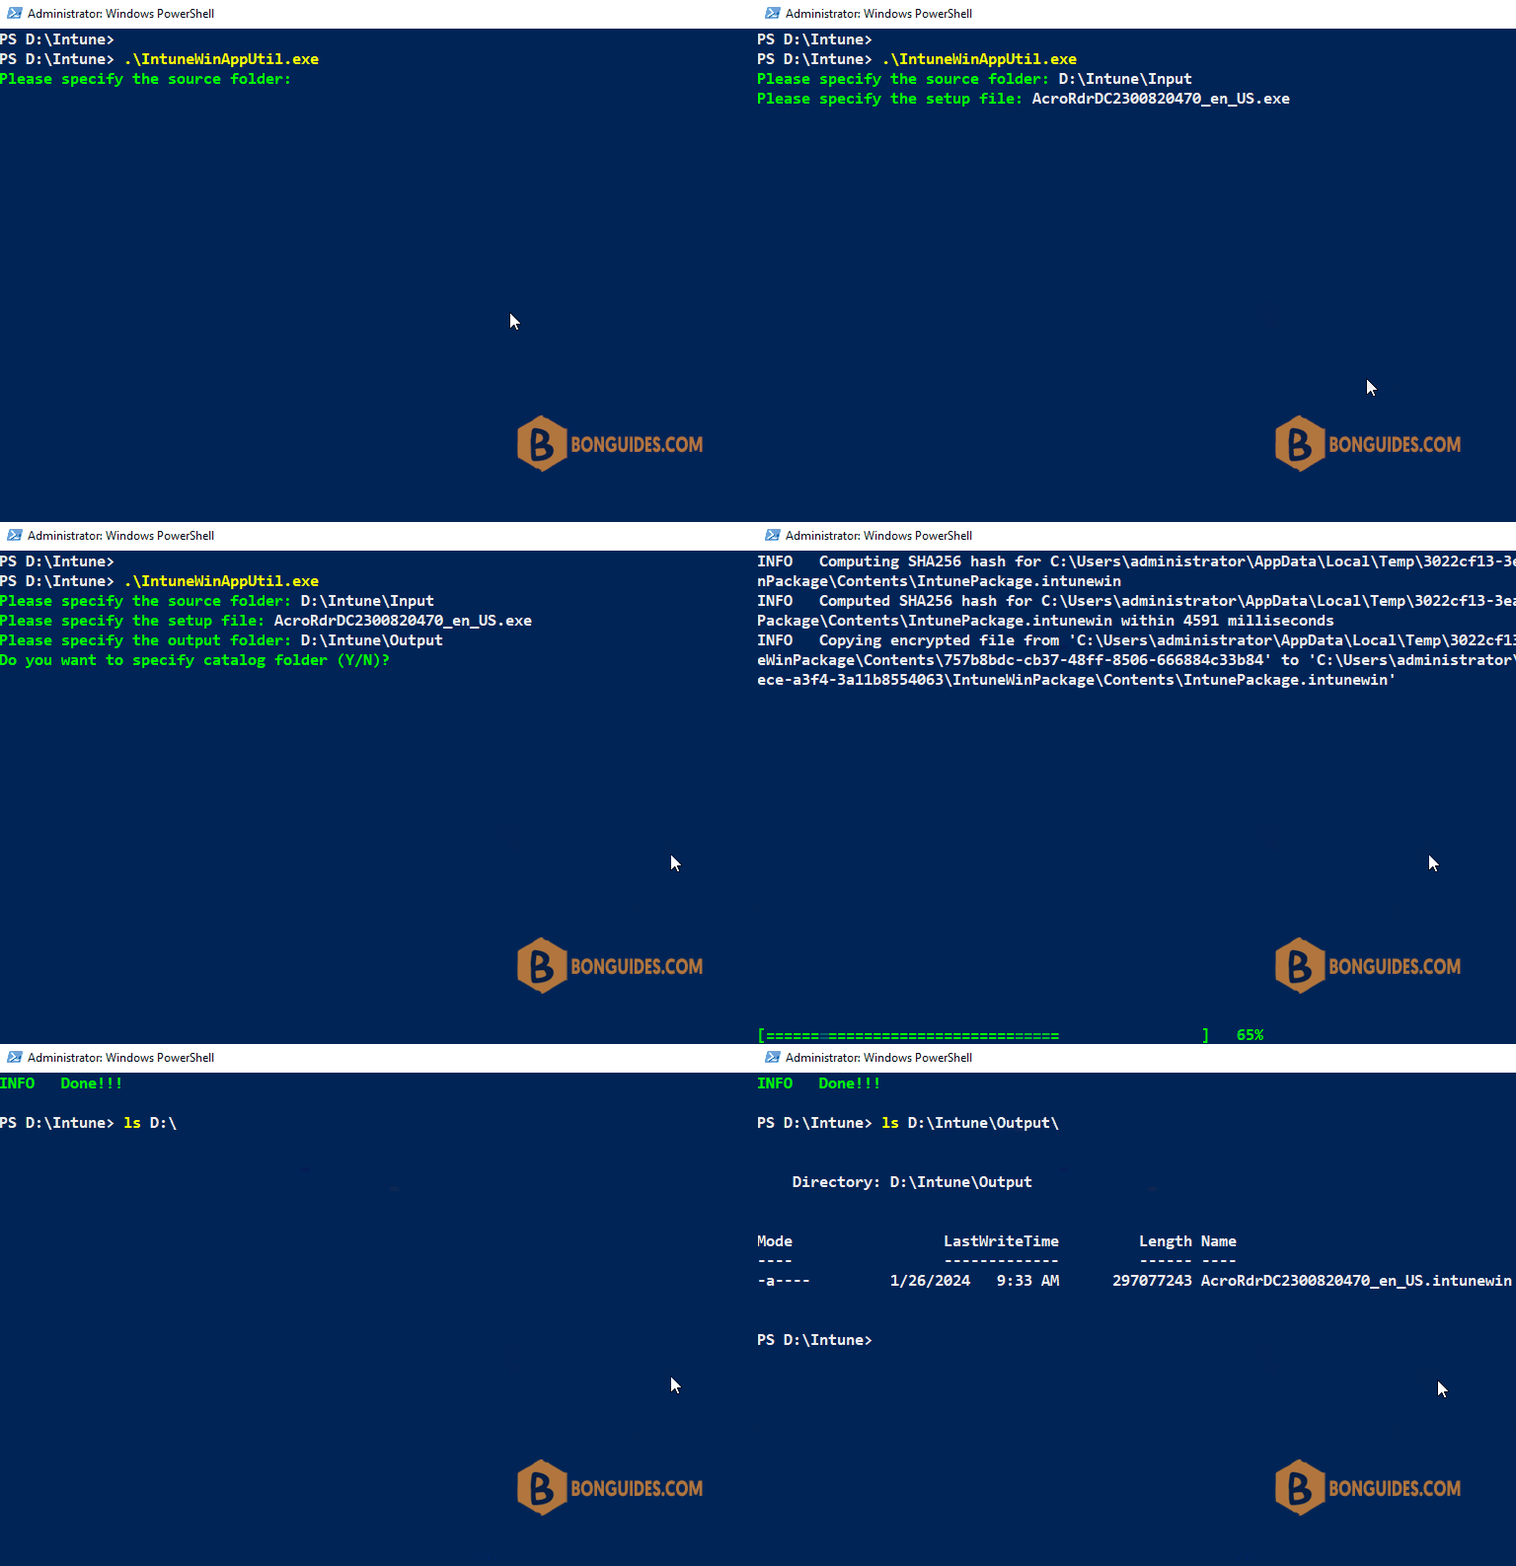
\IntuneWinAppUtil.exeFor instance, below is the output when we create .intunewin file for the Acrobat Reader application.

You can navigate to the output folder to verify the intunewin package has been created.

Example commands
This command .\IntuneWinAppUtil.exe -h shows usage information for the tool.
.\IntuneWinAppUtil.exe -hVersion 1.8.4.0
Sample commands to use the Microsoft Intune App Wrapping Tool for Windows Classic Application:
IntuneWinAppUtil -v
This will show the tool version.
IntuneWinAppUtil -h
This will show usage information for the tool.
IntuneWinAppUtil -c <source_folder> -s <source_setup_file> -o <output_folder> <-a> <catalog_folder> <-q>
This will generate the .intunewin file from the specified source folder and setup file.
For MSI setup file, this tool will retrieve required information for Intune.
If -a is specified, all catalog files in that folder will be bundled into the .intunewin file.
If -q is specified, it will be in quiet mode. If the output file already exists, it will be overwritten.
Also if the output folder does not exist, it will be created automatically.
IntuneWinAppUtil
If no parameter is specified, this tool will guide you to input the required parameters step by step.The below command generates the .intunewin file from the specified source folder and setup file.
- If –q is specified, the command runs in quiet mode.
- If the output file already exists, it’s overwritten. Also, if the output folder doesn’t exist, it’s created automatically.
.\IntuneWinAppUtil -c 'D:\Intune\Input' -s 'D:\Intune\Input\setup.exe' -o 'D:\Intune\Output' -qWhen you’re generating an .intunewin file, put any files you need to reference into a subfolder of the setup folder. Then, use a relative path to reference the specific file you need. For example:
- Setup source folder: D:\Intune\Input
- License file: D:\Intune\Input\licenses\license.txt
Refer to the license.txt file by using the relative path licenses\license.txt.
The package is ready for deployment, please follow the below posts to add and manage the Win32 apps in Microsoft Intune.
Conclusion
Deploying applications with Microsoft Intune provides a centralized, secure, and cost-effective way to manage and distribute software in an organization. With the ability to monitor the deployment progress from the Intune admin portal, IT administrators can ensure that the applications are deployed and functioning as intended on their managed devices.
Related: Below is the list of our posts that will help you to configure and manage devices
- Prepare Win32 app package for upload.
- Understanding Intune Detection Rules.
- Deploy an Win32 App with Dependencies.
- Upgrade or Replace app with Supersedence in Intune.
- Assign Apps to Groups with Microsoft Intune.
- Force sync devices in Intune.
- Access and Read Intune Management Extension Logs.
- Deploy Microsoft Store Apps Using Intune.
- Deploy PowerShell Script using Intune
Not a reader? Watch this related video tutorial:

