Table of Contents
This blog post will show how to create an Azure App Registration using Azure CLI for Microsoft Graph. Azure Graph API gives us access to all the Azure and Microsoft 365 services programmatic access. Graph API allows us to create, edit and view resources using API calls.
Azure App Registration is like a service account with permissions to a single or multiple Azure or Microsoft 365 services. The App Registration defines the level of access to the Azure services using supported authentication protocols.
Install Azure CLI on Windows
Before you begin, you need to install the Azure CLI using PowerShell. Start PowerShell as administrator and run the following command. This will download and install the latest version of the Azure CLI for Windows. If the Azure CLI is already installed, the installer will overwrite the existing version.
Invoke-WebRequest -Uri https://aka.ms/installazurecliwindowsx64 -OutFile .\AzureCLI.msi
Start-Process msiexec.exe -Wait -ArgumentList '/I AzureCLI.msi /quiet'
Remove-Item .\AzureCLI.msi
Once done, you can check the installed az version:
PS C:\> az --version

azure-cli                         2.51.0
core                              2.51.0
telemetry                          1.1.0
Extensions:
account                            0.2.5
healthcareapis                     0.4.0
Dependencies:
msal                            1.24.0b1
azure-mgmt-resource             23.1.0b2
Python location 'C:\Program Files\Microsoft SDKs\Azure\CLI2\python.exe'
Extensions directory 'C:\Users\MODAdministrator\.azure\cliextensions'
Python (Windows) 3.10.10 (tags/v3.10.10:aad5f6a, Feb  7 2023, 17:20:36)
Legal docs and information: aka.ms/AzureCliLegal
Your CLI is up-to-date.
Create Azure App Registration Using Azure CLI
1️⃣ To create an Azure App Registration using Azure CLI, follow the steps below. First, log in to Azure using the following command.
az login --allow-no-subscriptions --use-device-code2️⃣ You would see a message: To sign in, use a web browser to open the page https://microsoft.com/devicelogin and enter the code NZARV2R2J to authenticate.
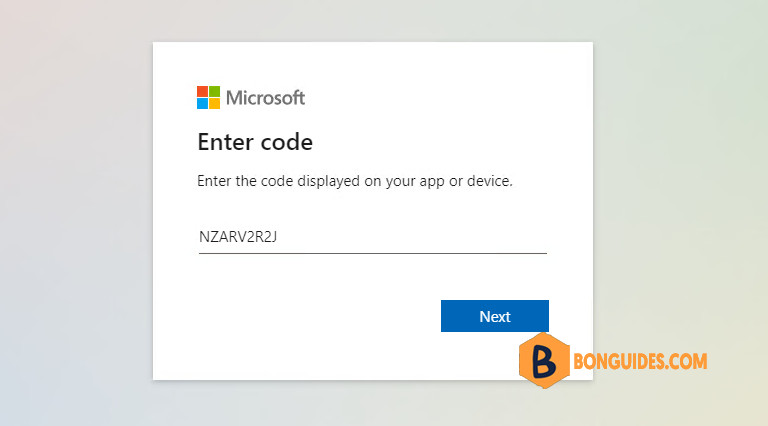
3️⃣ Sign in using your Global admin account to continue.
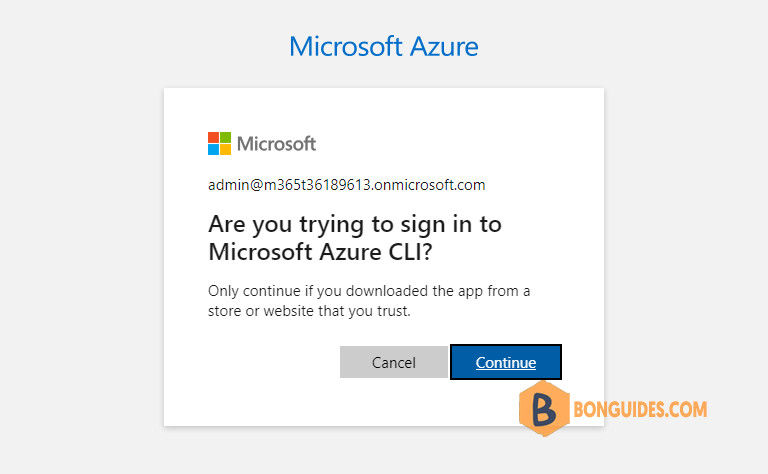
4️⃣ Once connected, you should see your tenant information as below:
51a4f9c0-e89a-4b28-8e25-26292bf1772e 'Contoso'
[
  {
    "cloudName": "AzureCloud",
    "id": "51a4f9c0-e89a-4b28-8e25-26292bf1772e",
    "isDefault": true,
    "name": "N/A(tenant level account)",
    "state": "Enabled",
    "tenantId": "51a4f9c0-e89a-4b28-8e25-26292bf1772e",
    "user": {
      "name": "[email protected]",
      "type": "user"
    }
  }
]
5️⃣ To create an App Registration, run the following cmdlet. Don’t forget to change the app name as you need.
az ad app create --display-name 'MyApp' --output json6️⃣ The app has been created, you can check the appId as follows.
PS C:\> az ad app create --display-name 'MyApp' --output json
{
  "@odata.context": "https://graph.microsoft.com/v1.0/$metadata#applications/$entity",
  "addIns": [],
  "api": {
    "acceptMappedClaims": null,
    "knownClientApplications": [],
    "oauth2PermissionScopes": [],
    "preAuthorizedApplications": [],
    "requestedAccessTokenVersion": 2
  },
  "appId": "14b6bc6c-1443-4342-a925-64450bbf6180",
  "appRoles": [],
  "applicationTemplateId": null,
  "certification": null,
...
Or you can get the appId of any apps in your tenant by Running the command below:
PS C:\> az ad app list --display-name 'MyApp' --query "[].{AppId:appId}"
[
  {
    "AppId": "14b6bc6c-1443-4342-a925-64450bbf6180"
  }
]
Configure the permission for the registered app
1️⃣ To assign permissions to the app, find the permissions you need to give the app in this link.
Note
Make sure you copy the ID of the Application not Delegated.
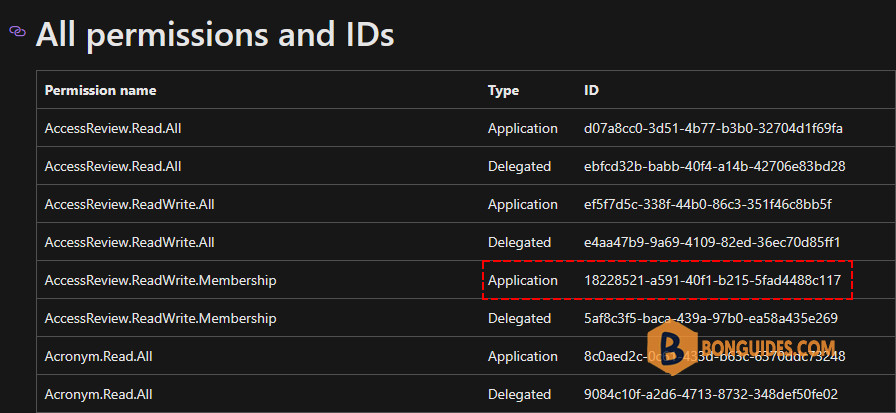
2️⃣ Change the –id value with your AppId value and the –api-permissions with the ID of the required permissions. For example, to give the API User.ReadWrite.All permissions. I will run the code below.

$appid = '14b6bc6c-1443-4342-a925-64450bbf6180'
$api = '00000003-0000-0000-c000-000000000000'   #Don't change it, it's Microsoft Graph Id.
$apipermissions = '741f803b-c850-494e-b5df-cde7c675a1ca=Role'

az ad app permission add --id $appid --api $api --api-permissions $apipermissions
–api: The unique identifier for the resource that the application requires access to. In the most cases, you should not change it.
3️⃣ You would see the below message. It means we need to Grant Admin Consent to the application using the command below.
Invoking `az ad app permission grant –id 14b6bc6c-1443-4342-a925-64450bbf6180 –api 00000003-0000-0000-c000-000000000000` is needed to make the change effective
$appid = '14b6bc6c-1443-4342-a925-64450bbf6180'
az ad app permission admin-consent --id $appid
4️⃣ To create an App Registration Secret, run the command below.
$appid = '14b6bc6c-1443-4342-a925-64450bbf6180'
az ad app credential reset --id $appid
The output shows all your needed information such as appid, clientsecret and your tenant id.
{"appId":"14b6bc6c-1443-4342-a925-64450bbf6180","password":"v7E8Q~8RP3vJmopCFiFXsLgH7s2D6FacWDuw7aHW","tenant":"51a4f9c0-e89a-4b28-8e25-26292bf1772e"}5️⃣ Once you’ve all needed information, you can put them into your script to connect to Microsoft Graph API.
#Configuration
$ClientId = '14b6bc6c-1443-4342-a925-64450bbf6180'
$TenantId = '51a4f9c0-e89a-4b28-8e25-26292bf1772e'
$ClientSecret = 'v7E8Q~8RP3vJmopCFiFXsLgH7s2D6FacWDuw7aHW'

#Convert the client secret to a secure string
$ClientSecretPass = ConvertTo-SecureString -String $ClientSecret -AsPlainText -Force

#Create a credential object using the client ID and secure string
$ClientSecretCredential = New-Object `
    -TypeName System.Management.Automation.PSCredential `
    -ArgumentList $ClientId, $ClientSecretPass

#Connect to Microsoft Graph with Client Secret
Connect-MgGraph -TenantId $TenantId -ClientSecretCredential $ClientSecretCredential
As you can see in the below output. We’ve connected to Micrsoft Graph using the app that we’ve created in the previous steps.
PS C:\> Connect-MgGraph -TenantId $TenantId -ClientSecretCredential $ClientSecretCredential
Welcome to Microsoft Graph!
Connected via apponly access using 14b6bc6c-1443-4342-a925-64450bbf6180

PS C:\> Get-MgContext

ClientId               : 14b6bc6c-1443-4342-a925-64450bbf6180
TenantId               : 51a4f9c0-e89a-4b28-8e25-26292bf1772e
Scopes                 : {User.ReadWrite.All}
AuthType               : AppOnly
TokenCredentialType    : ClientSecret
CertificateThumbprint  :
CertificateSubjectName :
Account                :
AppName                : MyApp
ContextScope           : Process
Certificate            :
PSHostVersion          : 5.1.22000.2003
ManagedIdentityId      :
ClientSecret           : System.Security.SecureString
Environment            : Global
Addition information
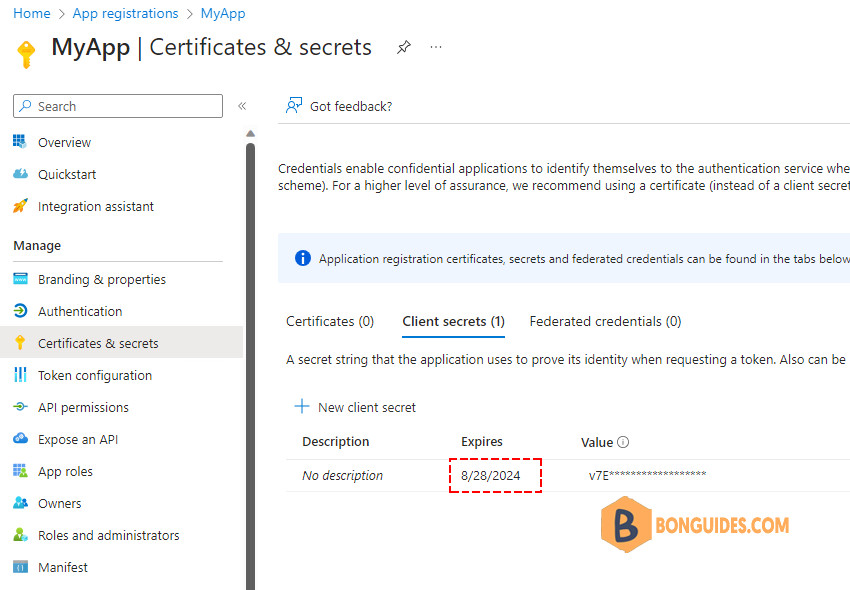
The client secret would be expired after 365 days. You can check it through Microsoft Entra admin center.