
Table of Contents
The process of creating a Windows 7 bootable disk is very simple if you’re using a Windows PC, but the process becomes slightly more complicated if you’re using a Mac. We’ll cover how to create a Windows 7 bootable disk using macOS.
What You Will Need Before Starting
- An 4GB or larger (8GB is preferred) USB drive that you don’t mind formatting.
- Your MacBook power adaptor should be plugged in, as you don’t want your battery to run out during the process.
- An active internet connection, to download the Windows 7 ISO.
Create Windows 7 Bootable Disk Using Boot Camp on Inter Macs
The first method involves using Boot Camp on Intel Macs. Boot Camp Assistant can be used to install Windows on a Mac and create a bootable USB installer drive.
Note
MacBook witt Apple’s CPU doesn’t support BootCamp. You can move the second method. And this method no longer supports in macOS Monterey and higer.
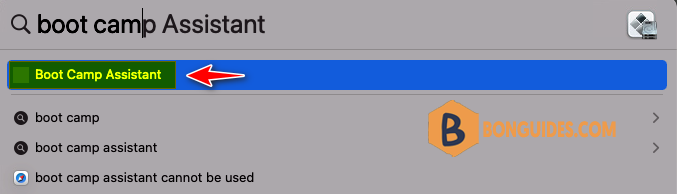
1. Launch Boot Camp on your Mac, you can do this from Applications > Utilities in Finder or by using Spotlight.
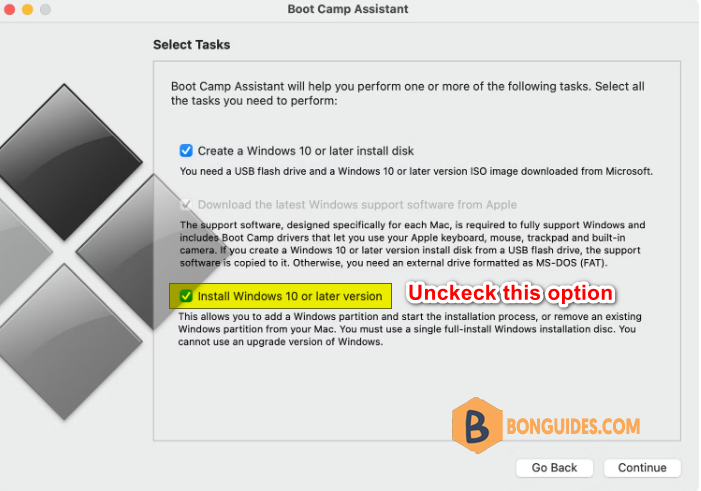
2. In Boot Camp, click Continue, and check the box to Create a Windows 7 or later install disk.
If the second box (Download the latest Windows support software from Apple) isn't grayed out, check it. Don’t check the third box.
3. Click Continue when you’re done then browse and select the Windows 7 ISO file you downloaded.
4. Under Destination Disk, select your USB drive, and click Continue.
5. Boot Camp will format your USB. Press Continue to proceed. The installation process will now start. Let it run, and you’ll see a window saying the Windows support software has been saved. That’s it.
Create Windows 7 Bootable Disk Using Terminal (Intel, M1, M2 Macs)
The second method we’ll cover today involves using Terminal, because Mac with Apple-based chip doesn’t support Boot Camp Assistant.
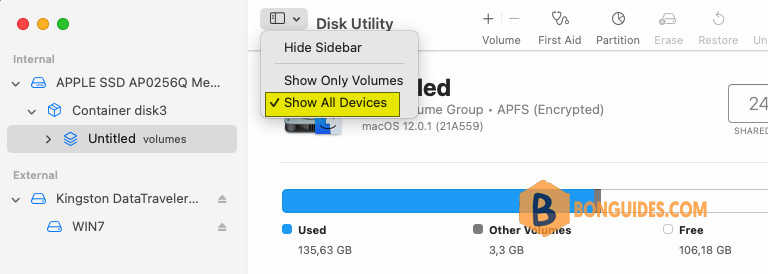
1. Open Disk Utility then enable Show All Devices option.
2. Select the USB stick form the left side then click on button.
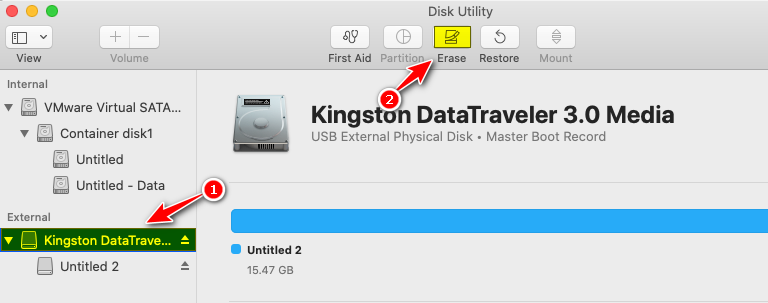
3. Erase the USB Stick following below options:
- Name: WIN7
- Format: MS-DOS
- Scheme: Master Boot Record
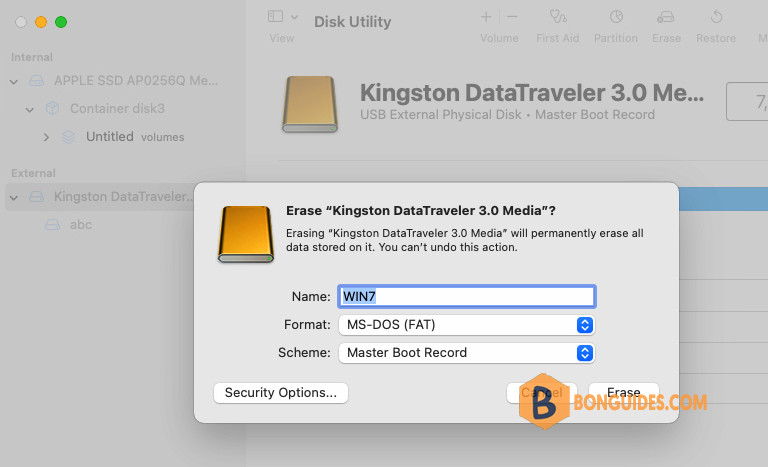
4. Open Terminal then get the list of disks on your Mac using diskutil list command. In this case, the USB stick identifier is disk4.
bonben@flame01 ~ % diskutil list
/dev/disk0 (internal):
#: TYPE NAME SIZE IDENTIFIER
0: GUID_partition_scheme 251.0 GB disk0
1: Apple_APFS_ISC 524.3 MB disk0s1
2: Apple_APFS Container disk3 245.1 GB disk0s2
3: Apple_APFS_Recovery 5.4 GB disk0s3
/dev/disk4 (external, physical):
#: TYPE NAME SIZE IDENTIFIER
0: FDisk_partition_scheme *7.8 GB disk4
1: DOS_FAT_32 WIN7 7.8 GB disk4s15. Unmount the disk using the following command and don’t forget change the id of your disk.
sudo diskutil unmountDisk /dev/disk46. Next, we assume you’ve downloaded a Windows 7 image file named Windows7.iso and save it in the Downloads folder.
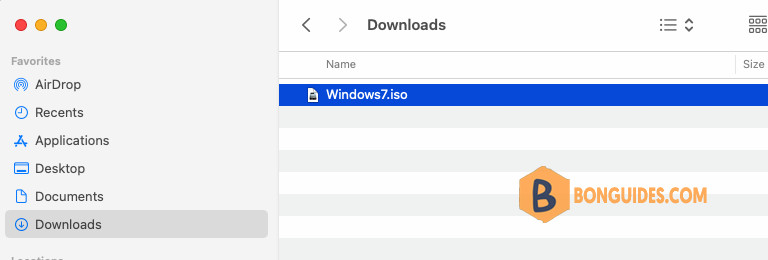
7. In the Terminal window, navigate to the Downloads folder then create a Windows 7 bootable USB stick on your Mac.
cd ~/Downloads
sudo dd if=Windows7.iso of=/dev/rdisk4 bs=1m
bonben@flame01 ~ % sudo dd if=Windows7.iso of=/dev/rdisk4 bs=1m
3167+1 records in
3167+1 records out
3320903680 bytes transferred in 545.202882 secs (6091134 bytes/sec)Finally, remove the USB drive from your Mac. It’s now ready to use as a bootable installation disk.


